About Me

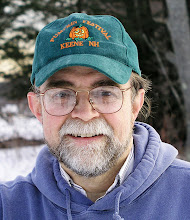
My photo
Spofford, New Hampshire, United States
Jeff Newcomer had been a physician practicing in New Hampshire and Vermont for over 30 years. Over that time, as a member of the Conservation Commission in his home of Chesterfield New Hampshire, he has used his photography to promote the protection and appreciation of the town's wild lands. In recent years he has been transitioning his focus from medicine to photography, writing and teaching. Jeff enjoys photographing throughout New England, but has concentrated on the Monadnock Region and southern Vermont and has had a long term artistic relationship with Mount Monadnock. He is a featured artist in a number of local galleries and his work is often seen in regional print, web publications and in business installations throughout the country. For years Jeff has published a calendar celebrating the beauty of The New England country-side in all seasons. All of the proceeds from his New England Reflections Calendar have gone to support the Pulmonary Rehabilitation Program at the Cheshire Medical Center. Jeff has a strong commitment to sharing his excitement about the special beauty of our region and publishes a blog about photography in New England.
Showing posts with label long exposure. Show all posts

Monday, March 5, 2018

Using Neutral Density Filters


Pond Brook Falls 67seconds, 6 Stop ND
   
10 Stop ND

It is a common saying that, “To a man with a hammer everything looks like a nail”.  Over the last few days, everything has looked like an opportunity to use my new Neutral Density Filters and I have been having a great time. 


Over the years I have used various filters when I wanted to reduce the light reaching my camera’s sensor.  Most often this has been when I was trying to slow my exposure of flowing water to get that soft, cotton candy look, which I love.  I routinely use my polarizer which, with the right direction of light can knock of one or two stops as well as cutting the reflections on the rocks.  With low light, a
Chesterfiled Gorge Cascade, 79 Seconds
polarizer may be all I need to get the exposure down to 0.5 to one second, which creates a nice soft look without obscuring all the detail in the water.  If I need to block more light, my next step has been to use my gradient neutral density filters.  I have a nice set of Cokin filters, which are designed to block the light in a portion of the scene.  Most commonly this is helpful to reduce the contrast between a bright sky and a foreground which is shadow, but the portion of the filter which has the maximum darkening effect is usually large enough to cover the entire lens.  It is an awkward arrangement but, in a pinch, it can work like a fixed neutral density filter.


These have been my light reduction work-arounds, they can work but are difficult and, despite my best efforts, at most I can reduce the light by 3-5 stops, not the 6 – 10 stops that can really change a scene.  Obviously, I needed a set of fixed ND filters that would be easy to use and provide a wide range of light reduction options.  Oh, and they need to be high quality and low price.  Easy.


Ashuelot Falls 46 Seconds, 6 stop ND


Finding a Reason to Stop at 2Filter.com
That brings us to earlier this week.  Susan and I were heading home from a tour of possible wedding party venues for my daughter (YEH), and happened to be passing the unobtrusive offices of 2Filter.com in Gilsum New Hampshire.  2Filter.com is a great on-Line source for photographic filters, but it is not a retail store.  The first time I made an order, I scared the hell out of the people in the office when, upon being asked for my shipping address, I announced that I would be dropping by to pick it up.  Since then I have enjoyed a friendly relationship with the owner and his helpful staff.  On this day, I had to come up with a reason to stop at the office and ND filters came immediately to mind.  With the help of the staff,  I came away with a set of Fixed NDs [3,6 and 10 stops), and also a Clear-Night Filter for my astrophotography. 

Ashuelot River Park, 45 Second 10 Stop ND


When buying filters, you want to get multicoated glass filters with thin but sturdy rings.  The thin rings are important to avoid vignetting especially if the filters are stacked.  My kit of Haida fixed ND filters met my criterion and for a fair price.  It was then time to go out and play.


So what situations call for the significant reduction of light making it to your sensor?


1)   Flowing Water

Pond Brook Cascade
1/60th second Polarizer

The use of long exposures to make flowing water appear like a gossamer veil is one of the most commonly used pieces of photographic magic.  Water never actually looks like cotton candy, but it is just one way to capture the feel of waterfalls and streams.  Different slow shutter speeds create different renderings, but on bright days, even with a polarizing filter, it can be difficult to slow the shutter sufficiently.  Neutral density filters allow long exposure even in the brightest sunlight.

60 Seconds, 6 stop ND


 For waterfalls, I typically use shutter speeds from 0.5 to one second, but I have been having fun experimenting with my new NDs for much longer exposures. My camera only goes to exposures of 30 seconds, but with the bulb setting I have captured my flowing water up to a minute or more.  Definitely a different look and feel.


2)   Moving Clouds

Chesterfield Town Hall

Technically just another kind of flowing water, using ND filters to capture moving clouds can lead to interesting effects.  The optimal shutter speed depends on the density of the clouds, how fast they are moving across the sky and, of course, personal preference.  I am excited about getting the chance to experiment with angry, fast moving clouds, but, as of this writing the weather has been too damn nice.  Over this weekend I caught puffy clouds flying by ther Chesterfield Town Hall.


71 Seconds, 10 Stop ND


3)   Video Shutter Control

It is generally understood that video has a more natural, “cinematic” appearance with a shutter speed  of 1/50th – 1/60th of a second, which is roughly twice the usual frame rate.  This can be difficult to achieve when filming on bright days, and neutral density filters are routinely used to block the light sufficiently to allow the optimal shutter.


4)   Bright Light Shallow Depth of Field, Especially Portraiture

Portraits are always difficult on sunny days.  The stark shadows, the squinting and the flat colors often present insurmountable challenges.  Reflectors and fill flash can help, but the bright light may also make it impossible to open the aperture sufficiently to get a nice soft focused Bokeh behind your subject.   Many of the newer DSLRs have faster shutter speeds that may be used to avoid this problem, but cutting the light with an ND can also permits a wider aperture.


5)   Long Exposure Crowd Control
Portland Alley

   Over the years I have occasionally been able to use long exposures to remove unwanted people or vehicles from a scene.  With a long shutter moving subjects may not be in one spot long enough to register on the sensor.  

30 Second Exposure
  A few years ago, I used this technique on a night shot of a busy alley in Portland Maine.  A 30 second exposure was long enough to remove all but the idle smokers from the scene.  For the dark alley, all needed was f/22 and an ISO of 100 to allow the 30 second exposure, but for shots in brighter light a neutral density filter would be needed. 


Maine Street Keene, NH

Earlier this week I set up on Keene’s busy Maine street in bright midday sunshine.  Traffic was heavy, but I magically removed most of the cars a 10 stop ND, f/22 and an 8 minute exposure.  I couldn’t remove all the evidence of bright car lights.  This technique will work better when used to remove people (who don’t have headlights) strolling by, and when the motion is perpendicular to the cameras view.


8 Minutes, 10 Stop ND


Neutral Density Lessons

These are just a few uses for fixed Neutral Density Filters.  I am sure more can be suggested.  I have only been playing with my NDs for a couple of weeks and can hardly be considered an expert in their use, but I have learned a few things from my experiences so far.


Stacking

First NDs can be stacked either with themselves or with other filters.  When NDs are stacked there is a wide range of effects than can be achieved. A 3 stop and a 10 stop can be stacked to reduce exposure by 13 stops.  Although it would be unlikely to be necessary, stacking all three filters from my new kit, I could reduce the light by 19 stops!  With that I could hit the shutter and come back in several days to review the results. 


Stickney Falls, Dummerston Vt, 93 Seconds

For my waterfall pictures I like to use a polarizer to reduce the reflections off the rocks and a polarizer can be stacked with an ND.  The polarizer reduces the exposure by an additional stop or two.  With more powerful NDs which essentially eliminate the light,  I must adjust the polarizer as well as the composition and focus before I add the ND.  Care needs to be taken to avoid moving the Polarizer ring as the ND filter is screwed in place.


The other important issue with stacking any filters is to watch for vignetting.  This is more of a problem when thick filter rings are stacked and when using wider angle lenses. 


Focusing and Composing

63 seconds, Chesterfield Gorge
Even with relatively weak ND filters, it can be difficult to compose and focus in the viewfinder.  One approach is to focus before the filter is added, but I found that even with moderate amounts of light reduction, I could use Live View to focus and to adjust the effects of a polarizer on the LCD.  With the 10 stop filter, everything was completely black and I had to make my adjustments before adding the filter.  Of course, cameras vary, and experimentation will usually be necessary.


Exposure

Maintaining the same exposure after adding a ND filter is simply a mater of compensating for the number of stops.  Since aperture adjustments are limited, I tend to keep the f-stop fixed and compensate with changes in the shutter speed, but it can get confusing when trying to count out ten stops on the shutter adjustment. 


Happily, there are several easy Apps, available in the iTunes App Store, that make this adjustment easy.  I settled on free one (typical) called the “Long Exposure Calculator”.   You start by finding the correct exposure without the ND.  For my waterfall pictures, this means the correct exposure with the polarizer in place.  This “Base Shutter Speed” is entered into the App and, when the filter density is dialed in, the correct filtered shutter speed appears on the bottom.  Simple, and if the shutter is greater than 30 seconds, a timer pops up to count down the appropriate amount of time. This works great, but if the light changes some adjustment may be required.

Long Exposure Calculator


I’ve been having great fun with my NDs.  One of the remarkable things about photography is how even relatively inexpensive pieces of kit can open exciting new ways of seeing our world.  Go have some fun.


Evening Stickney Brook Falls, Dummerston Vt : 60 sec 6 Stop ND


Sunday, March 2, 2014

Seeing the Unseen


This week I would like to celebrate the amazing capability of modern photography to help us to see the unseen.  My goal is only to touch on what is possible and to provide links to more detailed explorations.

From its invention, photography has been a medium that was prized for its ability to capture what we see in flawless detail, freezing more of "reality" than could ever be absorbed by our limited visual perceptions.  Without special forethought, my photography has tended toward images that celebrate the beautiful detail of the natural world.  I have tried to use the remarkable powers of digital photography and editing to place viewers in locations as I have seen them, working to display the mood as well as the reality of the remarkable world around us.  But photography has always provided a means to see things beyond our normal perceptual capacity, that are not accessible to the naked eye (THERE, I got the word "naked" into the article - TWICE!  Watch my hits soar!). 


Anyway, In the beginning photography captured "Reality" in its own way based on its technical limitations.  It has always had the
remarkable ability to freeze time, not only for moments but for centuries.  As initially a black and white medium, photography washed the color from the world and forced a new focus on light and pattern that had always been hidden under a gaudy chromatic layer in our perception.  Photography has expanded and altered our vision in many other ways and, digital photography, although not required for many of these advances, has made them more easily accessible and pushed opened the door to these unseen new worlds.  I have discussed many of these techniques in much greater detail in previous articles, but here is a brief list of some of the ways that photography can open our eyes to a new worlds.  Let the journey begin.  


Infrared
Infrared photography is perhaps the best example of seeing the
unseen.  Infrared is the portion of the electromagnetic spectrum beyond deep red.  Although these longer wave lengths are beyond the ability of our eyes to detect, infrared photographs have been captured since the early 1900's.  Today a digital camera can be modified to respond to the infrared making it much easier to capture this invisible world.  The infrared spectrum shows foliage in brilliant light, making summer scenes appear like winter landscapes.  It cuts through haze and reveals puffy clouds in stark contrast against inky black skies.  With infrared photography it is often possible to capture powerful images on days when the light is too flat and dull for strong conventional images.  I found it well worth the expense to modify my old Canon 20D doorstop to become my IR camera.
For More Information:
 Infrared, Seeing Photography in a Different Light


HDR

High dynamic range photography can be used to overcome the 
Improving Dynamic Range
limitations of film and digital sensors in recording the full range of light and dark apparent to our eyes.  In this sense it actually improves the ability to capture what we can already perceive, but HDR and its evil twin, tone mapping, has the seemingly unbounded artistic capability to mutate reality, 
turning a mirror on the artists mood and
fancy rather than the reality of the moment.  I love HDR because it provides such an unlimited opportunity for self-expression.  I generally use these tools to render images that better reflect the dynamic range that was apparent in the field, but occasionally it is fun to go crazy, jump through the looking glass,  and produce something that truly would never be apparent to the eye.


Going Crazy

For More Information:
HDR: Bon Appetitt
Taming the HDR Beast


Stop Motion:

Stopping motion requires fast shutter speeds that the high ISO
capability of new digital cameras has made more practical.  I remember, from the ancient past, when loading the camera with  ASA 400 film was a considered reckless, trading speed for the assumed damage to image quality.  Based on the lighting, I can now easily dial up the ISO to whatever is required, to allow a shutter speed fast enough to freeze the action or capture images in inky darkness..  The combination of the improved low light sensitivity of new digital sensors and the capability of software noise reduction algorithms has made it possible to maintain acceptable image quality at ridiculously high ISO levels.
For More Information:

 Accidental Bird Photography
Great Blue Heron on Harvey Pond


Long Exposure;

Long exposures have always been a capability of photography.  In 
Crowded Portland Street
fact in the early days it was a requirement. Daguerreotype portraits required an exposure of 2 or more seconds. Today long exposures can accomplish a long list of magical effects.  An exposure of a even a second or less can transform a roaring chaotic stream into a soft dream-like confection, looking nothing like the original scene, but providing a sense of frozen movement.  Long exposures of a busy street can remove all the distractions of moving cars and annoying people,  magically focusing on the stationary scene.  Star tract images of the night sky transforms individual stars from points of light into majestic arcs rotating around the north star. All of these technique are made much simpler by the ability, in the digital camera, to immediately review the results and adjust exposures accordingly

For More Information:
Photographing the Magic of Velvet Water
Long Exposure Crowd Control
Star Track Photography


Deep Space:

While we are talking about night sky images, I think one of the
most impressive ways that digital cameras have altered our sense of nighttime wonder has come from the ability that long exposures and high ISO have to extend our vision into deep space. ISOs ranging from 1600 to 6400 and exposures of 20-30 seconds brings a dense sea of stars into view that are invisible to our eyes even on the darkest night.  Beyond doubt,  the celebrity of this celestial show is our own galaxy, the Milky Way.  The most impressive images usually show the Milky Way's brilliant band in some appropriately interesting setting, and there are now many programs and Apps that can tell us precisely when, and where to stand to place a lighthouse, a tree or a silo in front of the show.  I live in the country and I often get a clear view of the sky, but even here the digital camera easily converts a subtle smug into a breathtaking view of our galactic disc.
For More Information
Night Time Photography, Searching for the Milky Way
Photographing Comet PanSTARRS


Time Lapse
Time lapse photography compresses time allowing us to see in a few seconds what occurred over hours.  All that is necessary is a sturdy tripod, an intervalometer to time the exposures and software to assemble the hundreds of images into a video.  For quick and simple time lapse videos I have used Quick Time, but many other options exist. I'm still a novice, but I have enjoyed creating videos of the setting sun, billowing clouds,  or stars moving majestically across the sky.  I even have one of Susan and I decorating the Christmas tree. 


Monadnock Sunset


Tree Trimming


For More Information
Time Lapse Time


Focus Stacking
It may seem that the use of focus stacking to achieve a deep depth of field only replicates what our eyes can capture, but in fact eyes
have the same focusing  limitations as any lens and iris system.  The only reason that we feel we can see everything from near to far in sharp focus is that our eyes are constantly and subconsciously adjusting focus as we move our attention around the scene.  A photograph with sharp focus throughout is actually a representation of the world beyond the capability of our vision, but it does match the dynamic nature of our perception.
For More Information:
Focus I
Focus II
Hand-Held Focus Stacking


Of course there are more ways that digital photography allows us to see the unseen. Editing software can alter our vision and a world without a tangle of wires in front of every beautiful scene is a priceless gift of Photoshop. It has been thrilling to explore some of the photographic options available, but It is also humbling to realize all that I need to learn.  But then again the endless opportunities to learn are what make photography endlessly exciting.

Jeffrey Newcomer
Partridgebrookreflections.com