

There
is no question, learning Adobe’s Photoshop can be an intimidating endeavor.
The program is so imposing and powerful that many are frightened away
before even trying. It took me several books and courses before I felt
that I could begin to use at a small part of this amazing tool. The fact
is that Photoshop is so deep that, I suspect that no one person can fully
understand it all.
 Chesterfield Donkey |
Of
course, when starting, there are a few basic tools that are important to
understand. Importing images, layers, selections and the basic image
controls are essential, but what about all that other stuff. You can go a
long way without having to worry about, HDR, panoramic merging, and split
toning, but it’s nice to know that all these tools are there just waiting for
you to explore – when needed.
One
of these tools, which is fairly new, is Content
Aware Fill. Like many of the new tools, Content Aware Fill (CAF) just
provides an easier way to do something that you could do before. It has
always been possible to use the Cloning Tool to fill unwanted areas of an image
with pixels taken from other parts of the image, or even from another image.
This can be arduous, as you try to find areas that blend seamlessly with
the underlying content and texture. The cloning brush is still an
essential tool, but given the right situation, Content Aware Fill can use the
amazing computational power of Photoshop to automate a large portion of the
job.
Content Aware Fill
 In
the Edit drop-down menu, Photoshop provides a list of options to fill an area
of an image. A selection can be filled with the current foreground or
background color, a pattern or any color you choose. This is also where
the content aware tool is found. After creating a selection around an
unwanted area of the image (eg my face), Content Aware Fill will attempt to
fill the area with pixels from around the selection. It works to blend
the fill with the surroundings. It doesn’t always work perfectly, but
often the results are almost magical. Typically, the filled area can
benefit from a bit of touching up with the Cloning Brush or the Healing Brush. I
thought of this as I was working on a picture of a pasture lane in
Chesterfield.
In
the Edit drop-down menu, Photoshop provides a list of options to fill an area
of an image. A selection can be filled with the current foreground or
background color, a pattern or any color you choose. This is also where
the content aware tool is found. After creating a selection around an
unwanted area of the image (eg my face), Content Aware Fill will attempt to
fill the area with pixels from around the selection. It works to blend
the fill with the surroundings. It doesn’t always work perfectly, but
often the results are almost magical. Typically, the filled area can
benefit from a bit of touching up with the Cloning Brush or the Healing Brush. I
thought of this as I was working on a picture of a pasture lane in
Chesterfield.Pasture Lane
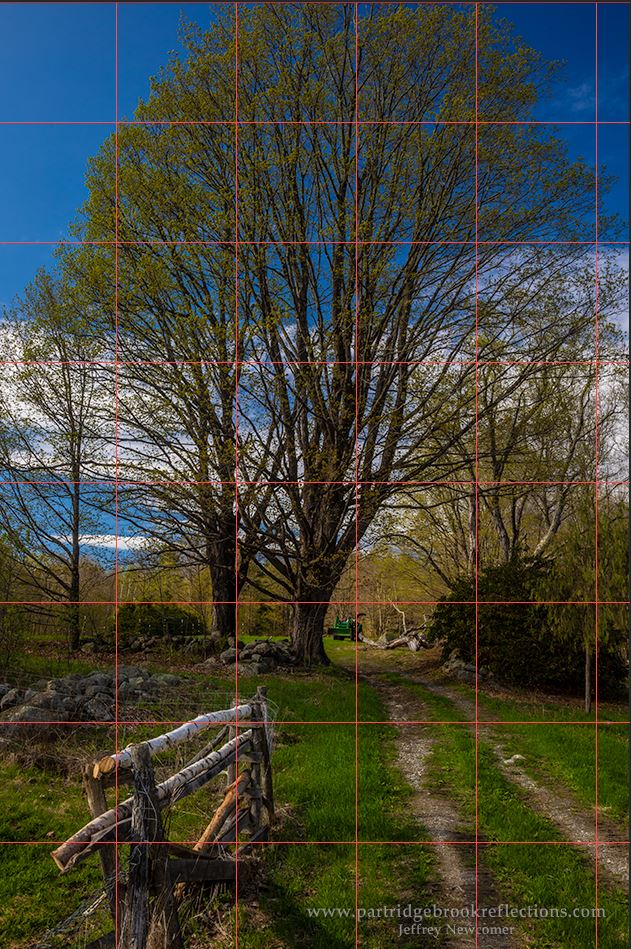 |
| The Leaning Lane |
Curing the Triangular Transparencies
 My
choices were simple, I could either crop out the areas of transparency, use
cloning to fill the spaces or do some combination of the two. I wanted to
keep most of the full image, so cloning was the obvious solution. All of
this could be achieved with careful use of the cloning brush, but it was the
perfect situation to start with Content Aware Fill.
My
choices were simple, I could either crop out the areas of transparency, use
cloning to fill the spaces or do some combination of the two. I wanted to
keep most of the full image, so cloning was the obvious solution. All of
this could be achieved with careful use of the cloning brush, but it was the
perfect situation to start with Content Aware Fill. |
| Fill Menu |
 |
| Filled Triangle |
 The
Content Aware Tool has a few options.
“Color Adaptation” should be checked to improve the color blending of
the patch. Since I was filling an area
of transparency, the most important thing in this case is to leave the
“Preserve Transparency” box unchecked.
Otherwise none of the area will be filled. I hit “Ok” and waited for the magic.
The
Content Aware Tool has a few options.
“Color Adaptation” should be checked to improve the color blending of
the patch. Since I was filling an area
of transparency, the most important thing in this case is to leave the
“Preserve Transparency” box unchecked.
Otherwise none of the area will be filled. I hit “Ok” and waited for the magic.  |
| Duplicate Fence Post |
As you review the results of the fill, it is important to look for areas where surrounding detail has been noticeably copied into the patch. This can be seen in the upper left where a fence pole was clearly duplicated. A little cloning easily removed the obvious defect, but sometime the duplications can be more subtle. A careful examination is always a good idea.
Madame Sherri’s Hat
 |
| Madame Sherri at the Ball 1920s |
 |
| Content Aware Fill - Poor Alignment |
 |
| CAF and Cloned Touch-up |
Parrish Shoes

The fictitious Parrish Shoes sign was painted on a wall in downtown Keene NH for the filming of the movie “Jumangi”. Since then, the town has elected to keep, and regularly refresh, the sign as a local attraction.
 I recently shot the spot from
the perspective of the shoes, but of course I couldn’t avoid at least one
person waiting at the crosswalk. With the woman against the brick wall, CAF
didn’t do a great job. The brick kept
bleeding into the patch. I tried it a
few times, but eventually found it easier to use the Cloning brush.
I recently shot the spot from
the perspective of the shoes, but of course I couldn’t avoid at least one
person waiting at the crosswalk. With the woman against the brick wall, CAF
didn’t do a great job. The brick kept
bleeding into the patch. I tried it a
few times, but eventually found it easier to use the Cloning brush. |
| Bleeding with Content Aware Filll |
 That’s
it. One of the confusing things about Photoshop is that there is almost
always more than one way to achieve the same result. The challenge is to choose the right tool or
tools for the situation. As you use the
CAF tool you will begin to recognize situations where it will work well and
other where the surrounding detail may get blended uncomfortably with the
result. In these situations, “Content Aware Patch” can provide a bit more
control over the sampling area. But that is a subject for another article
and, of course, you can always go back to the good old Cloning Brush.
That’s
it. One of the confusing things about Photoshop is that there is almost
always more than one way to achieve the same result. The challenge is to choose the right tool or
tools for the situation. As you use the
CAF tool you will begin to recognize situations where it will work well and
other where the surrounding detail may get blended uncomfortably with the
result. In these situations, “Content Aware Patch” can provide a bit more
control over the sampling area. But that is a subject for another article
and, of course, you can always go back to the good old Cloning Brush.
Jeffrey
Newcomer
No comments:
Post a Comment