About Me

My photo
Spofford, New Hampshire, United States
Jeff Newcomer had been a physician practicing in New Hampshire and Vermont for over 30 years. Over that time, as a member of the Conservation Commission in his home of Chesterfield New Hampshire, he has used his photography to promote the protection and appreciation of the town's wild lands. In recent years he has been transitioning his focus from medicine to photography, writing and teaching. Jeff enjoys photographing throughout New England, but has concentrated on the Monadnock Region and southern Vermont and has had a long term artistic relationship with Mount Monadnock. He is a featured artist in a number of local galleries and his work is often seen in regional print, web publications and in business installations throughout the country. For years Jeff has published a calendar celebrating the beauty of The New England country-side in all seasons. All of the proceeds from his New England Reflections Calendar have gone to support the Pulmonary Rehabilitation Program at the Cheshire Medical Center. Jeff has a strong commitment to sharing his excitement about the special beauty of our region and publishes a blog about photography in New England.
Showing posts with label post-processing. Show all posts

Friday, August 22, 2014

Resurrecting Old Favorites

 Bringing New Life to Past Images


Nellie's Dread


Susan and I are getting prepared for our trip to Alaska. As always, before a big trip, our dining room table has become the staging
The Look
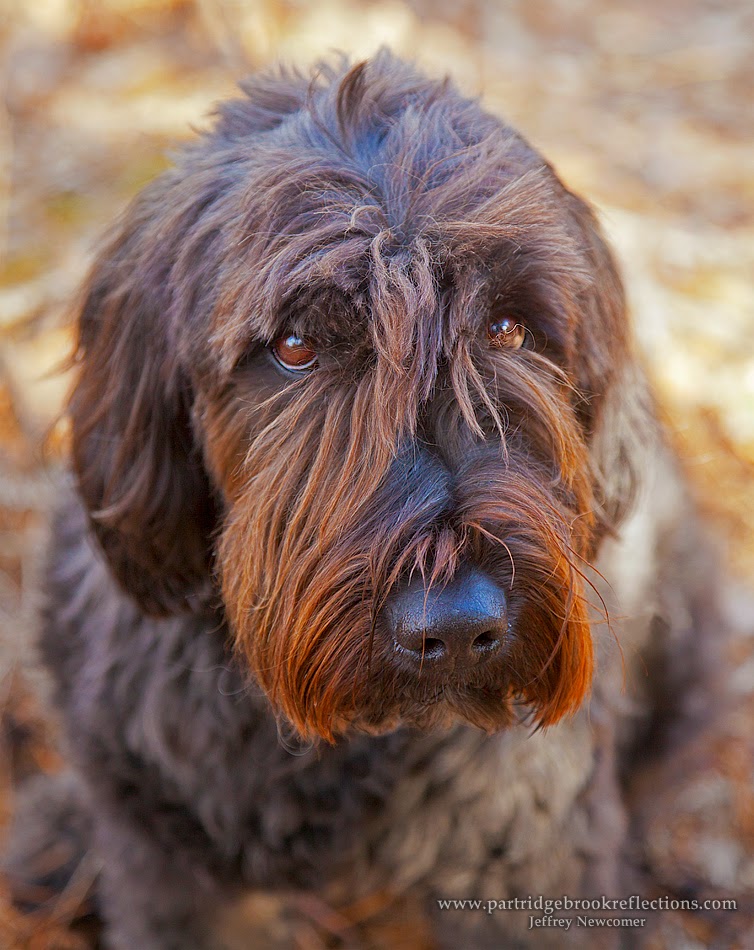
area where we pile all the stuff we don't want to forget. My job is to find all the various chargers and connectors we will need to keep our cameras and other electronics operating. Susan's task to keep me from bringing way too much clothing. Of course all this "staging" makes Nellie very nervous as she anticipates the coming separation. We have a nice house sitter lined up to keep Nell thoroughly covered in touch and love, but there is nothing like the appearance of suit cases to make her pathetically clingy.

I'm sure I'll be grabbing a picture or two on the trip and I hope to be sending out preliminary shots in my blog along the way. The status of my time and internet connectivity may be a bit shaky, so if I miss pushing out my weekly articles, I hope I will be forgiven. As I anticipate a pile of pictures to work through on my return, I thought this might be a good time to look back to some of my ancient images.

 Revisiting Old Friends

Every year there are a few images which I feel are my best, with which I have a strong personal connection. I enjoy wandering back to these old friends, but I notice that many of my former "masterpieces" don't seem to have the same brilliance and pop that I recalled. Many look unnaturally flat and dull. It's not surprising. Over 10-15 years, I would hope that my shooting and post-processing techniques have improved, and undoubtedly my personal style has evolved. Obviously, photo editing software has matured making it much easier to bring out the dramatic qualities of an image. I decided to revisit some of these old images, some dating back more than ten years, to see if, using current processing, I could breath new life into ancient pixels.

Immediately I was aware of the challenges. These old images had been captured at much lower resolution than is common now. I tried to find the least manipulated version of the images that was available. RAW files were preferable , but, for some, I had to start with a base image that already had editing baked into the file. Eight bit JPGs were especially difficult to manipulate.

Here are just a few examples of my attempts at Frankestein-like resurrections of old images. I first experimented with adjustments of color and contrast in Lightroom and Photoshop and later used blended tone mapped layers to add a broad range of pop to the images.

Portland Head Lighthouse
Some years ago, when I was more flexible, I jumped the fence at Portland Head Light to catch the surf rolling in, and nearly washing me out. This picture seemed a bit flat, without the drama that was so apparent in the moment. I worked on the image in Lightroom and Photoshop to increase the contrast and vibrance, highlighting the bright lighthouse against the dark angry sky. I also used the skew tool to reduce the keystone effect caused by my low position looking up from the rocks. The overall effect was closer to the scene that I recalled. 


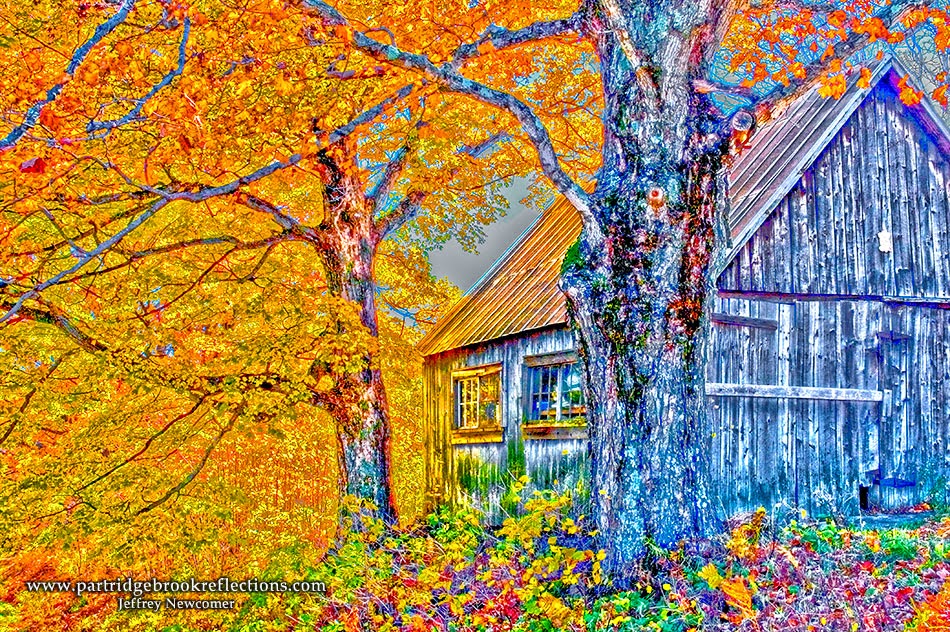
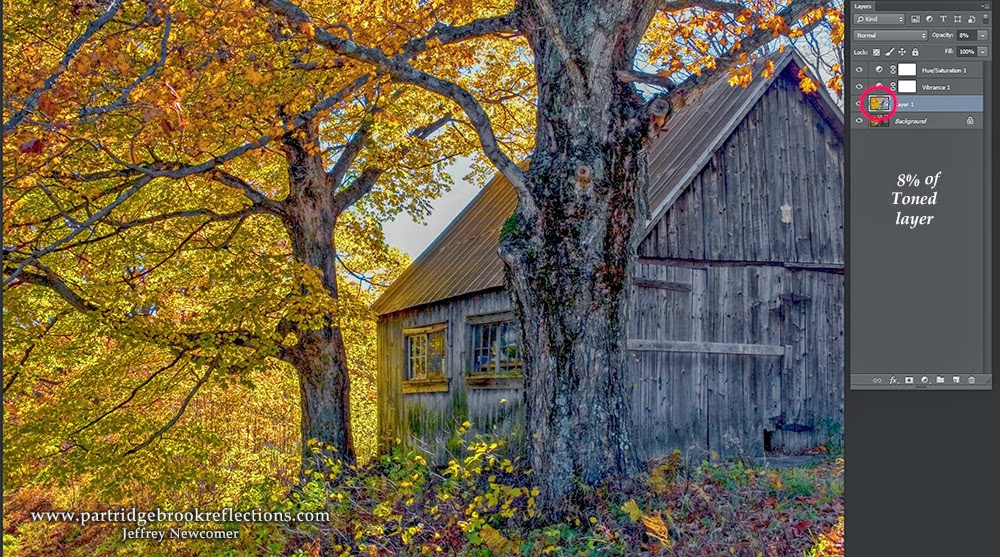
Artist's Shack, Marlboro Vermont

 Eight years ago I was cruising the back roads of Marlboro, Vermont looking for autumn color. I found this shack which, because of the model head in the window, I decided was an artist's studio. Probably wrong, but it gave me a title. I came back with an image that to my eye is terribly
HDR Tone
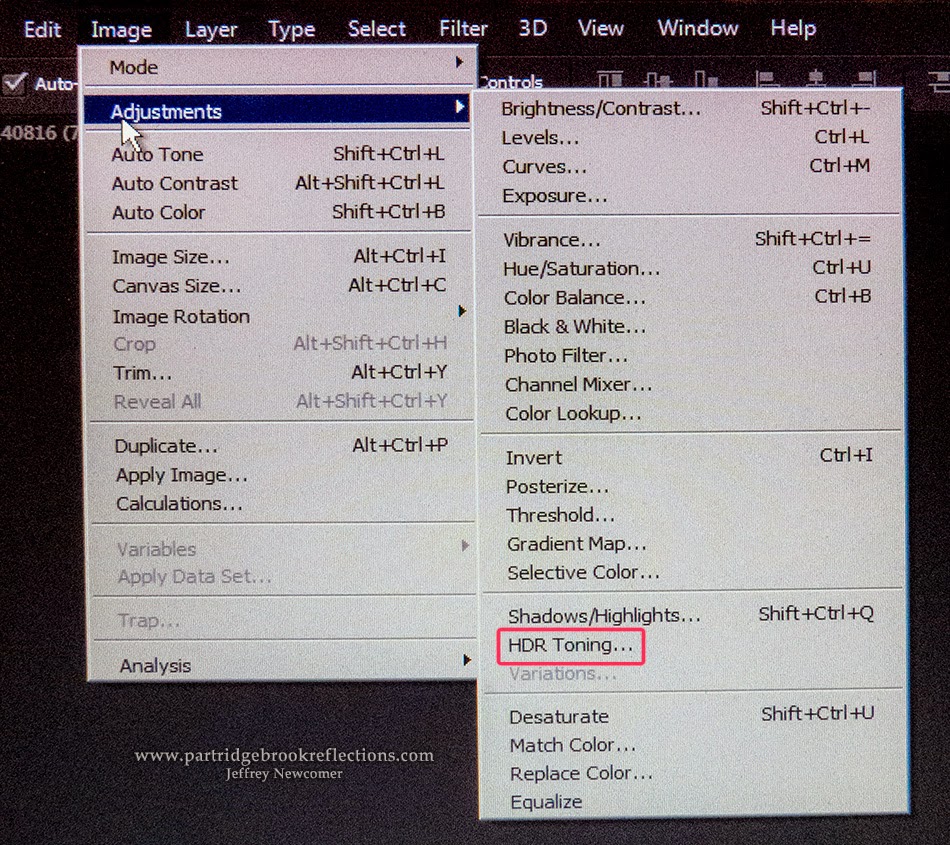
flat with none of the brilliant color that was apparent at the time. I moved the JPG into Lightroom and had some success, but then I decided to blend a toned layer to kick up the color and contrast. I have discussed this process previously. I made a flattened copy of the image and then applied "HDR Toning" in Photoshop. I have found that the "Scott5"preset is often a good starting point. The results are always grotesquely garish, but after I move this layer back to the original
Scott 5 Preset
image layer stack I drastically reduce the opacity to get just the amount of kick I want. In this case I only used an opacity of 8% to get the result I liked. It still has a touch of "painterly" quality, but I much prefer it to the original. The nice thing about blended tone maps is that adjustments in the opacity allow for a near infinite range of effect to meet anyone's taste.


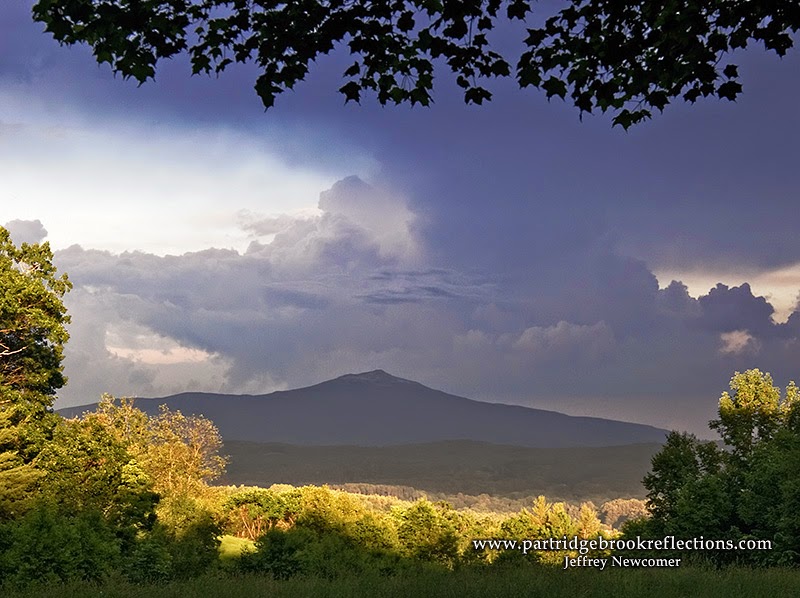
Storm Over Monadnock
One of my favorite early images and one of my best sellers is "Storm Over Monadnock" captured in 2006 with my canon 20D.  I had watched a thunder storm pass over my office in Keene, NH and I knew it was heading for the mountain. I jumped into the car and ran for Chapman Road with its view of Monadnock to the Southeast. I was thrilled to catch the thunderhead rolling over the top of the mountain. The most dramatic part of the scene was the contrast between the ominously dark mountain and the last light skittering across the valley below. Back then I struggled with the contrast and was never fully happy with my ability to bring the light into balance. In this case I used 25% of my toned layer to bring out the contrast. I could only do so much with this aged 8 bit original, but I was happy with the results


Harvest Sunset 
The Old Oak at Alyson's Orchard is gone now having fallen to a lightning strike a few years ago. Back in 2006 it still stood proudly on the hill and I was able to capture it as part of a classic autumn scene. Once again the picture from my archives appeared flat and bit overly warm in tone. I cooled the tone slightly in Photoshop without loosing the warmth of the setting sun and then applied a touch from a toned layer to bring out the drama. 


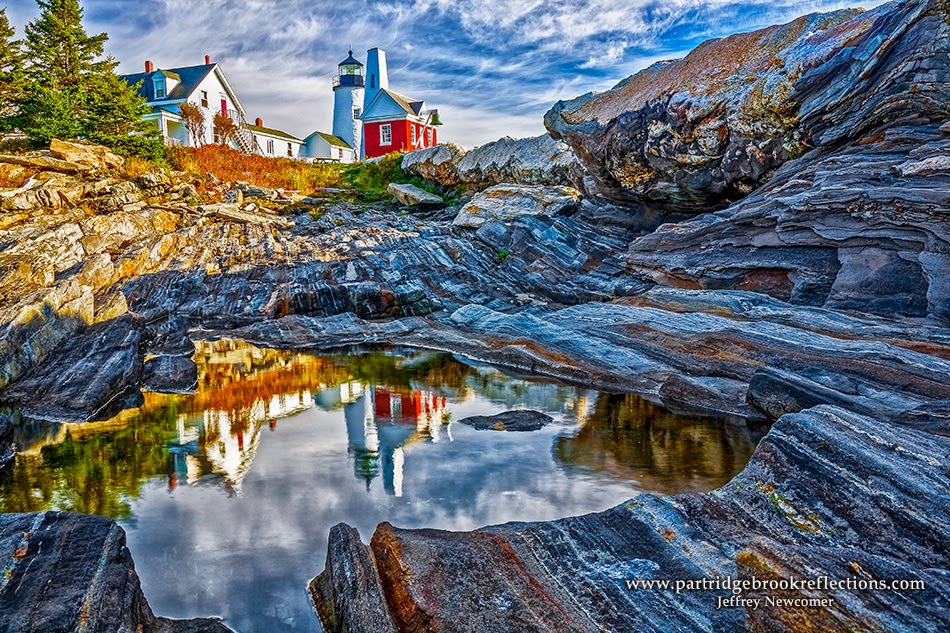
Pemaquid Pool
Pemaquid Light
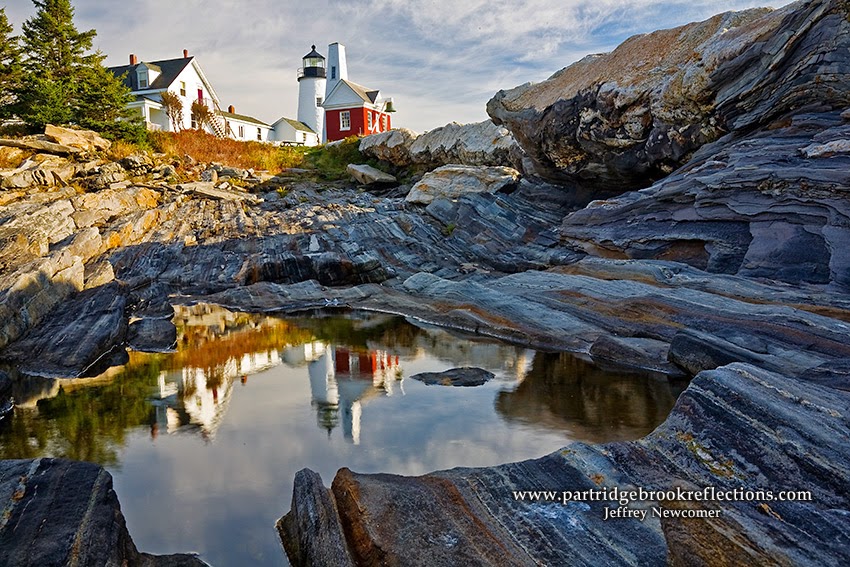
Pemaquid Light in Bristol, Maine is famous for the tidal pools that provide opportunities to catch interesting reflections. I was happy with the image that I captured of the reflected lighthouse in 2007. It has been one of my most popular coastal images, but I thought that, while I was playing with tone mapping, it might be fun to go a little crazy with this old favorite. I was also inspired by an image taken from the same spot by Rick Sammon using HDR technique. Using 28% of my toned layer I ended up with an effect beyond my usually comfort zone for HDR/Toning, but I can step back and appreciate the picture for what it is, without any pretense of real life appearance. Hey, its art. 


Well I have to get back to my packing. I've enjoyed my stroll through the past.  Photography is a time machine and it was fun to bring new life to old favorites. Now see what pictures you have that deserve to be re-imagined.


Jeffrey Newcomer
partridgebrookreflections.com


Sunday, August 17, 2014

My 10 Favorite Photoshop Short-Cuts


Shoots and Ladders
This week I have a short article about short-cuts.  Keyboard short-cuts can speed your Photoshop work-flow, but it is impossible to keep track of all of the options.  I find that just a few short-cuts take care of my most frequent and repetitive tasks.

Sometimes it seems as if I spend half of my conscious existence with my eyes wandering through the magical effects that Photoshop can produce on my images. Recently my photoshop time has been substantially reduced by my pre-editing in Lightroom, but all my images still pass through Photoshop for final tweaking. Photoshop can be a confusing soup of menus and options. It is easy to get lost in the seemingly limitless creative possibilities, but, for most images, my editing incorporates a fairly limited number of steps which often takes only a few minutes to complete. 

The Flow
Blueberry Row, Green Mt. Orchard, Putney, Vt
I start by reviewing the image looking for intrusions that may require removal such as cigarette packs or areas of distracting color or brightness along the edges. I determine whether I need to do more to tame or reclaim the shadows and highlight. I routinely try an adjustment in vibrance and then may make further corrections in important individual colors. I usually bring up the curves tool to tweak the contrast, but these changes often get applied to limited areas of the image with the use of a layer mask. At that point, I'm usually done. I save a copy of the unsharpened and uncropped picture at full size and resolution as my base image and then start cropping, resizing and sharpening to fit my specific needs. It is all fairly routine and, where there is a routine,  keyboard short-cuts can help to speed the process. 


Key-Board Short-Cuts
Trevor Morris' List
Editing can be accelerated by the use of at least some of the many key-board short-cuts that are available to accomplish frequently used tasks with a single key stroke or a combination of keys.  The full list of Short-Cuts in Photoshop is truly mind numbing, and I have found it much easier to access seldom used tasks through the menu system or through the click of a button on the screen. I can create a copy of a layer by pressing "Ctrl-J", but I can accomplish the same result by dragging the layer
Menu Short-Cuts
to the New Layer button in the Layers window. I find it easier to "drag and drop" than to search for the "J" key hidden in the middle of the keyboard.  I tend to use short-cuts for tasks that I do frequently or repetitively,  such as when I am using a paint brush to edit a layer mask and have to continuously  adjust the size of the brush as I move in and out of tight spots, or when I repeatedly jump between white and black brushes to add or subtract from the mask. The good news is that keyboard short-cuts are easy to find. There are many lists quickly available on the net, but many of Photoshop's menu options will also show the corresponding shorts right next to the commands. If you frequently go to a particular menu item, the short-cut is right there.  Pressing "Alt Ctrl Shift K" will bring up a list of "K"eyboard short-cuts as well as providing the opportunity to create your own short-cuts.


Ctrl Alt Shift K to View and Create Short-Cuts

For a more exhaustive list, check out Trevor Morris' lists which include the short-cuts for various versions of Photoshop


**************************************************

My Favorite Short-Cuts
Everyone's approach to editing is different and your favorite short-cuts may be quite different from mine, but here are a few of the key-board commands that I find most useful. These few probably account for 90% of the short-cuts I use on a routine basis.


First I have to mention the simple editing functions:

"Ctrl-X" : Cut

"Ctrl-C" : Copy

"Ctrl-V" : Paste

"Alt-Ctrl-Z" : back up one step
Given my fumbling editing, the backup key is used often.

Selections and Masks
My most frequently used short-cuts have to do with the creation and refinement of selections and masks. 


Four Focus-Stacked Images  with Complex Selection Edits


"Ctrl-A" : Select whole image

"Ctrl-D" ; DeSelect


Show the Mask
"\" : Show the mask in red
Revealing the mask in a red overlay is a great help in refining its effect and catching any missed locations.

"Alt-I" : Invert mask
A carefully drawn mask is a great resource within an image and can be copied to control the effect of various layers. Masked can also be inverted to apply an effect to the opposite area. 


Brushes
These allow quick adjustments in brush size and togggling between revealing and hiding areas of selections or masks.

"[" :  make brush bigger


"]" :  make brush smaller
Quick changes in brush size also helps when painting or cloning.
Brush size can be refined with repeated presses on the "[" or "]" keys.

"X" :  toggle foreground and background color
The mantra is "White reveals / Black conceals " and the "X" key allows easy toggling between the two as editing is refined.


Bringing It Home, Chesterfield, NH

That's it, my top ten, and ten is about all my aging brain can retain.   Those nit-pickers out there will have already figured out that my list actually includes 11 short-cuts. To you I can only say, "Don't you have any better things to do"!  Go make your own list.

I would enjoy hearing about your favorites.

Jeffrey Newcomer
partridgebrookreflections.com