About Me

My photo
Spofford, New Hampshire, United States
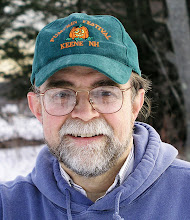
Jeff Newcomer had been a physician practicing in New Hampshire and Vermont for over 30 years. Over that time, as a member of the Conservation Commission in his home of Chesterfield New Hampshire, he has used his photography to promote the protection and appreciation of the town's wild lands. In recent years he has been transitioning his focus from medicine to photography, writing and teaching. Jeff enjoys photographing throughout New England, but has concentrated on the Monadnock Region and southern Vermont and has had a long term artistic relationship with Mount Monadnock. He is a featured artist in a number of local galleries and his work is often seen in regional print, web publications and in business installations throughout the country. For years Jeff has published a calendar celebrating the beauty of The New England country-side in all seasons. All of the proceeds from his New England Reflections Calendar have gone to support the Pulmonary Rehabilitation Program at the Cheshire Medical Center. Jeff has a strong commitment to sharing his excitement about the special beauty of our region and publishes a blog about photography in New England.

Sunday, March 27, 2016

Looking for Spring


Crimson Bud, Spofford NH


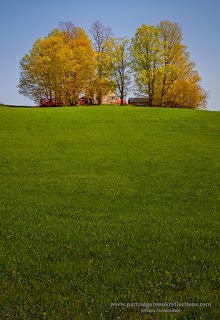
Hilltop Gold, Guilford Vt

I have given up on the winter that wasn't and must now expect the slow coming of spring. It is becoming a mini tradition to anticipate our annual burst of new life by collecting a few of the images from the preceding spring. This is usually seen as therapy after a long, cold and snowy winter but this year it is more a matter of moving on. Early spring is usually about a bleak mix of sticks and mud. This year we have the sticks but the good news is that, without the snow, we have very little mud. Sadly the lack of a healthy spring run-off also means that or waterfalls may less dramatic.


Golden Corner, Guilford Vt
So here is a brief collection of images looking back on last spring, trying to get us through until the greens start to explode. Of course we still could get an April blizzard. I remember about two feet of wet snow one Easter a few years ago, but despite fear of jinxing things, somehow this does not seem to be the year for such surprises. 


Merriam Brook Cascade, Surry NH

--------------------------------------------------------------------------------


Catsbane Brook Falls
West Chesterfield, NH

Flowing Water :
Last early spring was a lovely flowing water season.  I got to visit a bunch of old friends and discovered a few new location, including hidden Catsbane Falls in West Chesterfield.


Pond Brook Falls
West Chesterfield, NH
Pulpit Falls


Green River Falls, Marlborough NH


 ---------------------------------------------------------------------------------

Pisterine Spring, Spofford NH


Early Green / Our Second Autumn :
I love the early shade of green which rivals autumn for variety and warmth.


Academy Spring, Walpole, NH
Spring Cupola, Spofford NH


Zerubbabel's Rest
Chesterfield, NH
Grand Opening, Spofford NH


Spring Road, Guilford NH


 ----------------------------------------------------------------------------------

Campus Crocuses, Keene NH

Spring Flowers:
Of course spring is about flowers and I enjoy shouting them both in the wild and in the more controlled environment of nurseries and green houses.


Blue Carpet, Marlborough NH
Tulip Bed, Marlborough NH


College Tulips, Keene NH
River Park Lilies
Keene NH


----------------------------------------------------------------------------------
  
The Night Sky :

Spring is a great time to capture the night sky, The Milky Way is rising high in the sky and the warmer weather makes those long exposures more tolerable.


Pasture Arch, Walpole NH


Jeffrey Newcomer
Partridgebrookreflections.com
Monday, March 21, 2016

On-line Portfolios, How Much is Too Much


I've heard the recommendation often enough. You should limit the number of pictures visible on your portfolio page to just a few of your very best images, but how many are enough and when does the collection become excessive.

Portland Head Dawn
I have always had a certain parental pride in my images. It takes time to edit an image and if I didn't like the picture I wouldn't waste my effort. I think I have a good appreciation of my best images, but I am well aware that many of my pictures are not "hero" shots. Even the ones that fall short of the best composition or the most dramatic light usually have value from the story they tell or the memories they evoke.

Over the many years I have spent selling my images for books, magazines, the web or fine art prints, I have been amazed at how seldom the images I feel are my best are the ones that are most popular and profitable. Sometimes it has to do with practical matters related to the media. A magazine cover must be a beautiful image, but often it is more important that the picture compliments the topic, fits on the page and has room for the necessary text. My cover for the March 2011 Edition of NH To Do Magazine was far from my favorite view of sap gathering but it had nice open areas for the title and the list of articles. Compositions with large swaths of dead space are usually not the strongest images, but they are often exactly what the graphic designer is looking for.


Putney Sugar Shack
It is often impossible to anticipate what will attract the attention of someone looking for fine art photography. Sometimes it is familiar scenes that I have been able to capture in a different way. A warm sunset, an approaching storm or a colorful rainbow, "I've seen that spot a million times, but never quite like that." A few years ago I came across a small sugar shack in the woods of Putney Vermont. The light wasn't perfect, but for the family, the shack was an important reminder of the husband and father who built it. I sold numerous copies to family members.


Grand Tetons Sunset :"Across the Country"


The point here is that the pictures which turn out to be most important to me are often not the ones that I judge to be my strongest images. Everyone eye and heart is different and that is why I tend to have a much more broadly inclusive portfolio. 


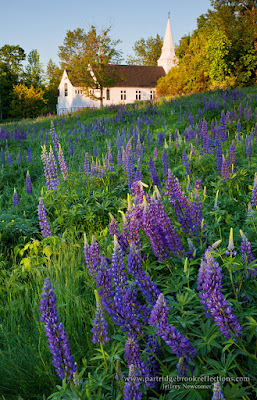
Sugar Hill Lupines


 Of course this discussion applies solely to on-line portfolios. In the good old days of paper, a portfolio generally referred to a book which contained 10 or 12 of your best images, but with the limitless capacity of electronic collections it is easy to get out of control with the number of images. The secret is to have a clear organization to make it easier for visitors to find what they are looking for, but an obvious and easily accessible collection of the "hero" images is still an important piece of the presentation. Here my discussion has more to do with an ideal that I am still short of fully attaining.


Web Site Cover & Featured Slide Show
My online portfolio is constructed and managed in Zenfolio, a system designed primarily to create web sites that can easily display an artist's work. The software is centered on the capability to construct layers of portfolios as well as information on the artist, contact information, a guestbook and even a blog feature. It also has nearly limitless capability to construct custom pages for any purpose.


Scope of the Problem

Presently I have over 10,000 images in my web portfolio distributed over 65 Galleries. My current challenge is to rearrange the galleries into coherent groups.

Getting Organized

Featured Gallery
Instead of a single group with galleries ranging from New England foliage to Castles on the Danube, I have started creating collections of Galleries.  To start I filled a Featured High Resolution with my favorite images and display them in a slide show playing on the front page.  I''m embarrassed to admit that my select "Featured" Gallery holds over 600 images.  What can I say, they are ALL my children, but someday I'll create a top 20-50 "Hero" Collection. Maybe.


Re-Organized Collections
I have grouped the New England Seasons Galleries together and then placed galleries focusing on New England locations and activities in a separate Collection, "Around New England". I actually do travel beyond New England on rare occasions and have separate Collections for images "Around the Country" and "Around the World". That only leaves a couple of catch-all collections including "Events & Projects (weddings, celebrations and client projects) and "Exhibitions" which holds just a few of my showings in the region.


The New England Seasons

I suspect I will add and subtract groups as I time goes by.  My point here is that, although it is impossible to reliably predict the taste  and needs of your clients, your online portfolio can offer a substantially larger collection of choices if it is organize to help potential customers find what they are looking for.   At the same time you can drawn attention to what you think is your best work from a link, gallery or slide show placed prominently on the front page.


Jeffrey Newcomer
partridgebrookreflections.com


Monday, March 14, 2016

HDR in Lightroom

Hubner Farm Sunset, Lightroom HDR


A couple of weeks ago I reviewed the Lightroom's new panorama tool which works with ease and precision. I have been impressed with this feature and, after trying it on new and reworked panoramas, Lightroom is now my location for rendering these dramatic images. This week I turn to the other function under Lightroom’s Photo Merge option and I believe the HDR tool will also become my preferred approach to natural appearing High Dynamic Range images. 


Dappled Light Tamed with HDR
Catsbane Brook, Chesterfield, NH
For some time, the ability to create High Dynamic Range images, with and without Tone Mapping, has been a unique advantage of digital editing. It started with a number of excellent stand-alone HDR programs. There were a number of choices, but my early favorite was Photomatix. They all provided the opportunity to blend multiple, variably exposed, images to display a broad, and sometimes unreal, range of brightness. It was easy to let things get out of hand, with bizarrely cartoonish results, but that fad seems to have mellowed. Like many I have tried to stick to creating HDR images that are designed to reproduce the natural range of brightness apparent to the human eye.

Photoshop’s early attempts at HDR were a bit awkward, but the tools have greatly improved in terms of both control and results, and now Lightroom has been added as a powerful option.

Start with the Images

Spofford Lake Sunset

HDR images start with capturing a set of images that cover a range of exposures. I most often grab three images, a standard balanced exposure and one about two stops above and below. I've always thought that more images, covering a wider range with smaller differences in exposure, would be better, but apparently three work fine and are recommended by Adobe. A tripod is helpful, but, given Lightroom's ability to align hand held shots, this is not required.

To Lightroom

The images can be placed in a collection or accessed directly from the source directory. After highlighting the series of images, the HDR Tool can be opened from "Photo Merge" in the Photo drop down menu or can be found by right clicking on the series. The menu is surprisingly simple. Immediately upon opening the tool, Lightroom creates a quick preview of the HDR image.


Lightroom HDR Tool
 If the images were hand held, the auto align box should be checked. Auto toning works on the final image by adjusting the sliders in the Toning section of the Develop module. It generally yields a preview closer to the appearance of the final merged image. Without Auto Toning the image can appear very dark, but all the adjustments can be easily modified.
Auto Tone Off


Deghosting

Auto Tone On, Medium Deghosting
Deghosting helps to correct areas in the image that may have moved between exposures. People walking by, or moving foliage can affect the final image and this is a major challenge for all HDR programs. By adjusting the amount of Deghosting Lightroom does a pretty good job reducing the problem. I only wish the program allowed a better assessment of the correction by permitting a closer zoom into the image. The Deghosting overlay shows what areas of the image have been affected by the corrections.

Merged HDR, Edited in Lightroom and Photoshop

 The Merge

Lightroom HDR Catsbane Falls

Each time a change is made in the settings, the preview must be remade, but this usually is not a long process. The final merge takes a bit longer, and when complete, the HDR image is placed in the same directory or Collection as the original series. For those familiar with the dramatic results of HDR/tone Mapped images the end-point of Lightroom's HDR may seem underwhelming. Lightroom creates a more natural appearing image which is a 32 bit RAW file. They contain greatly expanded dynamic range which can be used to dramatic effect as they are editing either in Lightroom or Photoshop. You don't get cartoons, but rather a natural appearing image with greatly expanded dynamic range.


Hubner Farm Sunset, Photoshop HDR and Tone Mapped


Hubner Farm Sunset, Lightroom HDR
I have been experimenting with Lightroom's HDR Tool on new, images as well as remaking some old High Dynamic Range favorites. I have been impressed with the results and the simplicity and speed of the process is refreshing. For most of my HDR this is fast becoming my first choice. Give it a try.


Jeffrey Newcomer
Partridgebrookreflections.com

Sunday, March 6, 2016

Let Lightroom Pick the Lenses for Your Next Trip


Jetty Sunset, Menemsha, Martha's Vineyard


Female Anhinga Costa Rica


Before I headed out on our recent trip to Costa Rica, I was faced with the inevitable question, what photography gear to bring, and more specifically, what lenses to carry along. Over the years I have tended to simplify and lighten my kit, but it’s always difficult to decide what to bring and, more painfully, what to reluctantly leave behind. Fortunately, Lightroom provides some much needed guidance.


Lightroom Course
Mormon Barn, Tetons Wyoming
I've been struggling to get ready for my Introduction to Lightroom Course which starts in one week (March 10th). It looks like I will have a fun group. I have been using Lightroom as an essential part of my routine work-flow and, I have become comfortable with the features of the program that are most important for my process, but as usual, preparing to teach a class has introduced me to a mass of new tools and tricks. The challenge will be to cover much of this without confusing the hell out of my poor victims.


Parliament Flame, Budapest, Hungary

Given my time restrictions, I suspect that my next few blogs will be short and, like last week, consumed with the wondrous features of Lightroom. Last week I discussed the program’s Panorama Tool, and this week it is about using the program’s metadata features to help decide what lenses to bring on a shoot or more challenging on a trip from home.

Away From Home

 
Sea Lion Yawn, Galapagos Islands
My goal on longer trips, especially those requiring being jammed into an airplane, is to limit the amount of equipment. Specifically, what lenses will I most likely use. On early trips I solved the problem by packing everything. On our trip to the Galapagos Islands in 2009, I carried my; 24-105mm, 100-400mm, and 16-35mm. Thank goodness I didn’t yet own my 100mm Macro. Still with an extra body, a tripod, a pocket camera and all the necessary accessories my kit was massive and barely made it on the flights. 


Bartolome Peak Galapagos Islands


At Anchor, Galapagos Islands
Over the years I have become aware of the fact that there is some gear that I seldom use and could easily, although painfully,  leave behind. This is where Lightroom proves very educational. Lightroom provides easy access to the pile of information with is held within each image file.  It is all in the Metadata,  including the identity of the lens used for the pictures. Here’s how to get at it.


Lens Metadata

 
Galapagos Lenses
From the Grid view in the Library Module, the Library Filter Bar can be opened by pressing “\”.  Under “Metadata” there are a number of columns of searchable information, usually including “Lens”. If this isn’t visible, it can be selected by left clicking on any of the existing column headers, or a new column can be added by clicking on the small box on the right of any header. Just don’t replace the “Camera” column since you may need that later to narrow your search to just one camera. The lens column shows the number of images taken with each lens within the selected directory. For a quick idea of which lenses you use most often you can start by selecting “All Photographs” in the Catalog, but I was interested in my lens statistics from some of my favorite trips.

For this exercise I selected the directories for the Galapagos, Rockies, Danube, Alaska and Costa Rica. I also looked at one trip to Martha’s Vineyard that was by car and therefore didn’t have the restrictions imposed by plane flight. I didn’t carry all my lenses on every trip, but the results were still interesting.

The Numbers Don't Lie 

The Results


Alaska Lenses
 
The results, summarized on a Spread Sheet, were not surprising. They showed that, by far, my most used lenses were my 24-105mm and the 100-400mm. Together I depended on this wide range of coverage 98% of the time. Importantly I used my wide angle or macro lens for only about 2-3% of the shots. Of course I didn’t have these lenses on every trip, but taking the trips individually the 24-105 / 100-400 combination was used between 95-100% of the time. 


Grizzly Fishing, Pavlov Island, Alaska


Breach, Alaska


My minimal use of the other lenses could be attributed to my inherent laziness, but more likely it has to do with the broad range covered by my two favorites pieces of glass. I also try to limit sensor contamination by switching lenses only when it is absolutely necessary.


Going Light in Costa Rica

Costa Rican Lenses


I was not surprised by the results of this exercise, but it did make me feel more comfortable about my decision to pack only my 24-105, the 100-400 and my 2x tele-extender on our trip to Costa Rica. I never felt short changed on capabilities and I was pleased that I could carry my gear in my light and capable Rotation  Panorama 180 pack. 


East Chop Light Martha's Vineyard


Martha's Vineyard Lenses
Don’t get me wrong. I’m not listing my Macro and 16-35mm lenses on eBay. These are marvelous tools and I enjoy using them in many situations, but it is good to know that, when necessary, I can go light.

You can learn a lot about your photography from data available in Lightroom’ s metadata screens. In addition to your lens preference you can select from a long list of information including, ISO, Aperture, Shutter Speed, Location, and Keywords.   So get out there and go to school on Lightroom.

Jeffrey Newcomer
partridgebrookreflections.com