 |
| The Quest for Depth |
Dehaze
 |
| 1st Draft The Cover WILL Change |
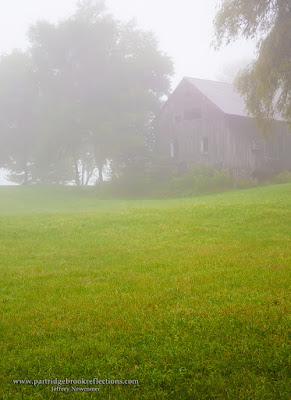
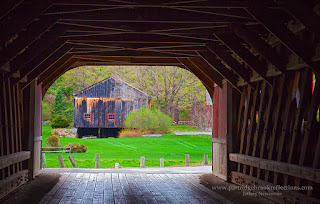
We landscape photographers have a love/hate relationship with fog and haze. Crystal clear air is beautiful, but a little haze can work wonders to provide a sense of depth and mystery.
 |
| Misty Stonewall Farm |
 |
| Spotlighting |
 |
| Depth from Negative Clarity |
Dehazing
 The Dehaze tool was introduced in the 2015 versions of Lightroom and in Photoshop's Camera Raw. It is primarily designed to reduce the softening effect of hazy air, salvaging detail in images that would otherwise be washed away. The Dehaze tool is easy to find in the Effects Panels of both Adobe Camera Raw and Lightroom's Develop Module. Within Photoshop, Dehaze can be accessed as an option in the Camera Raw Filter. The tool works well, but can't remove the haze entirely and if taken to extreme can create a dark, overly contrasty, effect that requires further adjustment. I suspect that this is one of those tools that will get better in future versions of the software.
  |
| Dehaze in Lightroom |
 |
| Dehazed |
 |
| West River, Dummerston VT |
"Negative" Dehaze
Much like with the Clarity Tool, I have been more interested in the Dehaze Tool's ability to go in the negative direction and add haze. The global softening created by "negative Dehaze", has limited usefulness, but when the effect is applied locally, to more distant parts of the scene, it can produce a layered look that reveals depth.
 |
| Global Haze |
O.K., Let's drop the double negative and just call it the "Haze Effect". As with the local application of negative Clarity, haze can be applied to the entire image and then restricted to a specific area with the application of a layer mask. Although haze can be created from within Lightroom, I find that the localized effect is easier to control as a Camera Raw filter in Photoshop.
 |
| Distant Haze |
I create a Camera Raw Filter Layer and then start by adjusting the Dehaze Tool to apply a level of haze which is more intense than I expect to use as my final result. I add the layer mask to localize the effect and then adjust the layer's opacity to reduce the initial high intensity of haze. I find that the haze effect works best when it is not overdone and is applied with a soft edged mask, but the extent and intensity of the effect can always be readjusted with the masking and the layer opacity. All of this can also be done with a Smart Filter layer.
 |
| Added Depth |
 |
| Morning Pasture, Chesterfield, NH |

The local application of negative Clarity and Dehaze either separately or in combination can add significantly to the sense of depth in an image. I have been enjoying playing with these adjustments, but as is always true with new tools in Photoshop, it remains to be seen how they will fit into the full range of techniques that are available.
 |
| Localized Dehaze |
Regardless of its eventual place, Dehaze is one more reason to keep up to date with the latest versions of Photoshop and Lightroom. So have fun. There are new toys in the sand box.
 |
| Dawn Road, Lyndonville Vermont - One of my old favorites |
 |
| Even classics can be helped with a little modern magic |
Jeff Newcomer
partridgebrookreflections.com

Thank you for this !!
ReplyDeleteThank for this helpful post especially these shower photos are nice .
ReplyDelete