About Me

My photo
Spofford, New Hampshire, United States
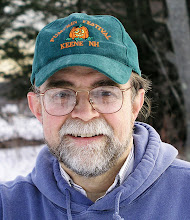
Jeff Newcomer had been a physician practicing in New Hampshire and Vermont for over 30 years. Over that time, as a member of the Conservation Commission in his home of Chesterfield New Hampshire, he has used his photography to promote the protection and appreciation of the town's wild lands. In recent years he has been transitioning his focus from medicine to photography, writing and teaching. Jeff enjoys photographing throughout New England, but has concentrated on the Monadnock Region and southern Vermont and has had a long term artistic relationship with Mount Monadnock. He is a featured artist in a number of local galleries and his work is often seen in regional print, web publications and in business installations throughout the country. For years Jeff has published a calendar celebrating the beauty of The New England country-side in all seasons. All of the proceeds from his New England Reflections Calendar have gone to support the Pulmonary Rehabilitation Program at the Cheshire Medical Center. Jeff has a strong commitment to sharing his excitement about the special beauty of our region and publishes a blog about photography in New England.
Showing posts with label lightroom. Show all posts

Monday, February 24, 2020

Iceland and Introduction to Adobe Lightroom Course


Gullfoss Falls

I’ve got a couple of major projects competing for my attention right now.  Actually three, but my taxes are nearly complete.  It is always surprising when I discover that I made money.  As usual, last year it was not much, not enough to live on, but for a landscape photographer anything in the positive is good news.  The other two demands on my attention are even better.


Drowning Pool, Pingvellir National Park, Iceland
First Susan and I just returned from a to brief, long-weekend, trip to Iceland.  I have always wanted to shoot in Iceland, and we managed to stuff a lot in a short period of time.  This tour convinced me that I must go back for a longer visit, likely in a warmer season.  I came home with over 400 images to work on, and that has reminded me about how dependent I am Adobe Lightroom as an essential part of my picture editing workflow.

Shameless Self-Promotion
Pingvellir Gorge
I am excited about my up-coming Introduction to Adobe Lightroom Classic Course.  The course will meet on six consecutive Tuesday evenings from March 3rd through April 7th at 6pm.  It will be a small group gathered around my dining room table in Spofford New Hampshire.  There are a couple of spaces still open, so get in touch if you are interested in learning about improving and organizing your images with this amazing program.  For more information, check out my article about my spring teaching schedule or give me a call at 603-363-8338.

Given the Power of Lightroom, Is Photoshop Necessary?
People often ask how much of my image editing is done in Lightroom and how much in Photoshop.  I feel strongly that, given the power and ease of use, for the majority of digital photography enthusiasts, Lightroom is all they will need to get started with image editing.  In my own workflow, I use Lightroom for my RAW editing, but I still routinely finish by moving my images to Photoshop for varying degrees of final touch-up.  Often after my full Lightroom adjustments, there is little to do.  I scan the image for small imperfections, dust spots or other distractions that I find easier to remove using Photoshop’s healing bush or cloning tool.  Subtle local adjustments in lighting or color can be applied more precisely using layer masks, and of course, manipulations of pixels can best be performed from within Photoshop. 


Pingvallavatn Lake

I almost always find something to do in Photoshop to complete my image, but how much of a difference does it really make and how much time do I spend using each of these often-complimentary programs?  I usually tell people that I get 80-90% of my image editing done in Lightroom, but that is just a guess.  I decided to look at the question in more detail as I edited some of my Iceland pictures.


Steaming, Geysir Hot Springs
The plan was to measure how much time I spent using the two programs, and also compare the images that resulted from work in  Lightroom Classic to that at the end of my Photoshop “touch-up”.   I realize that time spent was not necessarily an accurate measure of the contributions made by each program.  Lightroom’s intuitive workflow allows for substantial improvements in a relatively short period of time, while subtle refinements in Photoshop can often require more prolonged work.   These examples do not include the time that I spend getting the image ready for a full size JPG upload to the cloud (my web site) and reducing the image size for use on my website.

Lightroom vs Photoshop

Three Little Horses
Final Web Image
Let me start with an easy one.  All over Iceland you will notice groups of small horses seeming to be totally oblivious to the wind and cold.  In years past these cute guys were beasts of burden, but now, I am assured, their only job is to look cute at the side of the road and attract tourist to stop for a petting party.  We found this trio shortly after our visit to the Geysir hot springs.  All adorable, but my favorite shot came when one found the need to comment.

Lightroom Edit
Lightroom: This was an easy edit.  I adjusted the whites and highlights to retrieve some detail in the snow, while setting the black point.  I boosted vibrance slightly and added a bit of texture and clarity.  I usually save cropping for later in Photoshop, but here it was obvious that I had to get rid of the elbow protruding on the left. A bit more work than usual : 15:00 minutes


Photoshop Edit
Photoshop: This is one of those situations where there was little to add with Photoshop.  I used my favorite Shadow/Highlight Tool to add a bit more detail to the wind scoured snowy ground.  I darkened and brought out the color of the hair.  Finally, I drew the eye to the ”laughing” horse with a subtle splash of light.  And I was done.  I normally do a little sharpening in Lightroom, but I don’t sharpen in Photoshop until I am ready to output the image for a specific size and purpose.  Sounds like a lot but only 7:50 minutes
Total :  22:50 Minutes

Gullfoss Falls
One of Iceland’s most dramatic waterfalls is the Gullfoss Falls.  It was truly breathtaking, but what also robbed me of breath was the hurricane force wind that was screaming up the Hvita River Gorge.   I would have loved to spend time exploring all the different angles of this amazing spot, but given the conditions, I could only find two spots that allowed me to stand with a desperate margin of safety. How I avoided being blown away is a story for another time.  Back at home I tried to make the best of what I got.

Lightroom Edit
LightroomMy first concern was to avoid blowing out the highlights in the snow and water, especially in the waterfalls.  I dropped down on the highlight slider while watching to avoid making the foreground snow appear a muddy gray.  While setting the dark tones I was careful to avoid losing detail in the rocks. I added a little Texture, Clarity, Vibrance and a touch of sharpening.   As usual, I corrected the Chromatic Aberration.  I reserve cropping for later. 6:12 minutes

Photoshop Edit
Photoshop:  In Photoshop, I started by using the arrange tool to compare four versions of this image, side-by-side.  Studying all the images at 100% magnification I was able to find one that was reasonably sharp.  As my camera and I were being violently blown about, it was surprising that any of the images were sharp. Next, I used the Hue/Saturation Tool to bring out the blue in the water and ice.  Finally, I went into the Camera RAW filter to apply a bit more texture and Clarity.  I planned to use a layer mask to apply this effect just to the falls, but in the end, I liked how adjustment brought out the rugged appearance across the image. 11:52 Minutes
Total : 18:02 Minutes

The Results
I did the time comparison on two other images, both shots I took at the Geysir Hot Springs.  For the record, here are the average times for all four:
Lightroom:  13:30
Photoshop: 16:09

And for completeness, the average time spent fine tuning, cropping, and sharpening for output of a high resolution, full size JPG to the cloud and resizing and sharpening of the approx. 400kb web image:
11:15 Minutes

Grand Total: 40:58

Photoshop Edit
Note the detail in the water
Hot Pot, Geysir Hot Springs
Lightroom Edit

Too Much Time?
Leif Erikson
Hallgrimskirkja Cathedral, Reykjavik
Forty minutes for one image, and these were nor especially challenging.  I can spend hours removing a dense net of wires if the underlying image is strong enough.  I know some very good photographers who say that if they can’t finish editing in about 5 minutes, they throw out the image.  I think they may be missing some great shots.  Personally, I know how hard I work to get in the right spot and strive to get the best digit image in the camera.  For me, no amount of time is too much in the service of bringing an image to its full glory.  As Ansel Adams said, the original negative (or now the raw file) is the score and the final print or image is the performance.  I think that these images show that you can create great performances with Lightroom.  The differences in the Photoshop image are subtle, and I should note that I could have performed more refinements in Lightroom, if I didn’t plan to move the image to Photoshop for further work

Reykjavik Iceland

So get going with Lightroom and if you need some place to start, I will be happy to welcome you at my dining room table next week.

For more pictures of Iceland check out my Iceland Gallery.  I will be adding more images over time.
Sunday, November 18, 2018

Lens Correction


The Curved Door

The bad news is that every photographic lens induces some degree of distortion to the image that it sends to the sensor.  Some lenses cause more warping than others, but the amount and type of distortion is dependent on the focal length and the proximity of the subject. 

Types of Distortion
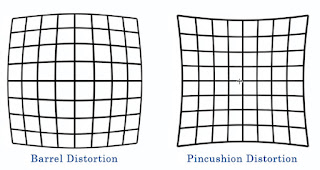
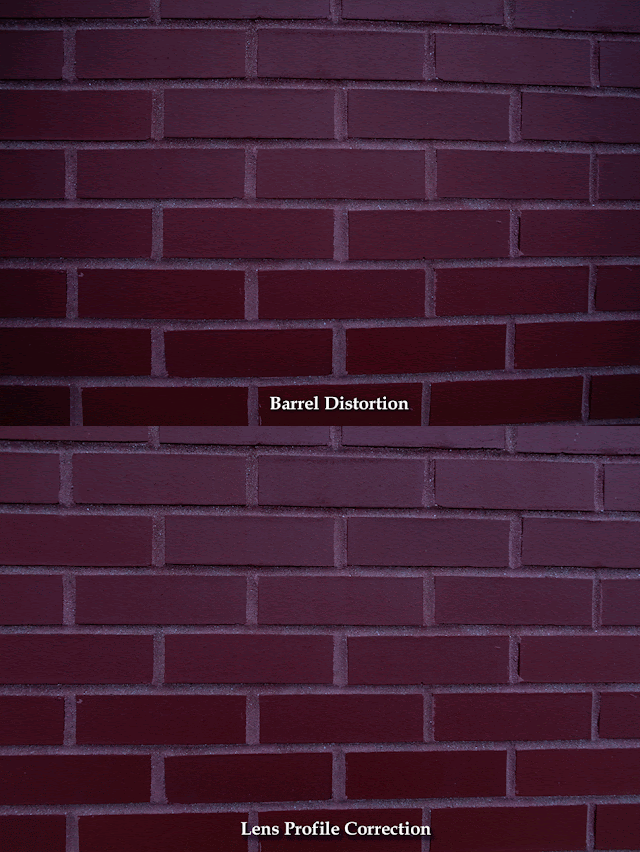
There are two types of distortion.  Wide angle lenses can cause the appearance of swelling out from the middle of the image, called Barrel Distortion.  This warping is often associated vignetting, a darkening at the corners.  Conversely, looking at more distant subjects with a telephoto lens can result in an inward bending of lines on the edges, called pincushion distortion.


The good new is that tools in both Lightroom and Photoshop can correct much of these problems and most of the adjustments are essentially automatic.  In Lightroom the magic all happens with the Lens Correction Tool.

The Curved Door
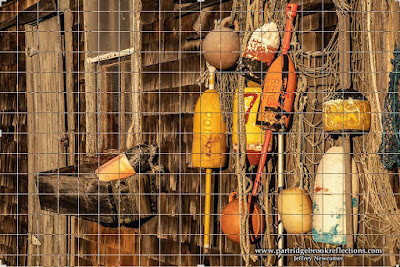
Recently, I was shooting along the waterfront in Rockport Massachusetts. I was especially attracted by the interesting detail in many of the Lobster shacks; colorful buoys, ropes and weathered doors.  I loved my angle on this shack, but I noticed that by using a 67mm focal length the lines of the distant door showed considerable pin cushioning.  The result was some post-processing correction and an excuse for another blog article


Lightroom’s Lens Correction Panel
Recent versions of Lightroom have a few nifty tools for correcting Lens distortion in the “Lens Corrections Panel”.  In Lightroom CC Classic, the first choice is between “Profile” and “Manual”.  In most cases you will not need to venture into the Manual options. 


Chromatic Aberration
The first option under “Profile” is to remove Chromatic Aberration.  I discussed the cause and treatment of Chromatic Aberration in an article six years ago.   Since then the causes have not changed, but many new lenses have become better at reducing the problem and the software has made its correction easier.  Just click on the button and most of the color banding will disappear. To fine tune the results you may need to dive into the Manual Options, but that will a subject for a future article.


Profile Correction
Profile Adjustment
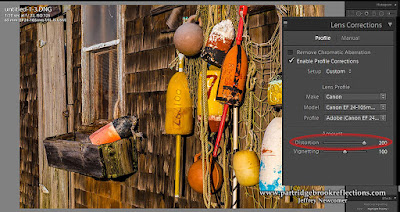
I love automatic stuff.  Adobe has assembled a large and expanding data base on the characteristics of most of the lenses that are available on the market and many legacy lenses that you may still be using.  This means that it is very likely that Lightroom can identify the lens in your metadata and automatically make the necessary adjustments to compensate for the distortion and vignetting.  Click “Enable Profile Corrections” and chances are your; Make, Model and Profile will pop up and the image distortion will be corrected. 


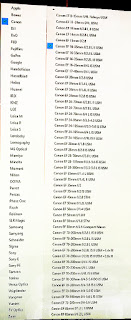
If the meta data does not contain the lens information, then you can look for it in the Lens Profile drop-downs.  If you can’t find your lens, most likely because it is new, you can wait for the next update which always includes a bunch of new profiles.  When all “automatic stuff” fails you can drop down to the “Amount” sliders and adjust both Distortion and Vignetting manually.


Fine-tuning the Door
The automatic profile adjustment made a marked improvement in the pin cushioning of the door, but it wasn’t quite perfect. The door edge still had a definite curve.  I went to the Distortion slider and found that a full +200 correction led to a better result.  For Lightroom and Photoshop automatic adjustments can work great, particularly for lens profiles, but sometimes they are just a good place to start.


Brick Wall Barrel Distortion
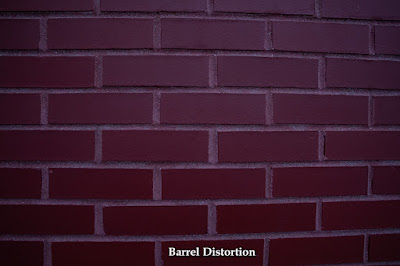
A wide-angle close-up of a plain brick wall gives a nice view of Barrel Distortion and for this I must thank the imposing façade of Dick’s Sporting Goods in Keene New Hampshire.  A straight-on view with my 16mm lens clearly shows barrel distortion and edge vignetting.  In this case the built-in Profile Correction nicely fixes the problems without any need for further adjustments.


Maple Trunk
Often lens distortions are not immediately obvious until they are corrected.  It is always helpful to compare a corrected image with the original, especially when using telephoto or wide-angle shots and it is nice that the process is so quick and easy.  My original shot of a Maple trunk in my yard looks reasonable, but when compared to the corrected version it is easy to see the bloated barreling in the center of the image.


Needs Work


The Lens Correction in Lightroom is one of the program’s simplest and most magical tools.  It is a worthy stop every time you travel through the Develop Module’s workflow.

Jeff Newcomer, NEPG
www.partridgebrookreflections.com


Thursday, May 24, 2018

Classes, Workshops and Exhibitions for 2018 - 2019

Lower Purgatory Falls, Wilton NH
I just finished a great Spring Waterfall Workshop, with enthusiastic people who were excited, not only about waterfalls, but also digital photography in general.  Now it seems a good time to announce my plans for the fall-winter classes and workshops.  


Introduction to Digital Photography
Sponsored by Keene Community Education
Four Tuesday Evenings from September 18th thru October 9th, 2018
Keene High School

My introductory class on digital photography has evolved over the years as I have tried to find better ways to inform and excite students about the amazing capabilities of digital cameras.  The course includes 4 two hour classes and two photo shoots. I cover a wide range of topics from understanding the differences in camera types, to image file formats, file management and archiving. Special emphasis is placed on exposure, composition and the use of different types of light.  All these topics are applied to the results of the photo shoots.  This class always fills very quickly, so watch for the announcement and brochure in mid-August from Keene Community Education and sign up early. 


Understanding Exposure

Email Erin White at ewhite@sau29.org to get on the list to be notified when the on-line brochure is available.
http://www.keenecommunityed.org/


Intro to Digital Photography Class, Spring 2018


Fall Foliage Workshop Weekend
October 12th – 14th, 2018
Monadnock Region and Southern Vermont

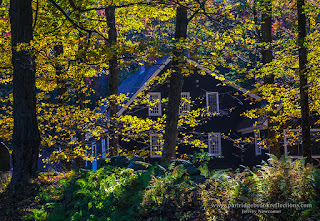
This autumn, I will again be offering my Fall Foliage Weekend Workshop.   I will be following the same format that seemed to work well over the last two years.  Again, I picked the weekend after the Columbus Day weekend craziness.  It is an opportunity to see great color without the same crowds that typically congest our beautiful countryside.  Our base of operations will be around my dining room table in Spofford, NH.  I will host the participants at my home on Friday evening for snacks and a discussion about photography in general, and the specific opportunities and challenges of foliage photography.  It will also be time to plan the shooting for all day Saturday and Sunday morning.  


Green River, Guilford Vermont
Saturday, we will head out early to explore as many different locations as possible.  My goal. Will be to place the group in beautiful locations and then help them get the most from the opportunities. Depending on the state of the color we may travel west to some of my favorite locations in southern Vermont, such as Guilford and the magic village of Green River, or we may explore the hills and farm around the Monadnock region and my own village of Chesterfield.


In the evening, we will return to the dining room table for an informal dinner of pizza and some gentle critiquing of the day’s shoot.
We will head out again Sunday morning for more of our exploration of color, and I will finally let people go around noon. I promise you will come away exhausted but thrilled with the experience.  I look forward to sharing my love for photography in this special time of year. 


Foliage Workshop 2017
The three-day program is $195, including the delicious snacks and an elegant pizza dinner.  Please get in touch early, by email or phone, to assure your place on the workshop list. If you are coming from outside of the area, I can send you a list of some the best local accommodations


jeffn49@myfairpoint.net
603-363-8338  


Introduction to Lightroom Classic – AND the Transition to Photoshop
Six Tuesday Evenings January 8th - February 12th
Monadnock Imaging, Main Street Keene New Hampshire

I am a dedicated long-term user of Photoshop, but over the last few years I have become increasingly impressed with the power of Lightroom, in terms of both its image management tools and its sophisticated editing capabilities.  I still bring almost all my images into Photoshop for final tweaking, especially when complicated masking is required, but I now use Lightroom for 80-90% of my global editing.  Given its power and ease of use, for the majority of digital photography enthusiasts, Lightroom is likely all they will need to get started with image management and editing. 


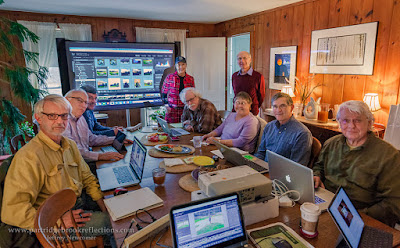
 During the last couple of years., I have offered a comprehensive introductory course covering all the essentials of Lightroom.  I run the class as a live demonstration.  Students are encouraged to work along on their own laptops, but a computer is not necessary to benefit from the material.   I’ve had a great time and, as is always true of teaching a course, I have learned a ton. Over the last couple of years Lightroom has evolved and grown, with increased capabilities, and I have worked to keep up with the changes.   


Lightroom CC
Recently Adobe has complicated our lives by splitting the Lightroom Program in two.  There are many good discussions of the differences between these very different programs, but simply speaking, the new Lightroom CC is an entirely new cloud-based program.  With a simpler interface, but significantly pared down capabilities.  It is designed for more casual photographers, and those who work primarily through a mobile interface.  For more serious photographers who store larger image archives locally on hard drives and who want to use the full features of the “old” Lightroom, the new program has no significant place. 

Lightroom CC Classic
For me and most serious photographers, the “new” choice is called “Lightroom Classic”.  It sounds disconcertingly like the old “Coke Classic”, but Lightroom Classic is just the old Lightroom CC with all the amazing features and functions and a few new tricks.  This split seems to be designed to create a simpler path for mobile, and other smart phone photographers, without stripping the power of the “Classic” Lightroom program.  Adobe promises to keep up with innovation on both versions of Lightroom.  We will be watching.

If you, like many, are still confused, just know that the CC and Classic versions are both included among the options in the Adobe Photography Subscription Plan, and still for $9.99/month.  


My course will be covering the full power of the Lightroom Classic Program. 

I initially thought that that four, two-hour classes would be enough to cover the program's many features, but because of my tendency to ramble and lots of great questions, I added a fifth class to cover the Slide Show, Book and Web Modules.

A Sixth Class
Complicated  Photoshop Selections for Focus Stacking
Lightroom is a great program which covers most organizing and editing needs of the majority of photography enthusiasts, but there are many aspects of fine tuning that can be performed best from within the scary confines of Photoshop.  My Lightroom students frequently ask, “When are you going to do a course on Photoshop?”.  The prospect of trying to organize a comprehensive course on this massive program scares me to death.  But perhaps an easier approach is to take a smaller bite of the apple.  Some time ago I added a fifth class to my Lightroom course and this time I will be adding a sixth session.


I will focus on the transition from Lightroom to Photoshop.  Starting with pictures which have been optimally edited in Lightroom, I will examine some of the important ways that Photoshop can refine those images using more precise selections, layers and compositing.  Consider it a chance to dangle your toes in the ocean of possibilities that is Photoshop, but for many who already own Photoshop as part of the Adobe Photography Plan, it can be an encouragement to take the plunge.


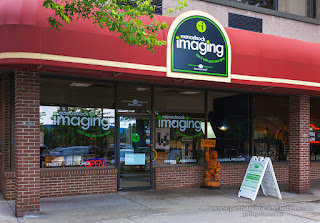
I have held previous Lightroom classes at my home in Spofford NH, and had to limit the classes to the 8 people who could fit comfortably around my dining room table.  Last year, the great folks at Monadnock Imaging in Keene generously offered to host the class at their store in Keene New Hampshire.  This allowed me to expand the group to a maximum of 12, and it also made the location more easily accessible, especially during the snowy winter weeks. With my next course in January, I will again gratefully accept Monadnock Imaging’s hospitality.  There will be no struggling over Chesterfield Hill in a blizzard, except for me.

There will be. not five, but six, two-hour, evening sessions, and of course, snacks will be provided. The expanded course will be $225.  Please get in touch by phone or email as soon as possible to reserve your spot on the list.


jeffn49@myfairpoint.net
603-363-8338  


-------------------------------------------------------------------------------------------

 Show the Work
As I have been planning my teaching, I have also been working on scheduling my exhibitions.  I have always understood the importance of showing my work throughout the region and it is well known that I have never seen a public wall that I didn’t like.  The number of my framed work is finite, and It can be a challenge juggling my pictures between the various venues in the region.  Spring also seems to be the season for fund raisers, and I have been honored to donate several of my works to worthwhile local causes.

Currently a few of my pictures decorate the walls and entertain the sweaty patrons of the Keene Family YMCA. Not the best place to find enthusiastic buyers, but it at least gets me to the gym a few days per week.

I also have a larger exhibit in one of the function rooms of the Keene United Church of Christ.   It is the iconic white church at the head of the square.  The show is up now and will continue through June.

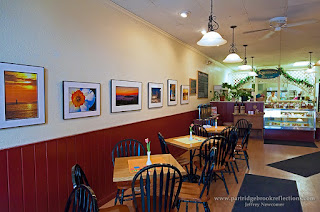
In July I will be moving to one of my favorite local venues.  Kristin’s Bistro and Bakery at 28 Washington Street, just off Central Square in Keene New Hampshire.  Kristin’s has nice walls, friendly people and some of the best soup in town.  I will be showing there for the month of July.


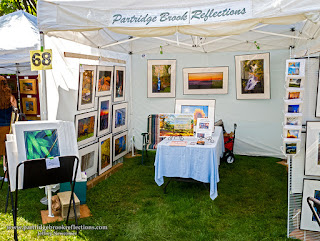
Keene’s Annual Art in the Park is scheduled for September 1-2.  I’ll be there with my old 10x10 pop-up and its jerry-rigged hanging system.  This is the only art festival that I do all year, primarily because it is a great time to hang out with all my local friends and make them look at my work.


Not all exhibitions are large or solo affairs.  As part of Keene’s Annual Art Walk, for a week beginning on June first, I will again be at the Greater Keene Chamber of Commerce, showing a few of my pictures in their two big windows facing Central Square.  For the duration of the show, the Chamber has generously offered to remove from the windows their posters advertising local events.  I plan to feature two of my big new canvas-wrap images.

Keene is fortunate to have a very active historical society and I am happy that beginning on June first two of my pictures will be part of the society’s show featuring art celebrating our Monadnock region.  The Historical Society of Cheshire County is located at 246 Main Street in Keene New Hampshire. The exhibition will run through December 4th 2018.


Finally, several of my pictures continue their long-term exhibition at Syd’s Carpet and Snooze Room at 43 St. James Street in Keene.  For a long time, Syd’s has offered their showroom walls to displace the work of the Monadnock Area Artists Association.

I think that is definitely enough for now.  I hope to see you at my exhibitions and that you will join me for one, or ALL, of my workshops and classes.  I’m getting too old for this, but hey, what is “retirement” for?

Please let me know if you have any suggestions for future programs or venues for my work.


Jeffrey Newcomer