About Me

My photo
Spofford, New Hampshire, United States
Jeff Newcomer had been a physician practicing in New Hampshire and Vermont for over 30 years. Over that time, as a member of the Conservation Commission in his home of Chesterfield New Hampshire, he has used his photography to promote the protection and appreciation of the town's wild lands. In recent years he has been transitioning his focus from medicine to photography, writing and teaching. Jeff enjoys photographing throughout New England, but has concentrated on the Monadnock Region and southern Vermont and has had a long term artistic relationship with Mount Monadnock. He is a featured artist in a number of local galleries and his work is often seen in regional print, web publications and in business installations throughout the country. For years Jeff has published a calendar celebrating the beauty of The New England country-side in all seasons. All of the proceeds from his New England Reflections Calendar have gone to support the Pulmonary Rehabilitation Program at the Cheshire Medical Center. Jeff has a strong commitment to sharing his excitement about the special beauty of our region and publishes a blog about photography in New England.

Sunday, January 26, 2014

Cropping, In Photography, Less is Often More


A Few Thoughts on Cropping
One of the most important attributes that separates a fine art image from a snap shot is its composition. A photograph of even a
mediocre setting can achieve a level of strength and immediacy when composed with balance and a flow which draws the eye to the subject without distraction or clutter. There are many compositional rules can be of help in arranging a powerful composition, including the rule of thirds, use of diagonals and head room, but one of the simplest and most effective methods to add power and focus to an image is with cropping. Cropping may be performed in the camera or in post-processing.  I tend to crop aggressively, but there are a few considerations to keep in mind about the benefits and risks of the cut and slashing.  An important concern is to avoid cutting too far.


In Camera

One of the most obvious signs of a snap-shot is when the subject is

Move in and Arrange Head Room
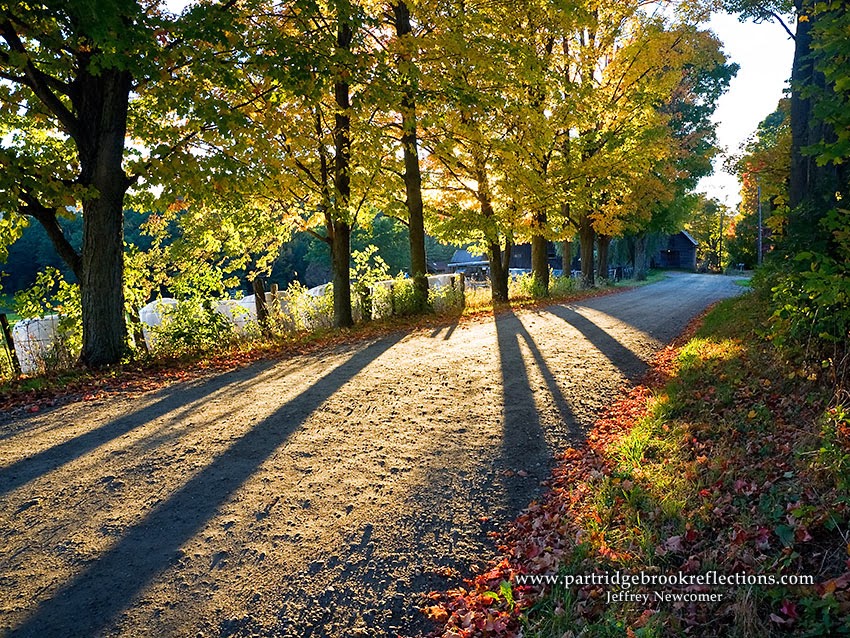
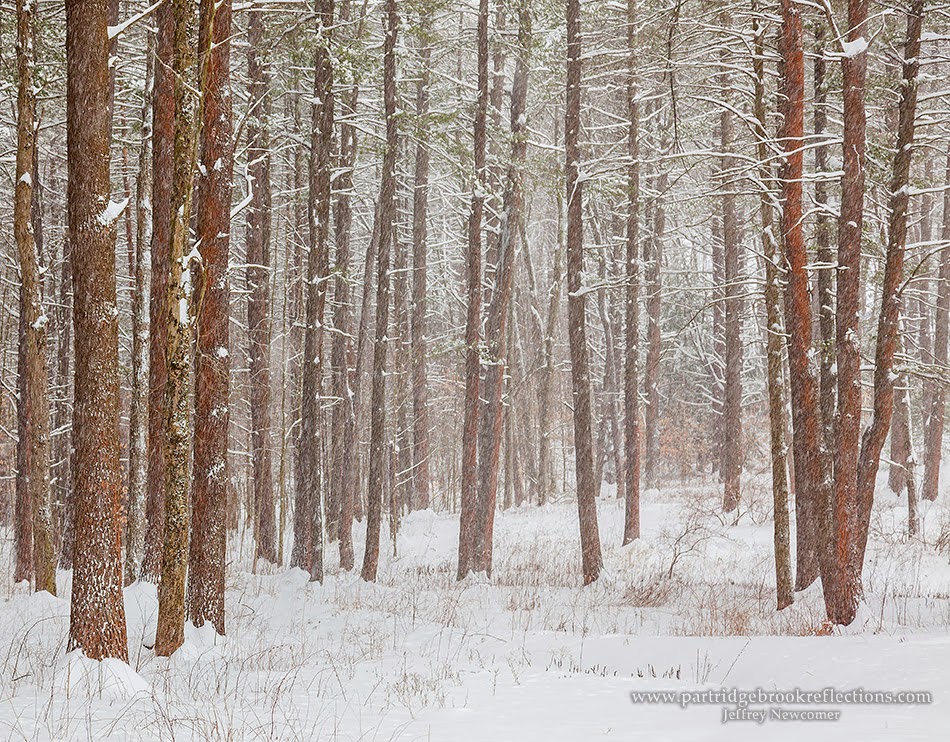
only a small portion of the image, usually dead center and surrounded by distracting and superfluous material. It is often helpful to start with a broad image which establishes the location, but from then on the mantra should be "move in, move in". Whether you move in with your feet or with your zoom lens the goal is to fill the image with your subject. As you zoom what you are actually doing is cropping out extraneous stuff that only distracts from the focus of the image. 

Audrey's Trail


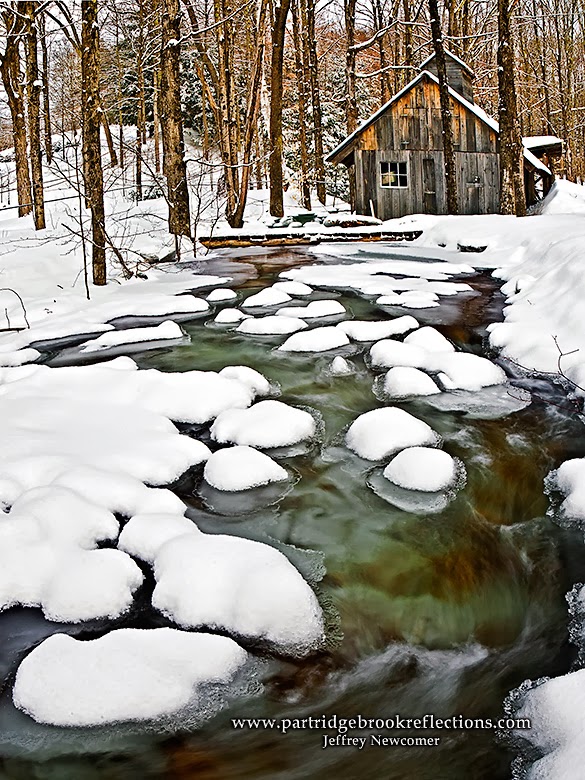
 The primary advantage of cropping and composing within the camera is that you are using all the pixels available on your sensor
and getting the maximal resolution for your subject, but it is important to remember that the "subject" is seldom just the "subject'. The "subject" of an image of a beautiful tree may include a stream, rolling hills or perhaps a mountain in the background all arranged to complement and draw the eye to the stately Maple. The art comes from recognizing how your subject best fits within its surroundings and to avoid moving in so close as to eliminate important framing elements. It is appropriate to emphasize the advantages of zooming in, but it is also important to remember that the camera frame places restrictions on the picture's proportions that may limit options during the fine tuning of the composition in post-processing. 


The Tyranny of the Viewfinder

The camera viewfinder and sensor imposes a fixed frame around your composition. As you move in you can explore various
arrangements of the important elements within that rectangle, but the problem comes when the best composition doesn’t match the dimensions of the frame. Although precise sizes are quite variable, most digital sensors are about half again as wide as they are tall, that is, most hover around an aspect ratio of 3:2 or 4:3. Specific dimensions vary, but the standard full size digital sensor is 37x24 mm or at a ratio of 3:2 (1.5). Nikon’s APS-H sensor can be 28.7x19mm (1.5), Canon’sAPS-C sensor is 23.6 x 15.7 (~1.6), and the smaller Micro 4/3rds sensors are 17.3x13 (1.33). Tightly composing within my full frame camera works well if the final image is intended to conform to a 3x2 aspect ratio. It will fit perfectly in a 12 x 18" or 4" x 6" print, but an 8" x 10" print has a ratio of 1.25 meaning that at least 17% of the pixels will need to be cropped away from one or both of the sides of the image to fit a 
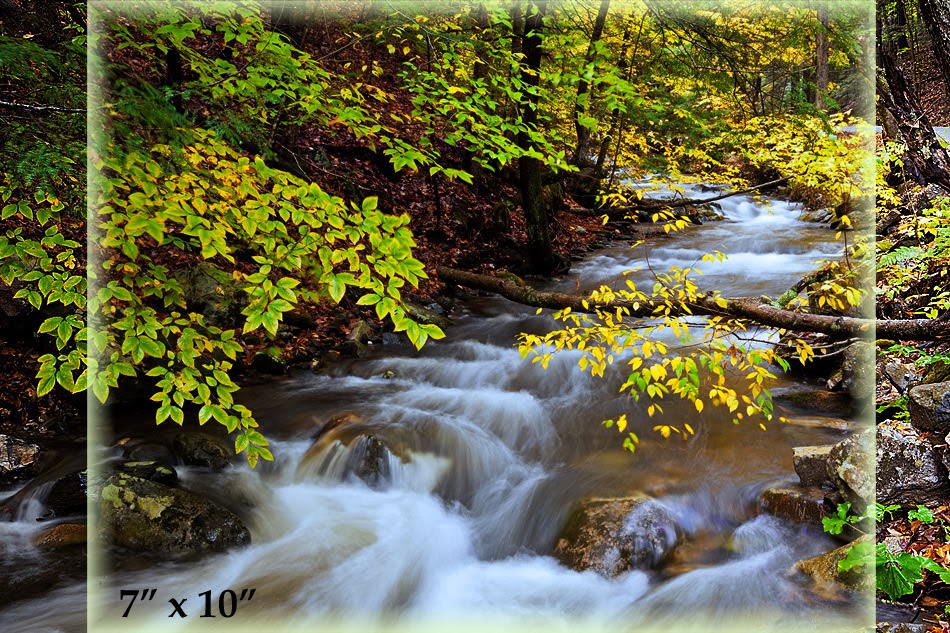
landscape oriented 8x10 print. Important parts of the image may be lost if the composition is too tightly framed in the camera. The point is that overly aggressive cropping in the camera can limit final composition options when the image is adjusted in post-processing to fit specific output dimensions. 


It is great to move in to your subject to get the best use of your expensive pixels, but today's camera’s have resolution to spare and we can afford to allow a little buffer to assure that everything of importance will be preserved after the final crop. By all means, crop in the camera, but do it carefully and with an eye toward the options for the final composition


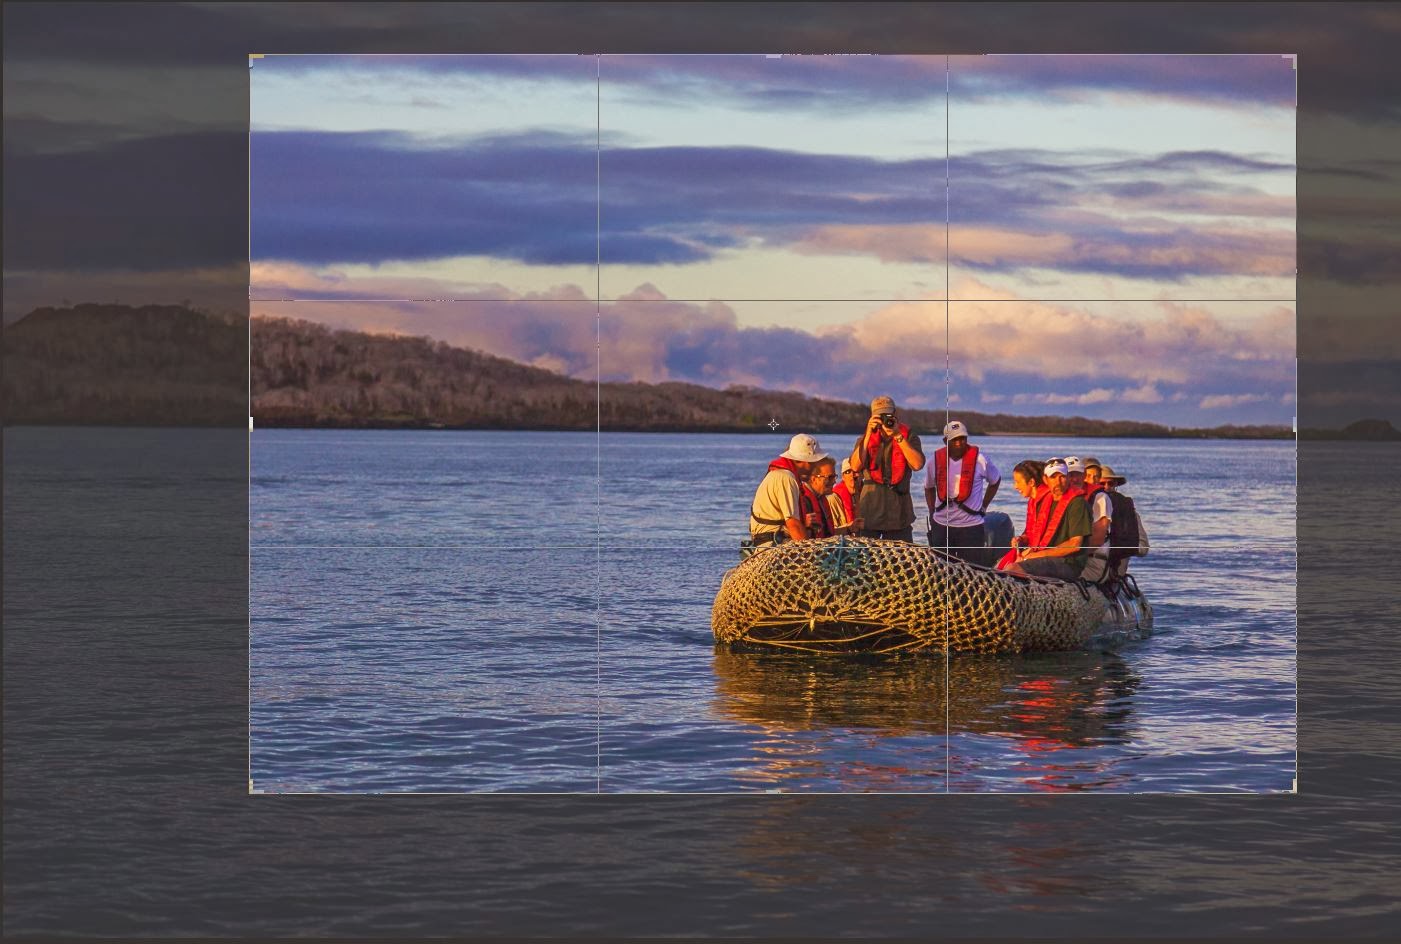
Photoshop can add a Rule of Thirds grid while Cropping
Post-Processing Crop
The capability to crop an image is basic in any photo editing software. As is true in the camera, post-processing cropping is done to fine tune the composition and to eliminate distracting elements along the borders.  It is also used to resize the picture for particular output dimensions. It is unusual to find a raw image that can't be strengthened by careful cropping, but before discussing post-processing cropping, I must mention one important basic rule.  Again it has to do with preserving your options.

Galapagos Islands, Ecuador


Before All Else, Do No Harm

Before I start cutting and slashing, I always save a full size version
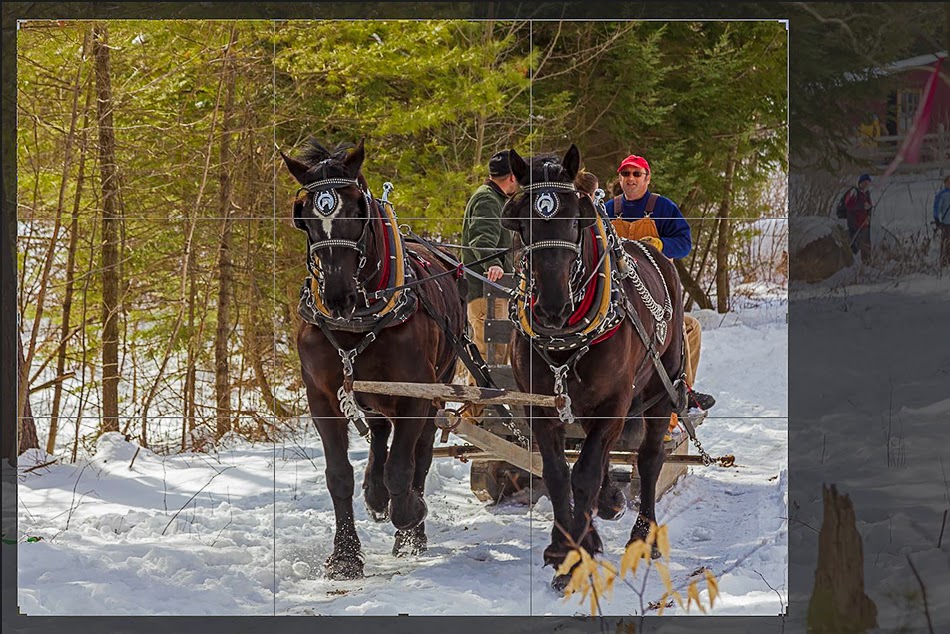
Rethinking the camera Crop
of the image. Sizing, sharpening and cropping are usually the last things I do when editing an image. They are done to specifically tailor the image for its intended output, whether it is for a 12x16 print, a massive poster or a small web image. I do as much editing on the full size image as possible and then save that file as my baseline source from which all other images are derived. Since any editing that I perform after resizing will need to be repeated on all other output versions, saving a full size, edited version can save a lot of time. Actually, before I reach the point of cropping, sharpening and sizing, I save two versions of my full size image, one as the original raw file directly from the camera and the second including all my basic edits in DNG format. 


Cut and Slash,
Why Do We Crop?
Stated most simply, cropping is the process of controlling what the viewer will see and just as importantly, what he won't see.


Improving Composition
Probably the most important reason to crop an image is to arrange the elements within the frame to highlight and draw attention to the subject. This includes positioning the subject within the frame. Guides such as the Rule of Thirds can help, but often the best guide is your own eye. The use of diagonals and other leading lines can draw the eye to the subject and their strength can be enhance by how they relate to the frame. Cropping can adjust for proper headroom for the subject and move horizon lines away from dead center. At the same time elements which pull the eye away from the subject can be eliminated. 


Removing Edge Distractions

A basic step in editing an image is to scan the edges of the frame
Newfane Courthouse, Clonning Needed
for distractions. Distractions can include a stray rocks or tree branch, but may merely be a splash of unusual light or dark which pulls the eye. Cropping can often removes these peripheral blemishes, but when the cropping required affects the overall balance of the composition cloning may be a better solution. Finding distractions can often be complicated by our own focus on the detail of what we know to be the main subject. Before I finish editing, I will often sit back and squint to blur the image detail. It is surprising how often distractions can be revealed when the image is reduce to abstract patterns of color and light. 


Sizing

Final cropping is usually designed to size the image for the
Not all leading lines are straight
specific output requirements. This often includes adjustments to fit a printed version or web sizing. Changes in image size and resolution can affect sharpness. A final sharpening may be needed before the image is ready to be released to the world.

Cropping is perhaps the most basic tool for creating powerful compositions. It can be painful to cut away our precious pixels, but, in photography, it is important to understand that less is often very much more.


Sunday, January 19, 2014

Diffraction & Best Lens Sharpness


As a landscape photographer, I am frequently striving to capture the maximum depth of field possible, but as is true of all photography, compromises need to be made on the path to the sharpest images.  The widest DOF is obtained at high f stops (small apertures), but with ever smaller apertures diffraction begins to affect sharpness, making images progressively softer.


Yikes, Physics

http://innovativescience.blogspot.com/2011/02/diffraction.html

Diffraction is a property of light related to its behavior as a wave.  Light passing through a lens does not focus sharply to a point, but spreads out as it is bent around the hard edges of the iris. The result is a soft bull’s eye, which is called the “Airy disk” and results in a softening of the detail in an image.  The name “Airy disk” may seem remarkably fanciful, especially originating from optical

Airey Disk:Wikipedia
engineers, but it does not come from its soft airy appearance.  The fact is that the guy who discovered the disk was named “George Airy”.  Diffraction is an innate property of light and not a defect in the lens.  It is present in even the most precisely constructed and expensive lens and grows worse as the aperture becomes smaller.  A few weeks ago I demonstrated the star burst effect created by diffraction on Christmas lights when small apertures are used.  The effect is minimal when the lens is wide open, but other optical defects such as spherical aberration, diminished sharpness at large apertures.  The balance of these competing effects means that the sharpest f
Starburst Effect
stops tends to be those a few stops smaller than wide open.  A lens is “Diffraction Limited” at the f stop beyond which the image begins to soften.   This is a property of the lens and not the camera, but since a lens’ Airy disk is the same absolute size on any camera, the effect tends to be relatively larger and therefore more prominent in cameras with smaller sensors and with higher resolution.   It is great to have all those pixels, but crowding all those smaller elements on the sensor means that the lens will be diffraction limited at a wider f stop.  Physics sucks doesn’t it ?  The properties of every lens/camera combination are different and the only way to determine optimal sharpness is to test it.


The Test

Fortunately, testing lens' for their sharpest f-stop is not difficult.  You start with a target that is flat and has sharp detail.  I used an antique map of Vermont and New Hampshire.  I taped it to the glass on a photograph hanging in the kitchen and then set my camera on a tripod, aligning it so that the plane of the sensor was parallel to the target. I precisely focused on the map using the camera's Live View and used mirror lock-up and a cable release to avoid any vibration. With the camera set on aperture preferred, I  recorded a series of images covering the full range from wide open to the smallest aperture.  The result was a collection of images that I could quickly scan to find where image sharpness began to break down as the f stop increased.
 

The Results

Actually I was pleased to find that the loss of sharpness at small apertures was not as bad as I had expected.  I was able to identify the optimal f stop (usually between f/10 & f/16), but I also got a feeling for how far I could reasonably push the aperture when I needed more depth of field.  For my 100mm Macro, I found that the images were sharpest around f/8 - f/14, but that I could still get reasonable results up to at least f/22.  It is important to remember that this analysis does not take into account the power of sharpening algorithms to salvage sharpness when the results are marginal. 


Landscape Dilemma


So what can we do when extreme depth of field is needed?  Sadly I can’t afford a tilt-shift lens, but, now that I know how far I can stop down before diffraction significantly rears its ugly head, I can more intelligently balance the impact of DOF vs. Sharpness and I can apply post processing sharpening to correct some of the problems.  This is also a situation where focus stacking becomes extremely valuable. Multiple images at lower (and sharper) f stops, progressively focused through the scene, can be stacked and blended to get deep DOF with consistent sharpness.  The digital camera once again defeats the apparently immutable laws of physics – take THAT Newton!


Photography is always a matter of compromise as our artistic vision collides with the limitations imposed by the physical properties of light, optics and camera sensors.  How these limitations are balanced has much to do with the outcome and knowing the most about the capabilities of your equipment is the key to striking the best balance.  Testing your lens' for their optimal sharpness is just one piece of the necessary homework required to get the most from your equipment and the best expression of your vision from the digital Camera.


Sunday, January 12, 2014

Photographing Falling Snow


And Getting Rid of the Blotches

It is a wonderful, but also occasionally painful fact that landscape photography is often at its best when the weather is at its worse.  This is certainly true when it comes to shooting the winter storms.  Whether gently settling or blown by ferocious winter gales, falling snow drops a lovely veil on any winter scene, but capturing the storm imposes a whole new set of opportunities and challenges.  These include both the practical difficulties of managing the cold and wet, and  also dealing with the fact that snow can appear completely differently depending on setting that are chosen in camera.

Practical Problems
 
The physical problems include keeping the camera, warm and dry and avoiding or removing the snow flakes that are inevitably attracted to the lens.  Simple preventive measures such as the use of a lens hood and avoiding aiming the camera directly into the flying snow can be very helpful, but in heavy snow I typically shroud my camera under a towel and only uncover the lens and viewfinder when I am ready to shoot.   Despite the best efforts, snow can attach to the lens.  It is important to check regularly and have dry lens cloths available to clear the view.  I have had the experience of taking a long series of images, only to discover that my lens had become blotched somewhere in the middle of the shoot. 

Basic Settings
Shooting falling snow requires a number of decisions about how you want the flakes to be portrayed.  Subtle differences in shutter, aperture and focal length can make a striking difference in the appearance and mood of the image. 

Shutter
Simply stated, long exposures, usually less that 1/100, will show

Central Square Storm 2 Seconds
the snow as streaks, while a quick shutter will catch the snow as individual flakes.  As longer exposures are used there is a point where the individual flakes disappear and what is left is a soft fog which intensifies with greater distance from the lens.  I saw this nicely displayed in my 2-3 second
exposures of the Christmas lights on Keene's Central Square.  The snow was coming down heavily but no falling flakes could be seen.  Of course the correct shutter will depend on how quickly the flakes are falling. often subtle differences in shutter can make a significant difference in the mood of the image.  Check out the tractor and barn comparison below.   Experimentation is always necessary. 


In the Storm, 1/90th

In the Storm, 1/250th


F13, 1/90th
Aperture
A small aperture, with a large depth of field, will include a greater depth of sharp flakes, which will tend to make the storm appear more intense.  A wide aperture will focus attention on a smaller, more intimate selection of flakes and the shallow depth of field can allow the snow to stand out better against the background's soft Bokeh. 


f20, 1/100th


1/250, 340mm
Focal Length
The foreshortening effects of telephoto lens' tend to compress deeper selections of snow again giving a more intense feel.  Wide angle lens' give a broader sense of the surrounding but may need heavier snow to capture the full power of the storm. 


Enhance Storm Intensity:Long Shutter, Small Aperture & Long Lens
1/6 th, f 16, 105mm


Crank the ISO
Of course in tough weather conditions compromises need to be
made. As always, the appropriate setting for each of these parameters is affected by the others.  In the dark of a storm there may not be enough light to combine a fast shutter with a small aperture.  Fortunately we now have the option to crank up the ISO.  Higher  ISO levels invariably result in more noise, but the good news is that there may be very few situations in which high ISO noise is less noticeable than in a blizzard.


Flash
Snow flake will stand out better, especially at night, if they are
Stone Bridge, Flash with Blotches
illuminated by a focused light source, such as a street light or car headlights, but here is probably no better way to stop falling snow dead in its track than to use flash.  Regardless of the  shutter speed the short duration of an electronic flash will freeze any nearby motion.  This effect will dissipate by the inverse square law as distance from the flash increases.  The problem with flash is that it most prominently lights the nearest flake, which are inevitably large and distracting.  With removal of the grotesque blotches (see below) the remaining flakes are more naturally highlighted  The combination of flash and natural light leads to a complex mixture of exposure and color temperature.  Again experimentation is in order.


Large Blotches Removed (See Below)


Ok, that is some of the basics.  Now let me finish with one of my pet peeves about falling snow images.  The Blotch.


Curing the Blotches
Blotched Storm
 

 For me "blotches" are the bane of my falling snow images.  You have undoubtedly seen beautiful atmospheric images of snow storms, but here and there are big blotches of white that seem out of place.  These white smudges come from the snow flakes that are close to the lens when the image is captured.  They are invariably out of focus and to me at least, extremely annoying.  Happily there are. number of ways to eliminate the blotch. 

Shade the Lens

 The simplest solution is to shade the lens from nearby flakes.  In the tractor by the barn comparison,  I shot from under a porch roof at Roads End Farm.  Magically, no blotches.  When a roof is not at hand an umbrella or a piece of card board can also help.  Just keep your shade out of the frame.


Central Square, 1/50th
Slow Shutter
The blotches are generally most noticeable at faster shutter speeds. With longer exposures the flakes are streaked and the smudged nearby flakes become less defined. Again the appropriate shutter will be dictated by the speed of snow fall and the size of the flakes.


Cloning and  Healing Brush
You knew we would have to get to Photoshop eventually.  Given the random complexity of the snow images, it is comparatively easy to use Cloning or the Healing Brush to replace the blotches.  In newer versions of Photoshop, the Content Aware Fill tool can also correct the scars. The automatic techniques, such as the Healing Brush usually do an amazing job, but occasionally I will use cloning to find a good source that matches the original background.


Multiple Image Layers 
My favorite approach to the blotch is to use multiple images.  Since the location of the blotches vary from image to image, I can use one image to patch another.  I pick the best of a series of images and then add the second best in a layer above the first.  After aligning the two images, I mask out the top layer.  I then scan the image and wherever a blotch appears I simply paint with white on the upper layer mask.  This nearly always brings up a section without the blotch. To me this is the most elegant solution, since the uncovered background tends to match that of the lower image. The blotches on the Stone Bridge above were cleaned with this technique.

The great thing about falling snow is that it provides a treasure chest of creative opportunities all within the easy reach to your camera's basic settings.  Now if we can get some snow out of this miserably cold weather, we will be set to go.  Get out there and experiment.

Sunday, January 5, 2014

Accidental Bird Photography


Staying Off the Cold Ground!

Red Tail Hawk

Bird Torment
 This week I have the pleasure of talking about something that I have repeatedly insisted that I know nothing about, bird photography.  Some of my reluctance for shooting birds may come from early experiences of being tortured by the family Parquet, but a recent experience  got me thinking about my mostly, accidental bird photography.


A few days ago, I was doing errands around Keene, NH and I happened to see a regal appearing Hawk enthroned on a road-side sign.  Not wanting to be rear-ended, I continued down the road until
Road-Side Red Tail Hawk
I could safely turn around.  Fortunately I am almost never in the car without a camera.  Often my "carry around" camera is a Canon G11, but on this day the good news was that I had my Canon 5D Mark II.  The bad news was that I only had my workhorse 24-105 lens.  I would have loved to have been lugging my 100-400 lens with the new 2x tele converter.  800mm would have been incredible, but the important thing was to have a camera, any camera, in the car.  There was no cover, so I slowly approached the bird along the road.  I kept shooting knowing that at any moment the hawk might be startled by me or, more likely, the thundering traffic. Although the bird was stationary, I kept the camera set with high ISO and fast shutter anticipating the take-off.  When the Hawk eventually decided it was time to move on, I was able to grab a few sharp in-flight shots.  it was a treat and the whole experience got me thinking about the importance of having a camera always on hand and making do with what you have.  It was a perfect example of how I shoot birds.  I am a dedicated accidental birder.


I have immense respect for serious bird photographers. To be good
Barred Owl, Sugar Hill, NH
they must often spend hours stalking and waiting upon their prey.  This frequently involves long vigils.  When lucky, they are enclosed in a cold blind, but when less lucky their spot may be the frigid damp ground.  Birds are skittish, moving targets and may only offer quick glimpses of their beauty, requiring long, fast glass to catch the moment.  Perhaps most importantly birders  must be careful students of the habits of their targets.  Understanding bird behavior is a key to successful bird photography.  These guys have to possess levels of  knowledge, dedication and persistence that I find truly remarkable.
Barn Swallows Targeting My Car
I, on the other hand, am a landscape photographer, and no small part of the reason for that is that trees, mountains and lakes do not require stalking, and they don't skitter away when approached too quickly.  Of course there are many challenges to landscape photography.  Early mornings, cold weather, and missed diners, but seriously, I rarely have to spend hours laying in the dirt waiting for a rock to favor me with an appearance.


The Accidental Birder

All this said, I do occasionally grab an image of a bird.  Usually this happens when an annoying winged beast flies across my view when I am trying to capture a majestic landscape.  I have no choice but to wait until the little creep flies out of frame or try to grab a few images, hope that I might be able to  incorporate the guy into the scene in some poetic way.  Seriously, I love images of these glorious winged creatures, but my bird photography tends to be more accidental and opportunistic.  I rarely stalk, but I do try to be prepared to grab the chances when they arise, and that is what accidental bird photography is all  about.


You Can't Shoot it if You Don't Have a Camera

 We can talk about the best equipment for bird photography, but the first step of accidental birding is just to have a camera with you, and although they are getting much better, I'm not talking about a cell phone.  On the rare occasion that I go out purposefully to shoot birds, I pack my full kit; my DSLR, 100-400mm Canon glass, my 2x tele-extender and tripod, but more often I find my best subjects when looking for other opportunities.  Then it is a matter of getting the most out of whatever equipment I have within reach.

Using What you Have
Most importantly, when I can't use my fully phallic glass to close in on my subject, I have to zoom with my feet.  I try to avoid crawling

Sea Gull off the Isles of Shoals
but slow patient movement can narrow the distance.  In the end, to get a dramatic shot, I usually still have to crop in quite a bit and having the most pixels to start with is crucial.  Cropping out half of a 24 megapixel image still leaves 12 megs to deal with, but, if I start with 8 megapixels the quality is bound to suffer.  A camera with good high ISO capability is also important. Birds in motion require fast shutter speeds and  have learned to adjust the ISO to whatever is required to keep the shutter fast enough to catch the action. My Red Tail Hawk in flight was frozen with the shutter at 1/800th, requiring  an ISO of 800 at f 9.  Of course you can shoot birds with your point and shoot or even with a camera phone, but this is a situation where better gear does make a difference.  The first rule is to always carry a camera, but the second, and nearly as important, rule is to carry to best camera you can practically manage.

Seeing the Birds (The Power of Selective Vision)
In the early autumn of 2012 I joined a group of New England

Peacham, Vermont
Photography Guild members for quick day trip exploring the color in Vermont's Northeast Kingdom.  On the way home I drove with John Vose who is a great bird photographer.  As we ambled through the beautiful rural Vermont country-side, it became obvious that while I was watching the flow of the landscape looking for magic combinations of  foreground and background, John was scanning the trees for wildlife.  We each had entirely different ways of seeing and I found it very difficult to redirect my focus to catch the opportunities that he seemed to discover so
Cloud Forest Tucan
easily. The most impressive example of this capability for selective vision came during a trip to Maquipucuna, an immense wildlife preserve in the Ecuadorian cloud forest.   Our guide had the remarkable ability to spot exotic birds hidden in the canopy 100's of yards away. How he saw birds that I could barely make-out with binoculars remained a total mystery.


Shooting Birds, On Purpose!
Since I don't have the magic vision, I occasionally depend on

Blue Heron Nest, Westmoreland, NH
specific  locations that are suggested by my birder friends.  These may take the form of accessible nests or wet lands, any place that I can set up my tripod and settle into a lawn chair with my coffee and Ipod.  I have to be especially inspired to sit for hours waiting for the action.  Inspiration has come with the activities around a Blue Heron Nest on Harvey Pond in Westmoreland, NH or watching for Bald Eagles to return to a nest on the Connecticut River.   Closer to home I can catch the visitors to our bird feeder or check the activity in our barn as the swallows nest and enthusiastically poop on my car.


Bird Feeder Junco


Baby Albatross, Galapagos Islands
The experience that almost turned me into a birder was our trip to the unique Galapagos Islands in Ecuador.  The place is a birder paradise. With the wildlife so close that you have to step over them.  Even I could get intimate studies of the remarkably varied fauna.  It was an amazing experience, but it also spoiled me for the effort required to chase down New England birds. 


Blue Footed Booby, Galapagos Islands


As I get older it becomes increasingly unlikely that I will ever be attracted to hours of lying on the cold ground hoping for a feathered glimpse, but I will continue to keep the camera close,  ready for  the occasional happy accident to fly by.  Now can someone please hook me up with a Snowy Owl?


Landing Pattern, Harvey Pond


Jeffrey Newcomer
Partridgebrookreflections.com