

Susan and I are getting prepared for our trip to Alaska. As always, before a big trip, our dining room table has become the staging
 |
| The Look |
I'm sure I'll be grabbing a picture or two on the trip and I hope to be sending out preliminary shots in my blog along the way. The status of my time and internet connectivity may be a bit shaky, so if I miss pushing out my weekly articles, I hope I will be forgiven. As I anticipate a pile of pictures to work through on my return, I thought this might be a good time to look back to some of my ancient images.
Revisiting Old Friends
Every year there are a few images which I feel are my best, with which I have a strong personal connection. I enjoy wandering back
 to these old friends, but I notice that many of my former "masterpieces" don't seem to have the same brilliance and pop that I recalled. Many look unnaturally flat and dull. It's not surprising. Over 10-15 years, I would hope that my shooting and post-processing techniques have improved, and undoubtedly my personal style has evolved. Obviously, photo editing software has matured making it much easier to bring out the dramatic qualities of an image. I decided to revisit some of these old images, some dating back more than ten years, to see if, using current processing, I could breath new life into ancient pixels.
 Immediately I was aware of the challenges. These old images had been captured at much lower resolution than is common now. I tried to find the least manipulated version of the images that was available. RAW files were preferable , but, for some, I had to start with a base image that already had editing baked into the file. Eight bit JPGs were especially difficult to manipulate.
Here are just a few examples of my attempts at Frankestein-like resurrections of old images. I first experimented with adjustments of color and contrast in Lightroom and Photoshop and later used blended tone mapped layers to add a broad range of pop to the images.
Portland Head Lighthouse
 Some years ago, when I was more flexible, I jumped the fence at Portland Head Light to catch the surf rolling in, and nearly washing me out. This picture seemed a bit flat, without the drama that was so apparent in the moment. I worked on the image in Lightroom and Photoshop to increase the contrast and vibrance, highlighting the bright lighthouse against the dark angry sky. I also used the skew tool to reduce the keystone effect caused by my low position looking up from the rocks. The overall effect was closer to the scene that I recalled.
Artist's Shack, Marlboro Vermont
 Eight years ago I was cruising the back roads of Marlboro, Vermont looking for autumn color. I found this shack which, because of the model head in the window, I decided was an artist's studio. Probably wrong, but it gave me a title. I came back with an image that to my eye is terribly
 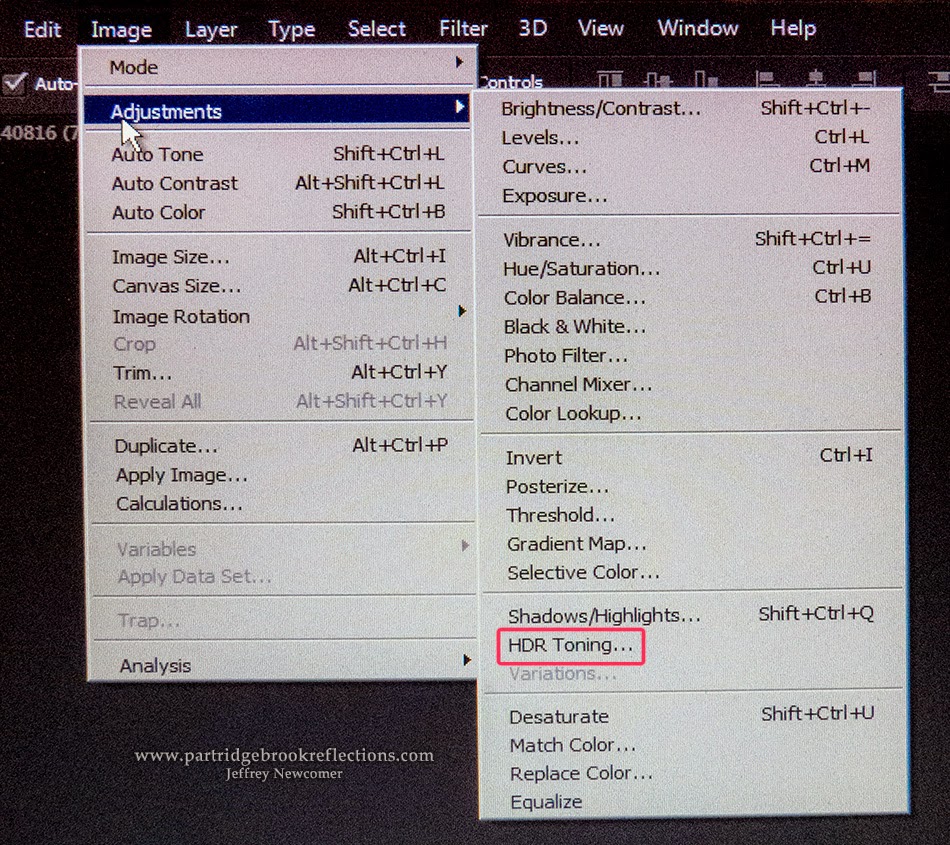 |
| HDR Tone |
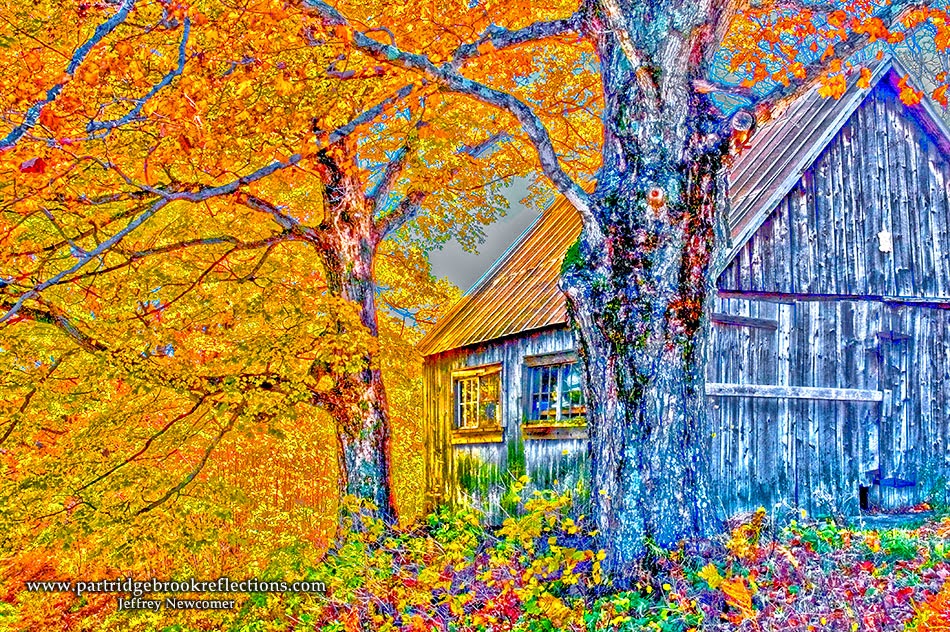 |
| Scott 5 Preset |

Storm Over Monadnock
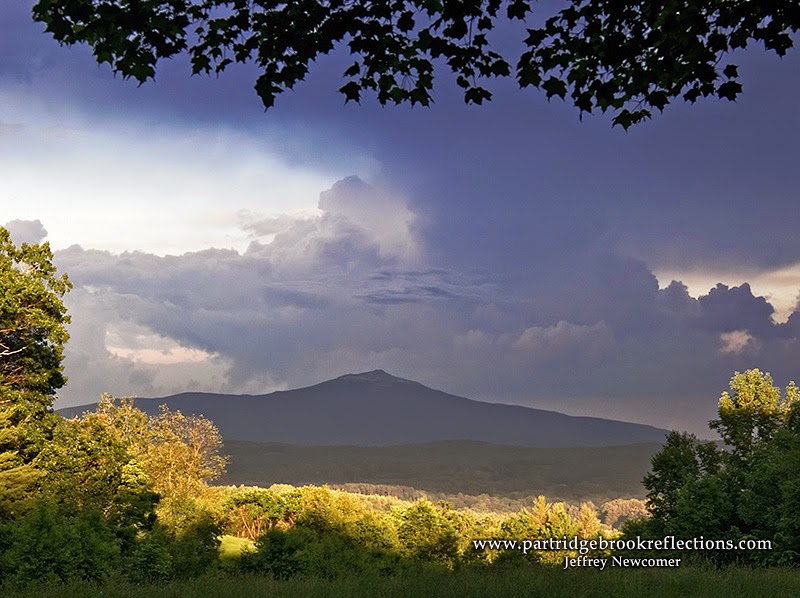 |
| Storm Over Monadnock |
 dramatic part of the scene was the contrast between the ominously dark mountain and the last light skittering across the valley below. Back then I struggled with the contrast and was never fully happy with my ability to bring the light into balance. In this case I used 25% of my toned layer to bring out the contrast. I could only do so much with this aged 8 bit original, but I was happy with the results
Harvest Sunset

The Old Oak at Alyson's Orchard is gone now having fallen to a lightning strike a few years ago. Back in 2006 it still stood proudly on the hill and I was able to capture it as part of a classic autumn scene. Once again the picture from my archives appeared flat and bit overly warm in tone. I cooled the tone slightly in Photoshop without loosing the warmth of the setting sun and then applied a touch from a toned layer to bring out the drama.

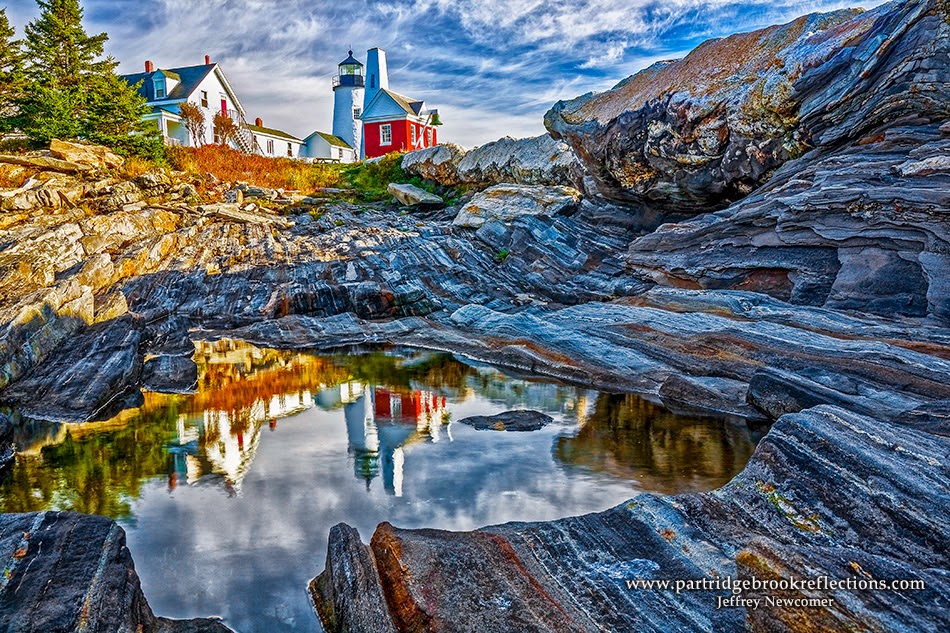
Pemaquid Pool
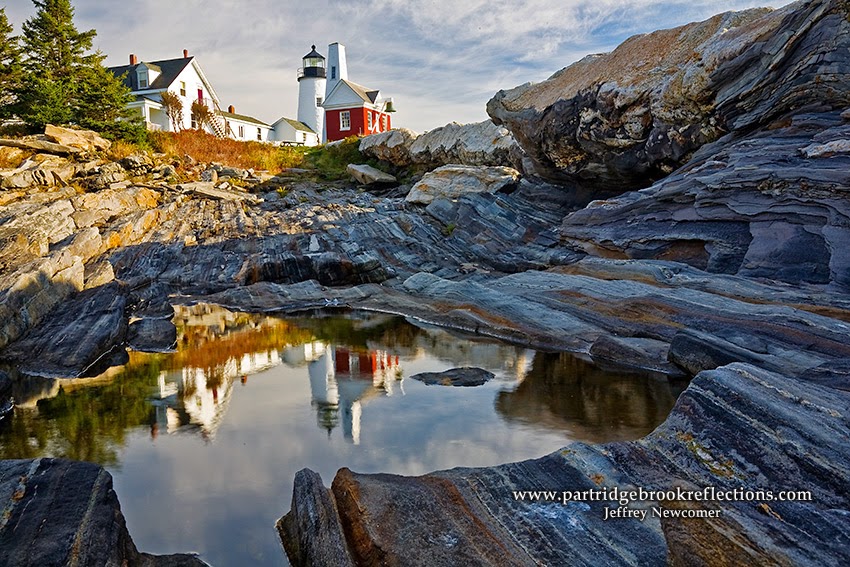 |
| Pemaquid Light |
Well I have to get back to my packing. I've enjoyed my stroll through the past. Photography is a time machine and it was fun to bring new life to old favorites. Now see what pictures you have that deserve to be re-imagined.
Jeffrey Newcomer
partridgebrookreflections.com


.jpg)


