About Me

My photo
Spofford, New Hampshire, United States
Jeff Newcomer had been a physician practicing in New Hampshire and Vermont for over 30 years. Over that time, as a member of the Conservation Commission in his home of Chesterfield New Hampshire, he has used his photography to promote the protection and appreciation of the town's wild lands. In recent years he has been transitioning his focus from medicine to photography, writing and teaching. Jeff enjoys photographing throughout New England, but has concentrated on the Monadnock Region and southern Vermont and has had a long term artistic relationship with Mount Monadnock. He is a featured artist in a number of local galleries and his work is often seen in regional print, web publications and in business installations throughout the country. For years Jeff has published a calendar celebrating the beauty of The New England country-side in all seasons. All of the proceeds from his New England Reflections Calendar have gone to support the Pulmonary Rehabilitation Program at the Cheshire Medical Center. Jeff has a strong commitment to sharing his excitement about the special beauty of our region and publishes a blog about photography in New England.

Saturday, April 27, 2013

The Galapagos Islands a Photographic Journey (Part 1)


The Galapagos Islands off the coast of Ecuador are a treasure of abudant and diverse wildlife.  For photographers, it is unlike any other place on earth.  It is not easy to get there but if you ever have a chance, don't think, just go.

This is one those weeks when I find myself desperate for a topic for the weekly blog. Actually that is true of most weeks. It is a mystery how every week something, no matter how lame, seems to come up. Of course I do try to keep a few topics in reserve for emergencies. Some have been in reserve for a long time and eventually, they scream to be let loose. So this week it is time to open the emergency file and let one of my children fly free.

Actually it is hard to believe that I have held on to this one for so

Espanol Mockingbird
long, since it is about the most remarkable photography trip I have been fortunate enough to enjoy. In December of 2010, Susan and I spent almost two weeks in Ecuador. Much of the time was spent on a photography cruise among the Galapagos Archipelago aboard the National Geographic ship the Endeavour, but we also finished the trip with several days at the Maquipucuna Reserve in the Andean cloud forest. For a landscape photographer like myself the whole trip was an immersion into an amazing diversity of wildlife.


Galapagos Route
The Galapagos Islands straddle the Equator about 600 miles off the coast of Ecuador. Their isolation made them a perfect location for Charles Darwin's field observations, in the 1830's, that led to his revelations about evolutionary biology and natural selection published in his 1859 book, Origins of the Species. Since Darwin there have been intense pressures to develop the islands, but through the remarkably enlightened efforts of the Ecuadorian people the Galapagos have been largely restored and preserved. 97.5% of the Galapagos Islands are now, strictly protected, 
Nazca Booby in Flight
uninhabited park land, accessible only by licensed tours, on ships which follow tightly controlled itineraries. Everything is design to limit human impact. Travel on the islands is restricted to carefully marked walking paths and if even a toe strays across the boundaries, the ever present naturalist guides are quick to pull you back onto the path. It can be frustrating for photographers when the perfect angle on a scene is just out of bounds, but I quickly appreciated the nearly fanatic attention that is protecting this special place for generations to come. Our first inkling of the commitment to preservation came on the flight to the islands from the coastal city of Guayaquil. In the air the contents of the overhead compartments were spray with insecticide. Upon landing, and before we could touch the soil of the Galapagos, we had to walk through a basin of disinfectant.


Sea Lions on the Benches


We landed at the little airport on small island of Baltra. While waiting to get ferried to our ship, we got our first experience with the native animal’s total disregard for human activity, when we discovered that the benches were all occupied by lounging Sea Lions. Our ship was the National Geographic Endeavor, a sturdy 296 foot expedition boat that spent its earlier life exploring around the Polar Regions. The Tour was run through Lindblad Cruises.


National Geographic Endeavor,
Zodiacs were our primary mode of transportation

Our trip was a designated photography tour which meant that there were more than the usual number of photographic guides and the

Dawn Patrol
walks were paced to allow stops that were long enough to permit time to properly work the sites. Also every morning boats were provided to bring the dedicated photographers to shore just after dawn and before the sane people were even thinking about breakfast. Perhaps the best part was that many of the participants were professional photographers, but, like me, they were not primarily wildlife shooters. There were people who specialized in areas such as studio, portrait, and wedding photography, but we all shared the excitement of having the opportunity to shoot in an entirely unique environment. It was great to be exploring with such an experience group of photographers and I probably learn as much from them as the guides.

North Seymour Island
But enough travel log. I want to talk about the animals. On our first day, we got settled quickly and had time to spend a few hours 


Blue Footed Booby Dance
before sunset exploring nearby North Seymour Island. We had the chance to get close to many exotic birds, including the prancing Blue Footed Boobies, and the Majestic Frigatebirds. The Boobies are lovely in flight, but ridiculous on the ground with their famous “Booby Dance” and matting display. And their feet really are blue. Frigates have the largest ratio of wing span to body weight of any bird. They are great long distance, endurance flyers, but can’t take off from the ground. They are most famous for the ballooning red pouches which males use to attract a mate. As we walked along the path we were close enough to touch the unperturbed birds. Of course if I had reached out my hand it would have been instantaneously lopped off by one of our helpful


Frigatebird on the Make
guilds. The Sea Lions were so close that we occasionally had to step over them to continue down the trail. We could have lingered for hours but our guides were watching the time. Sunset comes quickly on the equator as the sun plummets strait down to the horizon and we wanted to get in the Zodiacs before we were lost in darkness. It was short visit, but  a great introduction to the amazing experiences to come. In the evening we had our first experience with the wonderful food on the ship while we cruised to Espanola Island, one of the southern most of the archipelago. 


North Seymour Sunset

 Blue Footed Booby Dance Video (You Tube)


Espanola 

Cliffs of Espanola


The Galapagos Islands sit above colliding tectonic plates and are
Waved Albatross
volcanic in origin. They range widely in age, with the older islands, such as Espanola, more than 3 million years old, and located to the east. To the west, the islands such as Isabela and Fernandina are still forming with the last major eruption on Ferandina in 2009. It all adds up to the wide variety of geology as well the endemic fauna. Our second day was spent exploring Espanola, which,
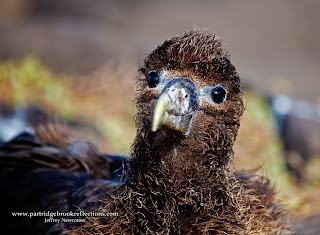
Albatross Chick in the Nest
because of its isolation is home to many unique species. Most notably Espanola is the only place on earth on which the beautiful Waved Albatross nests. Like the Frigate, the Waved Albatross is a famous long distant flyer, using the winds to soar and glide for hours, but they also have trouble taking off from flat ground. Albatross
Immature Nazca Booby, Espanola
prefer to nest along the high cliffs of Espanola, where their young
learn fly by leaping off the precipice, facing success or oblivion. Strolling along the cliffs we had the opportunity to study Albatross and Nazca Booby nests. While the mature birds were out fishing we were able to comfortably approach within a couple of feet of immature birds still in the nest. Espanola is also home to unique species of, red colored marine iguana and Hood Mockingbirds. In the afternoon we visited another part of the island with an entirely different feel. Gardner Bay is one of the few
Espanola Marine Iguana
expansive sandy beach in the Galapagos. Here the major attraction was scores of Sea Lions resting contentedly on the brilliant white sand. As always the Sea Lions paid no attention to the funny looking bipeds, except that occasionally a curious pup would chase us up the beach. We had to be careful to avoid touching the adorable little guys. (Check out the video below)


Gardner Bay


Sea Lion Video Montage (You Tube)

After the first couple of days days we were all thrilled and exhausted. It is such a privilege to have the opportunity to explore the Galapagos that I didn't want to waste a moment and from dawn to dusk the expedition guides provided a continuous flow of activities to keep us moving. In addition to our tours on land we generally had one or two chances

Green Sea Turtle
every day to snorkel in the rich underwater world that thrives around the islands. Sadly I wasn't prepared for underwater photography, but the experience was remarkable. We swam leisurely among swarms of riotously colored fish as well as Green Sea Turtles, Galapagos Penguins, Sea Lions and Black Tip Sharks. On one occasion I found myself face to face with a Sea Lion who had just captured a fish. He identified me as a competitor and nailed me with a jealous stare. I moved away.

Sally Lightfoot Crabs


Black Necked Stilt
Floreana
Our third day was spent at the southern island of Floreana. After a morning snorkel we hiked to an isolated beach populated by lounging Sea Lions and the brightly colored Lady Lightfoot Crabs. Throughout the islands, these brilliantly red creatures contrast with the stark gray and black of the lava rocks. Inland on Floreana is a large salt water pond that is the surprising home of a flock of flamingos as well as the delicate appearing Black-Necked Stilt.


Nazca Booby on Espanola
This is probably a reasonable point to pause. Even a superficial description of our trip deserves more than one article. If you are still with me, check back next week for more, including migrating Giant Tortoises, the Galapaos Hawk , Gray Pellicans and more remarkable landscape. Yes I actually got to shoot a little landscape!

For More Images Check out:
Check out Galapagos Journey Part 2 for the completion of the story.


Jeffrey Newcomer
Partridgebrookreflections.com

Sunday, April 21, 2013

Do Something New With Your Photography


One of the great things about photography is that there are so many different ways to do it.  It is certainly another stick season. The snow is gone, the buds are just greening up, and the anemic winter run-off has left many of my favorite waterfalls uninspiring. What to shoot? One can only lay in bed shooting pictures of your feet for so long. So why not try something new?

 I have always concentrated on landscapes, but every so often, and


Comet PanSTARRS
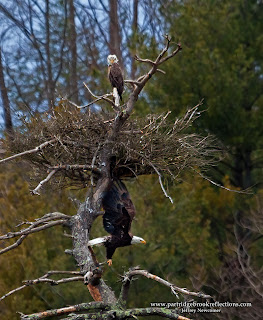
especially this time of year, I get bored of trees and rocks and start looking for something else to shoot. This spring I was distracted by chasing the Comet PanSTARR and that got me interested again in star field photography. On several occasions, I even dragged myself out of bed at 3AM, in an attempt to catch the Milky Way. I am not a birder, but I have been watching the nest on the Connecticut River, hoping that the eagle pair will settle in to raise a family. I have probably jinxed my chances by getting a tele-Extender.

The variety of photography is almost endless. If you are in a bit of a “Stick Season Slump”, consider something from my brief list of possibilities. Some of these only require a shift in focus, while others may benefit from special equipment. I always like an excuse to get new gear, but they all provide an opportunity to learn new stuff.
What follows are random incomplete reflections about only a few of the many ways to get a fresh perspective on your photography. Fortunately, all the information you need is just a Google search away.  Fair warning, I have tried all of these modes of photography, but I must admit that I am expert in none. That's what makes them exciting.

Get Out of Your Comfort Zone

We do tend to get into ruts. I keep my trusty 24-105 lens on my camera far too much. Just pulling something else from my bag, whether it is a wide angle, macro or my fast 50mm portrait lens, can be refreshing. Also try changes in perspective. Crawl on the ground or get up high. Of course a more expensive way to leave your comfort zone is to take a trip, but it doesn’t have to break the bank. I've enjoyed recent travel out West and along the  Danube River, but for me,  a trip to the Maine Coast is always refreshing.


Teton Sunset


Star Photography
I have recently returned to star photography. I have played with star


Mt Monadnock Trails
trails
and time-lapse video, but recently I have been working on star field shots, especially looking to capture the Milky Way. However it is done, star photography reveals views of the night sky that are impossible to appreciate with the naked eye and stimulates a magnificent sense of perspective on our place in the universe. Key equipment includes a camera with low noise/high ISO capability, a wide angle lens, a solid tripod and, if you plan to do time-lapse, an intervalometer. Oh and don’t forget a reliable alarm clock to rouse you at ungodly hours.


Star Track Photography
Searching for the Milky Way


Time lapse
 

Time-lapse photography is another technique that reveals what our eye cannot see. The changing patterns of nature or frenetic human activity can be compressed into short intervals that distill the action, making subtle patterns clear.  All you need to make time-lapse videos is an intervalometer to time the shutter releases and software to assemble the images into a movie. Of course as with almost everything here a sturdy tripod is a must. One other point. Time-lapse videos take hundred of images. At the standard 24 frames per second, a 30 second video will require 720 images. Because I get concerned about wearing out the shutter in my primary camera, I have dedicated my old Canon 5d to time-lapse service.

Trimming the Tree (YouTube:First Try at Time-lapse: Sorry)


Video


The ability to capture high quality video from your digital camera is a great new feature, but I can testify that video requires an entirely different skill set than conventional still photography. Although DSLR cameras can record high definition video they have limitations compared to a dedicated video cameras. Most notably, continuous focus is difficult to control smoothly, but also DSLR are not equipped to record quality sound. Over the last year I have been contributing video to the upcoming Mt Monadnock documentary, but given the limitations of my Canon 5d Mark II my video clips have been primarily set clips for background images (B Roll: As above). You can
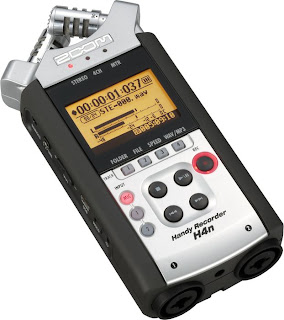
spend a lot of money to supplement the video capabilities of your DSLR. Basic equipment includes a tripod, preferably with a fluid head for smooth panning and a follow focusing attachment. One of the most important elements of good video is good sound. A quality external microphone and recording device are key. I use a Rode microphone attached to a Zoom H4n field recorder. Of course, when you are finished, there are many options for video editing. There is a lot to learn to get decent video, but that's the fun.


Wildlife

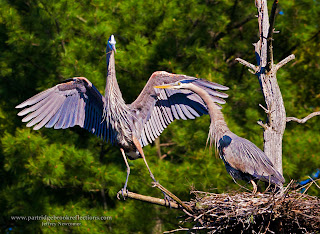
If, like me, you are primarily a landscape photographer, an exploration of wildlife photography can be a great new challenge. I have great respect for the patience and dedication of those who get amazing wildlife shots by siting out in the cold for hours. As for me, I like my wildlife stationary and predictable and close to my car. In the spring, the birds keep close watch on their nests and that is a great time for me. Sadly my favorite Blue Heron nest on Harris Pond in
Westmoreland, NH is gone this spring, but I am watching an eagle nest on the Connecticut River. I'm hoping that they will settle in to raise a family. A long lens is the primary requirement of wildlife. I found that my 400mm isn't quite long enough to capture detailed images of the eagles from across the river. I will try to sneak closer once they are settled, but I don't want to disturb them at this critical time. I also got a 2x Tele-Extender, but will need good light to off-set the two stops I loose with the extra reach. Of course wildlife may also be as close as your couch. I hear that a few people on the web like pictures of cats and dogs. 


Get in Close
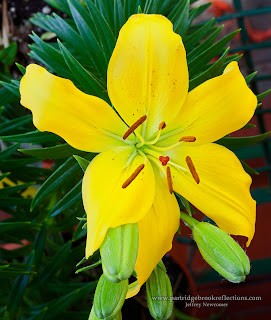
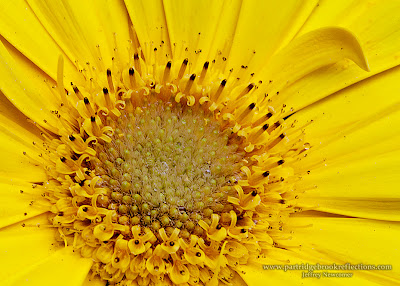
Macro photography opens an entire new world of opportunities both in the natural world and at home. I love studying the detail of flowers and that is often done best in protected environments, such as at a greenhouses or at home. My annual pilgrimage to the beautiful greenhouses at the Walker Farm, In Dummerston, Vermont has become a seasonal tradition. This time of year 
the early spring flowers are a welcome source of material as well. The greatest challenge of macros is the management of the often painfully shallow depth of field. Stopping down on the aperture and using a tripod can help, but focus stacking in photoshop or other programs can make a big difference. Equipment for macro photography can range from cheap to prohibitively expensive. Extension tubes can be effective and cost almost nothing, but, I have to admit that since I sacrificed for a wonderfully sharp macro lens I haven't gone back to the tubes.


Infrared
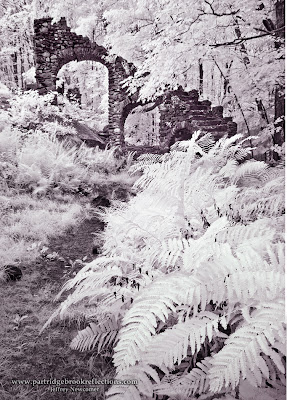
Infrared photography provides a fresh look by recording an otherwise 
invisible portion of the electromagnetic spectrum. Glowing foliage and inky dark skys can breath new life into dull flat scenery. Shooting in infrared is best with luxuriant foliage, so winter and early spring are not the best seasons. With many digital cameras infrared can be shot with dense, nearly impenetrably dark filters, but images usually need to be framed and focused before the filters are adding and the long exposures make a tripod a necessity. Happily a much more elegant solution is available. Your lonely, old camera can be modified to shoot infrared. I did this with my old Canon 20D and turned a dusty doorstop into a gateway to a whole new way of seeing. I've found that on days when the light is hopeless, I can still get some interesting shots by harvesting among the longer wavelength. 


Infrared, Seeing Photography in a Different Light 


My list goes on, but I think this is a good place to stop my ramblings. I will leave other options like street photography and portraiture for you to explore on your own. My intention here is only to get you thinking about fresh approaches for your photography.  So the next time you find yourself moaning about having nothing to shoot, apply a quick dope slap and get out to try something new.


Saturday, April 13, 2013

Night Time Photography, Searching for the Milky Way


Ancient Light, Westmoreland, New Hampshire


 Finding the Milky Way is an important step in getting great images of the night sky.  I've found a nice program that makes the search much easier.

This week is the International Dark Sky Week, to focus attention on the growing impact of light pollution on our ability to appreciate the
Night Photography, Old faithful
Old Faithful Geyser & the Milky Way
Yellowstone, Wyoming
glorious beauty of the night sky. Recently star photography has become very popular. The new, highly sensitive digital cameras have made it possible to look deeply into space, reveling dense star fields that couldn’t be imagined by the naked eye. Star field photography involves special techniques to capture the best depth of view, while limiting star movement and noise. It typically involves a balance between high ISO noise and the motion blur that occurs at longer shutter speeds. I have discussed star track photography in a previous article and there are many excellent, detailed tutorials which describe this process as well as techniques to record the stars as points of light. Fellow New England Photography Guild member Mike Blanchette, has wonderful series of articles in our NEPG Blog, beginning with "Aim for the Stars". Without much effort you can learn the simple requirements for stunning star photography, but in addition to the technical aspects, it is crucial to know when and where to look for the best show. 


Searching For the Milky Way
Nice Stars but No Way
Finding a location with limited light pollution and something interesting to place in the foreground is important, but, very often, the key factor is finding the Milky Way. Any review of star field images will show that the most of the striking star pictures include the Milky Way. A good part of its appeal comes from how difficult it is to see with unaided eye. Here in the country, with only a modest amount of light pollution, the Milky Way is usually seen as a vague smudge across the sky, hence the reference to Milky. Forget about it in the city.


When I first started capturing images of the night sky, I was stunned by how brilliantly the Milky Way exploded into my images. With the
Mt Hood and Milky Way, Night Time Photography
Milky Way Rising Over Mt Hood, Oregon
combination of high ISO and a long exposure, light from millions of distant suns becomes gloriously apparent in all of its luminous colors. But how do you find the Milky Way. How can you predict when it will be up in the sky, and how can you predict its location so you can find a view point with low light pollution and interesting foreground elements. In our region the Milky Way is highest in the sky during the summer months, sadly when the atmosphere is less clear, but it does show up this time of year especially in the early morning. My friends on the coast have an easier time finding clear views of the horizon across the water, while I must find high points with a view in the right direction.


There are many good night sky programs, which are wonderful for identifying constellations and planets, but often these are not great for locating the Milky Way and predicting the sky’s appearance in different locations on specific nights. If the program does not show the Milky Way, it is helpful to know that it is most prominent between the constellations of Sagittarius and Scorpio, but this doesn’t provide a sense of the full display across the sky. Enter Stellarium.


Stellarium

I haven’t done an exhaustive search but I have found a great free-ware program that does a beautiful job. It is a bit like a nighttime version of the Photographer’s Ephemeris. Stellarium is a free open source
Stellarium program finds the Milky Way, night time Photography
Stellarium : Chesterfield, NH
planetarium. It shows a realistic sky in 3D, just like what you would see with the naked eye, binoculars or a telescope. You can easily move the point of view to any GPS Coordinates or choose from a rather overly exhaustive list of locations. The date and time of day is easily adjustable and the sky shows the effects of developing sunrise and sunset. The range of possible display adjustment is amazing. Of
course you can show the constellations and planets, but you can also
Milky Way, As Predicted
Chesterfield, NH

adjust the level of atmospheric disruption and even the number of shooting star per hour. Most importantly for me, the program shows the full extent of the Milky Way. Once you select the date and your location, you can click through the hours watching the Milky Way appear and progress across the sky. Last weekend I used the program to find the Milky Way in the southern sky just before dawn. I was able to find a dark location with a clear view of the horizon. I was still competing with light from Brattleboro, the approaching sunrise, and scattered clouds, but Stellarium showed me what to expect and confirmed that I might be able to get a better look if I get there a little earlier next weekend.


Stellarium is one of those rare programs that beautifully solves a specific problem and it is FREE. Give it a try. You will find many other interesting features. One of my favorites is that, when you click on a star, the program tells you the name of the star and its distance in light years. The program is not a glitzy multimedia experience. I doesn’t offer high resolution images of the planets or other nighttime features, but for dynamically following the sky, it is great. The program is currently available for Mac, PC and Linux. An iPad version is out there but it doesn’t seem to be available in this country. I’m sure there other programs that work similarly. I would love to hear about them, but you can’t beat the price. 


Wish for some nice clear weather over the next couple of days and get ready to get up early.


Stellarium Web Site

Jeffrey Newcomer
partridgebrookreflections.com

Sunday, April 7, 2013

Head & Nose Room


Katherine & Rama,
Hood River Oregon, August, 2012


Heads Up!
This week I have a brief discussion of the "rules" governing the best amount of headroom and nose room in a photograph.   The important point is that these are not absolute, but they do provide great guides for effective portrait and landscape photography and as so often,  it comes back to thirds.
 

Beautiful Evergreen Dead Space


I was reminded of this while editing pictures from Katherine and Rama’s wedding in Oregon last summer.  Headroom refers to amount of space above a subjects head in a composition. Many people frame pictures of people with the head(s) dead center in the image. It makes sense since the faces are the essential focus of interest for the photo, but, as is true for so much of good composition, what makes intellectual sense does not often produce the best esthetic results. Too much room and the subject looks small against the large area of dead space hovering above. Too little and the top of the frame begins to look like an absolute ceiling, drawing the subject upward.  


As is true in all portrait photography, the eyes are the key element rather than the top of the head and the location of the eyes usually defines the best amount of headroom.  The final answer is a matter of taste, but in general the most pleasing results come from placing the subject where it looks most stable within the frame. Perception studies have been done using a single dot in a frame to define the neutral point. This is the location where the dot seems to be at rest rather appearing to be drifting either to the center or the sides. the result is that images generally look best with the eyes about 1/3 down from the top of the frame. This should sound familiar since it is just another manifestation of the classic Rule of Thirds. Ok, if it didn't work so well, the Rule of Thirds might seem like an overly constraining edict. You should feel free to be a rebel and break the rules whenever you want - I'm not your mother.  But it is good to understand the rules that you are breaking, and the Rule of Thirds is at least a good departure point for many compositions. Why else would I have placed in capitals? 


Research aside, it just looks better. Moving away from these comfortable neutral locations can add a bit of creative tension to

Mountains Have It Alberta,
Valley of the Ten Peaks, Alberta, Canada


a scene. I give it a try every so often, but I always seem to come back to some permutation of the thirds.  For headroom, the most common reason I will violate the rules is when the background is deserving of
greater emphasis. One classic example would be when the subject is standing in front of a majestic mountain scene, such as the Ten Sisters in the Canadian Rockies. The rule can also be effectively violated in extreme close-ups. Zooming into the eyes and mouth, the forehead may be cut off without too much pain. In Jon’s portrait, I came in close but still kept the eyes at about 1/3 from the top. 

Jon's Head

The Nose Knows! 

Eagles on the Connecticut River, Vermont


Nose Room


The Gaze; the Eyes Have It
Nose room is the amount of open space left in the direction of a subjects gaze when they are looking away from the camera or when they are moving across the frame. In the photographs of the eagles on their nest along the Connecticut River, placing the bird’s direction of gaze against the side of the frame is obviously restricting. We want to ask, "Why are those eagles staring at the wall?".
With adequate nose room the question is transformed into curiosity to discover 
Nazca Boobie: Flight Room
what is attracting their attention. In this situation it is both literally and figuratively true that subjects need adequate breathing room. When shooting on the run, such as birds in flight, it is often tough enough to keep the subject in the frame. the center is fine as long as you leave enough space the crop into a more balance composition.


The Hills are Alive: And Have Heads and Noses

 
Without an animal in site, nose and headroom can still be important in landscape images.  Decisions about how much sky to include in a photo and whether trees should be cut off can have a significant effect on how the subject and flow of an image is emphasized. How much sky to include is often affected by the interest in the sky itself. When the sky is a bland, gray, I try to crop out most or all of the dead 
space, but sometimes the sky IS the story.   Strong landscape compositions usually have a clear direction of flow which requires its own "nose room".  As a viewer’s gaze follows the flow it can be uncomfortable to have that gaze run unbuffered into the side of the frame. In the image of Darling Hill Road  in Lyndonville Vermont, the
Cut off the Nose
diagonal road creates a strong direction of gaze which would end awkwardly if it ran right into side of the image. As always there are important exceptions. When the flow of an image is tied to a flowing stream, it is usually comfortable to let the brook run of the edge of the frame. 


The guidelines for head and nose room don't come from complex calculations, they come from how we see - how our visual cortex interacts with and filters the immense rush of visual input and allows us to attend to what is important.  All the rules aside, the best way to tell if you have the spacing right is if you don't notice the head and nose room at all.

All of this discussion is just one of the easiest to understand aspect of what is called "negative space", the space around the main subject of an image, which can help balance a composition, draw the eye and provide breathing room for the subject.  Stay tuned for more on negative space, as soon as I figure it out.


 Just two final points:


  • I enjoy shooting at friend's wedding, but I DO NOT do weddings!


  • And for my daughter - GO BLUE!