 Lightroom
is all about being more productive in the organizing, editing and sharing your
images, and the use of the program’s many short-cuts is one of the most
powerful ways to to streamline your work-flow. Within Lightroom, there
are literally hundreds of short-cuts available to control almost every function.
The trick is to find the short-cuts which apply to the tools which you
use most frequently. Of course, I have my own favorites.
Lightroom
is all about being more productive in the organizing, editing and sharing your
images, and the use of the program’s many short-cuts is one of the most
powerful ways to to streamline your work-flow. Within Lightroom, there
are literally hundreds of short-cuts available to control almost every function.
The trick is to find the short-cuts which apply to the tools which you
use most frequently. Of course, I have my own favorites.
 |
| Shortcuts in Drop-Down Menus |
Happily
Lightroom makes it easy to find the appropriate short-cuts. Many of the
choices in the program’s drop-down menus include the short-cut for that
function. If you like tables, each module has its own list of common
short-cuts found in the “help” drop-down menu. Just select the specific
short cut list.
 |
| Library Short-Cut List |
The
best way to assemble your own favorites list is to step through your work-flow
and notice the short-cuts that apply to the functions that you use the most or
that are the most difficult to access through the menus. Functions that are
available with the push of a button, such as cycling between Loupe and Grid views
in the Library Module, may not be as important to learn.
You
will find your own favorite short-cuts, but here are some of mine.
-------------------------------------------------------------------------------------
 1) Crtl-Z
: Undo
1) Crtl-Z
: Undo
I
may use this more than any other short-cut. It is nice to have a quick
way to back-up from my mistakes before they get the chance to taunt me from the
screen. The nice thing is that repeated Crtl-Zs will back through any
series of missteps.
2} BackSlash
(“\”)\
The
backslash has different functions in different modules. In the Library,
it cycles through showing and hiding the filter bar at the top of the image.
There is nothing intuitive about this selection. The “t” key brings
up the bottom Tool bar, but why “\” for the Filter bar? It must be that
more obvious keys were already taken.
In
the Develop Module, the back-slash short-cut’s function is to cycle
between an edited image and its original appearance, a handy before and after
tool and a bit more intuitive (leaning backwards) than in the Library Module.
3) T
“T”
cycles between showing and hiding the toll bar under the main preview window.
Too many times during my Lightroom classes, students will tell me that
they don’t see the Tool bar functions only because they haven’t pressed “t”
to make them appear.
 |
| Tool Bar |
4) D &
E
There
are short-cuts for all of the Lightroom Module, but I only tend to switch
quickly back and forth between the Library and Develop Modules. Given the
frequency of my usage, I don’t need to a short-cut to get me to the Book
Module. “D” brings up the Develop Module and, again counter intuitively,
“E” the shortcut for the Library. If you try hitting the “L” key you will
end up in the Lights Out mode.
5) G
& E
“G” bring up the grid mode and “E” goes to loupe in the Library module from all the other modules. From within the Library Module, these choices are easily available from buttons on the left of the Tool
bar, but they are not present in the other modules and are used so frequently that short-cuts are helpful.
6) I
 |
| Information Overlay |
“I”
cycles the overlays of image information in the Loupe mode. The key cycles
between two custom information screens and a blank view. The content of
the overplays are set in the Loupe options of the View drop-down.
Screen
Architecture
7) Tab
“Tab”
shows/hides the two side panels.
8) Shift-Tab
“Shift-Tab”
shows/hides both the side and top panels
9) Function
Keys
This
is a bit of a cheat, but I will include these handy function keys all as one
choice, since they all work together.
 |
| Panel : Show / Hide |
“F5-F9”
individually show and hide each of the panels and are worth the effort to
quickly optimize the screen for a particular activity. Happily These four keys are clustered together on my keyboard.
F5 : Shows/Hides the Module
picker (Top panel)
F6 : Shows/Hides the
Filmstrip
F7 : Shows/Hides the Left
Panel
F8 : Shows/Hides the Right
Panel
If I
want to get the fullest view as I edit an individual image in the Develop
Module, I can first hide all the panel with “Shift-Tab” and then bring back
only the Develop Panel by hitting “F8”.
10) F
“F”
is one of my favorite short-cuts that show the active image in full screen.
It provides the best view of the image without any distractions.
11, ) Rating
Short-Cuts
I know ! "11", Consider it an Alternate "10"
Picking
ten favorites is impossible, so I will cheat once again by grouping together 14
short-cuts which all have to do with rating images.
As I review images
that I have uploaded to Lightroom, one of my first task is to rate the them
based on there quality and how much time I want to spend on editing. Lightroom
has three rating systems which can be used individually or in combination,
Flags(Flag, Unflag & Rejected), Stars (0-5) and Colors (Red, Yellow, Green
& Blue).
 |
| Ratings |
A fifth color is available but sadly Purple has no
short-cut. Regardless of the system you use to rate your images, it is
convenient to use short-cuts to quickly mark each picture as you fly through
the filmstrip. You will probably choose just one or two of the rating
systems and therefore I feel no shame in grouping them together as if they were
one.
Flags
“P/U” : Flag/Unflag, think of
“P” as “Pick”
“X” : Reject,
This
does not delete the image but only marks it for future sorting and
consideration
Stars
“0-5” : 0,1,2,3,4,5 Stars
“]/[“ : Increase/Decrease
Rating
Colors
“6-9” : Red, Yellow, Green,
Blue
I think “0” should have been
used for Blue, but tragically, I don’t work for Adobe.
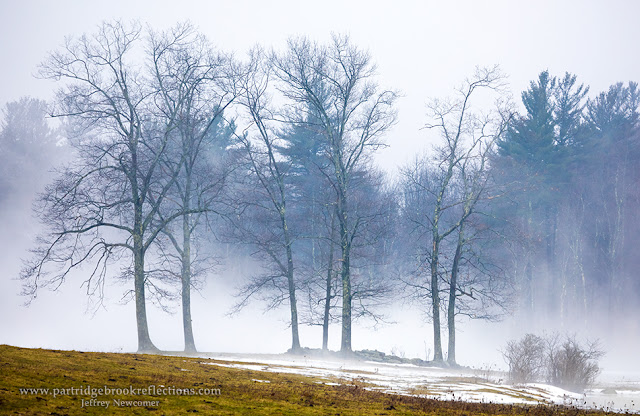
 |
| Gold Ascending Jaffrey Center, NH |
OK,
I know that I have listed 11 favorites, but, if you count, I have actually
mentioned 30 Short-cuts! I’m obviously not a stickler for numbers.
Enjoy, and get going with your own favorites. Each one saves only a
second or two, but when used together, they can significantly speed your work-flow.
Isn’t that what Lightroom is all about.
For a comprehensive list of the mass of other shortcuts check out "The Lightroom Queen's" collection.
Jeffrey Newcomer
partridgebrookreflections.com


 This
week, in my article for the New England Photographs Guild Blog, I decided to
honor my home town of Chesterfield New Hampshire. Well, actually, just a part of it. Chesterfield comprises three separate
villages including West Chesterfield, Chesterfield Center and my home near the
lake in Spofford Village. In previous
articles, I have focused heavily on Spofford, but this week I thought it would
be fair to highlight the classic beauty of Chesterfield Center.
This
week, in my article for the New England Photographs Guild Blog, I decided to
honor my home town of Chesterfield New Hampshire. Well, actually, just a part of it. Chesterfield comprises three separate
villages including West Chesterfield, Chesterfield Center and my home near the
lake in Spofford Village. In previous
articles, I have focused heavily on Spofford, but this week I thought it would
be fair to highlight the classic beauty of Chesterfield Center.  Chesterfield
is a rural community with little industrial or commercial development, located mostly
along State Route 9, the only “major” road, which bifurcates the town from east
to west. The
town center benefits from this lack of development. It buildings, mostly of stone, are aligned
along Route 63 and include the 1851 Town hall, an adjacent library and the diminutive
stone historical society building. Also present
along the road are the town’s K-8 school, the fire department and the new town
office building whose stone facade was design to compliment the other village
structure.
Chesterfield
is a rural community with little industrial or commercial development, located mostly
along State Route 9, the only “major” road, which bifurcates the town from east
to west. The
town center benefits from this lack of development. It buildings, mostly of stone, are aligned
along Route 63 and include the 1851 Town hall, an adjacent library and the diminutive
stone historical society building. Also present
along the road are the town’s K-8 school, the fire department and the new town
office building whose stone facade was design to compliment the other village
structure.
 My
article for the NEP Guild goes into a little more detail, but here I just
wanted to include an album of some of my favorite images that would not fit into
the Guild blog. Chesterfield Center is
easy to find. From Route 9, just turn
south on route 63. You will soon discover our lovely village perched on a ridge
with panoramic view to the west and the southern Vermont hills.
My
article for the NEP Guild goes into a little more detail, but here I just
wanted to include an album of some of my favorite images that would not fit into
the Guild blog. Chesterfield Center is
easy to find. From Route 9, just turn
south on route 63. You will soon discover our lovely village perched on a ridge
with panoramic view to the west and the southern Vermont hills.