About Me

My photo
Spofford, New Hampshire, United States
Jeff Newcomer had been a physician practicing in New Hampshire and Vermont for over 30 years. Over that time, as a member of the Conservation Commission in his home of Chesterfield New Hampshire, he has used his photography to promote the protection and appreciation of the town's wild lands. In recent years he has been transitioning his focus from medicine to photography, writing and teaching. Jeff enjoys photographing throughout New England, but has concentrated on the Monadnock Region and southern Vermont and has had a long term artistic relationship with Mount Monadnock. He is a featured artist in a number of local galleries and his work is often seen in regional print, web publications and in business installations throughout the country. For years Jeff has published a calendar celebrating the beauty of The New England country-side in all seasons. All of the proceeds from his New England Reflections Calendar have gone to support the Pulmonary Rehabilitation Program at the Cheshire Medical Center. Jeff has a strong commitment to sharing his excitement about the special beauty of our region and publishes a blog about photography in New England.

Friday, July 29, 2011

Calendar Pressure

This is the time of year that I start getting increasingly nervous about the fact that I don’t have my New England Reflections Calendar done for the coming year. This is why I should be working on the calendar and not slavishly serving the insatiable blog monster. Since I have to Blog, I’m hoping that blogging about the calendar will jump start the project. For 6 years I have been producing a calendar to benefit the Pulmonary Rehabilitation Program at The Cheshire Medical Center / Dartmouth Hitchcock Keene in Keene New Hampshire. For some time before that I had considered publishing a calendar featuring my New England landscape photography, but I always felt that it would uncomfortable to try to market myself in that way. Then it became glaringly obvious. If I used the project as an opportunity to give back to my community, I would feel less self-conscious about promoting my work. From the beginning I have donated all the proceeds of calendar sales to Pulmonary Rehab and although I frequently donate my work to various nonprofits in the region, it has been the calendar that has given me the most satisfaction. I have been involved in Pulmonary Rehabilitation from the beginning. The program provides an opportunity for patients who are struggling with chronic lung disease to understand their illness and though exercise and education learn to function more comfortably and independently at home. Over the years the calendar sales have brought in over $40,000 to help patients afford the cost of the program and to support supplemental rehabilitation activities such as the annual eager breather’s Fresh Air Day Cruise on lake Winnipesaukee.
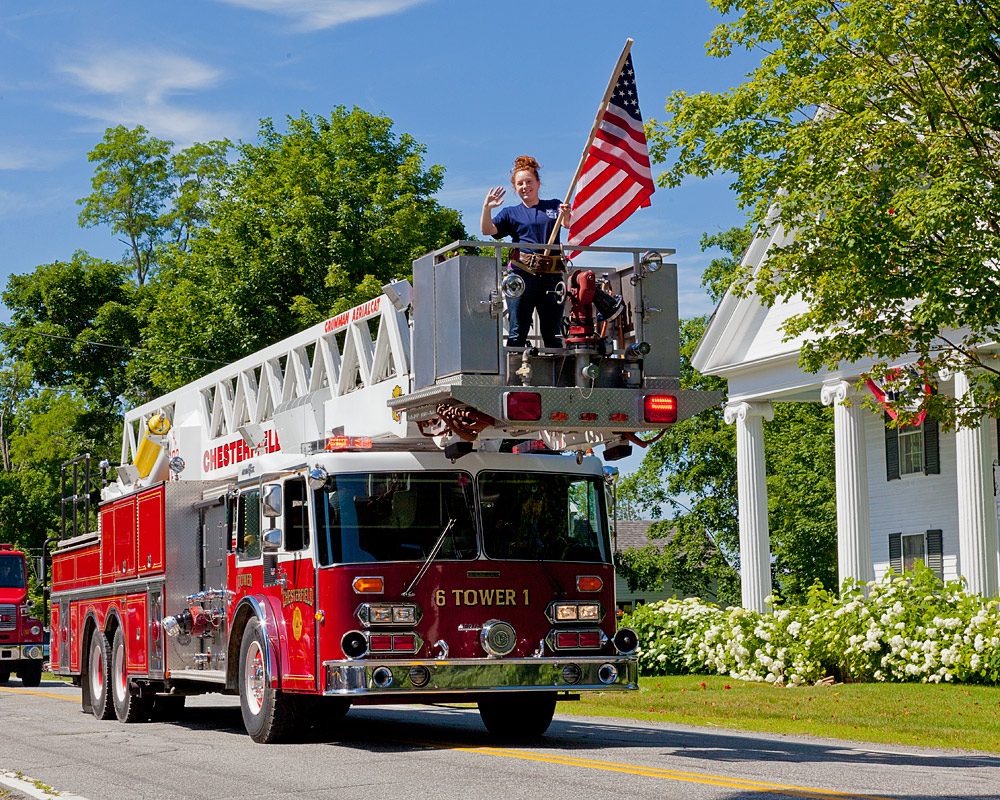
2006 Cheshire Medical Center Fresh Air Cruise Crew
So here is what I have to do over the next few weeks. First I must select the images for the calendar.  Unfortunately, because the calendar is in landscape format many of my best portrait oriented images are immediately eliminated and, after 6 years I have to be careful to be sure that I don’t absentmindedly include one of the 60 or so pictures that were published in previous editions. I try to strike a fair balance of images from Vermont and New Hampshire while usually adding one Atlantic coast picture. I look for images that are not only attractive but that also tell a story that I can recount in the few lines available at the bottom of each month’s page. I often find myself staring at a nice image while thinking, "What can I possibly say about this picture". I struggle against the urge to simply write "Red Barn in Hinsdale" and instead dive into research to find something a little more informative.  Next I have to find banner images that will fit just above each month’s calendar, trying to compliment the large image. I look for thumbnail images to decorate some of the open blocks on the calendar. One of the most challenging tasks is to select a cover image. It is always difficult to settle on the one "hero shot’ that will make my calendar pop off the shelf. After I have selected the images, the next chore is to decide on which holidays to include. Do I list Washington’s birthday and Lincoln’s birthday along with President's Day?, isn’t "Christmas Eve" self –explanatory?, how do I spell "(C)han(n)uk(k)a(h)"? and what do I do about Cinco de Mayo? Happily my new partner is from Pakistan, but even he can’t unambiguously explain to me when Ramadan actually begins. All I want to do is avoid an international incident.
After everything is together in my own mock-up form I can send it to the printer. When the proof comes back I get as many people as possible to review the pages, but, no matter how careful we are, mistakes always seem to slip through. One year we ended up with the Pumpkin Festival on the wrong weekend and last year the designer skipped a day . Seriously! There was no September 26th in 2010! Since the calendars were already distributed throughout the community, I had to go from store to store adding a sticker with the correction to every calendar I could find.
Well that is a brief decription of what I SHOULD be doing instead of blogging. I don't mean to sound negative. Despite the work and the frustrations, producing the calendar has done more to connect me to my community than anything else. I feel strongly that it is important for photographers to give back. Dealing regularly with people struggling with chronic lung disease, I see how valuable a program of rehabilitation can be. It is wonderful that I can use my photography to support that program in some small way.
Now I have several hundred images to review!

You can check out Flickr Sets showing images from the last couple of years :

2011 Calendar


2010 Calendar


Sunday, July 24, 2011

Protecting Your Photographic Jewels


There is an endlessly ongoing debate about the routine use of filters to protect valuable lenses from scratches and smudges. I have always felt that my lenses are my most precious photographic jewels, much more valuable than my latest camera.. With the rapid pace of development in digital technology, it seems these days that I'm lusting for a new camera about every couple years, but great glass should last for a lifetime. When I buy a new lens, the very next thing that I do is to slap on a UV or clear filter to protect my investment and I get sweaty palms every time I change that little piece of glass. I have heard all the arguments against this practice and they are quite reasonable. "What sense does it make to place a cheap piece of glass in front of a $1,000+ collection of marvelously tuned and coated optics". "The extra layer of glass provides more opportunities for reflections and flare. softening the images". "A lens cap can provide all the protection you need". All good arguments, although I should point out that quality filters are hardly cheap any more. On my side I can only offer what happened to me earlier this week.

The weather has been oppressively hot the last few days with temperatures smoldering into the high 90's, worsened by suffocating humidity. One of the only advantages of this weather is that, as the afternoons progress, we are often treated to towering clouds building into impressive thunderheads. A couple of days ago I went out in the evening looking for opportunities to catch the golden light on these castles in the sky. The sky above was clear and deep blue, but closer to ground the hazy air had an almost iridescent glow that made the heat palpable.  I set up across a field from a nice farm house in Hinsdale NH and waited for the towering clouds to move across the scene.  At one point I ran back to the car to get my telephoto lens. My heart dropped when I pulled the lens from my case. Apparently a wayward AA battery had escaped its container ending up underneath my beloved 100-400mm zoom. The lens cap had come loose allowing the battery to sadistically grind into the lens. As can be seen the polarizing filter that I had left in place was demolished. Holding my breath as I removed the filter I found only a little glass dust from the filter, which was easily blown and brushed away. That polarizer gave its life to protect the lens and I was never so thrilled to loose a filter. It was even the cheapest of my polarizers.

I still understand the arguments against keeping filters on lenses and I do remove them in special situations such as when shooting into the sun. I always get the best filters I can afford, but after this week I feel even more strongly that I should continue to protect my precious photographic jewels.


If you are looking for quality filters you can't go wrong by visiting my friends and neighbors at the Filter Connection, in Gilsum New Hampshire. 

Sunday, July 17, 2011

Shine a Little Light

Lost in the Ferns


There is a long list of tools that a photographers can use to draw a viewer’s eye to the intended subject of a composition. Perhaps the most important is to eliminate distracting elements, but also the use of leading lines, selective focus and the impaling of the subject on one of the rule of thirds cross hairs can be effective. Lighting can also be used to draw attention to the central theme of an image and this week I want to share a quick and simple Photoshop technique that I frequently use to draw the eye, as well as to add drama and depth to an image. It's just a matter of shining a spotlight on your subject.


Spotlighted Nellie
My dog Nellie is a great trail dog and she loves to hide herself among the spring ferns in the forest. Although the foliage is a critical part of the story, 
Spotlighted
Curve Adjustment
I still want Nellie’s mischievous face to shine out from the jumble. I could create a careful selection of her face and then apply a curves or levels adjustment to brighten her expression, but I find that the resulting contrast is often too stark to seem natural. A simpler, and to my eye a more pleasing, approach is to again use an adjustment layer to either darken the background or lighten her face (or both) and
My Daughter Abigail (not in the ferns)
then apply a circular gradient on a layer mask to apply the adjustment in a more gradual way.  If I am brightening the subject I will use white in the gradient tool to apply the effect. If I have darkened the image, then black will screen the subject. You simply start with the cursor on the center of your subject and then pull it outward to create the desired size and feathering. The result can be thought of as applying a soft edged spotlight to the subject. This approach can certainly be overdone, but, if applied carefully, the result is usually not consciously noticeable. The effect can best be appreciated by switching the adjustment layer on and off. Once completed, the intensity of the adjustment and its opacity can be tuned to get the desired result, and the impact can often be surprisingly significant. I frequently use this spotlighting approach in portraits to focus attention on the subject, especially when the background is unavoidably busy. It is much more controlled than if I applied vignetting to the entire image.


Double Spotlight
Spotlighting can also be effective in adding depth and drama to landscapes. In the picture of horses heading home to Roads End Farm, I both darkened the surrounding trees and lightened the horse to draw the eye down the road and accentuate the sense of depth. In appropriate situations this can draw out a sense of dimension from an otherwise flat image. 

Spotlight on the Right


Spotlighting does not work in all situations, but it is such a simple technique that it is frequently worth a try. My goal is always is to draw the viewer to see and feel the scene as I did in the field, and this is just one tool that can help to achieve that vision. Give it a try. I would appreciate hearing if you find this useful.

Sunday, July 10, 2011

Shooting Chesterfield's 250Th


This fourth of July weekend the town of Chesterfield New Hampshire celebrated its 250th Anniversary. It was actually in 1752 that the town was chartered as Chesterfield, but it wasn’t until November of 1761 that the first settlers traveled up the Connecticut River to build near where the current boat landing is located.  It has been our privilege to live in Chesterfield for over other 30years and although the natives still consider us "flat-landers", they must acknowledge that our two children have their roots firmly planted in Chesterfield's rocky soil. Over the years we have felt a strong attachment to the town and our neighbors. We have participated in the uniquely American tradition of town meeting government and while Susan has served on the Budget Committee and School Board, I have been a member of the Conservation Committee for over 20 years.  Last weekend's 250th Anniversary was a wonderful and well deserved celebration and I was honored to be asked by the Selectmen and the Historical Society to be their photographer. The festivities were held mostly on Saturday and included a parade, antique car show, historical skits, story telling, coronary artery clogging food and a ceremony honoring the town’s history. Descendants of the early families, many of whom still live in town, were recognized. The whole event was relaxed and low key, much like a big family picnic. 


I have photographed a number of events in recent years including the Penguin Plunge and the Stonewall Farm Sap Gathering Contests. I think I am beginning to get a handle on how to approach the job, but every event has its own challenges and opportunities. The 250th party had the advantage of being in a small area,  but I had to split my time between photography and taking my turn at the Conservation Commission table.  As usual I especially enjoyed getting in close to the participants to get intimate portraits, but I always have to remind myself to get the broader establishing shots. 


 Images of the signs and wide perspectives of the field and proceedings are important to give a feel of the overall experience. I try not to get in the way of the activities and for this my 100-400 telephoto was very helpful. Fortunately the day was bright and sunny allowing me to hand hold my big lens without too much trouble, but the bright contrasty light imposed its own challenges, especially on portraits. Where possible I tried to move my subjects into the shade, but I was also able to get more experience with fill flash. By the end I had about 500 images to process. So far, I have over 100 workable photographs, but one things is certain. If I don’t show a picture of every town fire truck that rolled down the parade route, I may not get much of a response the next time my house is in flames.


Due to the vision, dedication and hard work of so many townspeople, the whole celebration came across beautifully.  Now back to the rest of those 500 images.  I hope to get them done by the time the 300th anniversary rolls around.
Chesterfield's 250th Photo Album

Tuesday, July 5, 2011

Infrared, Seeing Photography in a Different Light


Photographers love new gear. For me, whether it is a new lens, filter, or camera, it seems like there is always something (or somethings) on my list. With all that magical, shinny stuff out there it is easy to forget that the secret to great photographs is vision and the technique to capture that vision within an image. Ok, but putting all that artsy stuff aside, I want GEAR! So how can we realistically judge the value of new equipment?  I believe that the best yard stick is to assess the extent to which a particular piece of equipment allows us to see our subjects in different ways. A wide angle lens, a macro lens or a camera with enhanced low light capability all have the potential to open new windows on the world, expanding our vision. Using this criteria I have found that shooting in Infrared passes the "new vision" test with flying colors (or at least in bizarre colors).  Just over a week ago I got my old Canon 20D back from Lifepixel.  Lifepixel is one of a few companies specializing in Infrared conversion. In a couple of weeks they transformed my dusty doorstop into an exciting new tool and I'm having a great time.


Prudential Center 1978
Infrared is the portion of the electromagnetic spectrum beyond deep red.  Although these longer wave lengths are beyond the ability of our eyes to detect, infrared photographs have been captured since the early 1900's. I first explored infrared photography over 30 years ago using special film and development techniques. Early in my digital life I returned to IR using dark filters which blocked the visual spectrum. Images required long exposures and had to be framed and focused before the filter was attached.  Also auto focus was useless. The filters were expensive and as I moved to DSLRs the process seemed to be too much of a hassle to be worth the cost. With IR conversion of my 20D it is time to get back into IR once again.


The Conversion:

Digital sensors are actually highly sensitive to infrared light. In fact, digital cameras must have a infrared filter to keep the visual spectrum from being overwhelmed. The camera conversion process involves removing the IR filter and replacing it with one that blocks visable light. Because this all happens behind the mirror on DSLRs, the result is a camera that can be framed and focused like a standard DSLR. And without the dense filter the exposures are similar to those with visible light. Lifepixel did all this for $250. I could have saved money by doing the conversion myself , but for me having the experts do it and stand behind it was a bargain.


Seeing in Infrared:
So how does infrared "see" the world. More correctly, how does infrared affect how I see the world. Most importantly Infrared has resurrected my black & white eye, but it is black & white with a major twist. Black & white and IR photography are both about contrast and pattern, but, in order to find interesting patterns in a the scene with Infrared, we need to understand the differences between what we see and what the sensor records as light and dark. There are some important differences between how B&W and IR "see".  Among the most prominent attributes of Infrared images are inky dark skies and the ability to penetrate atmospheric haze. Murky conditions that might be dismal for visual light photography can be clear and sharp in IR (see the comparison shots of Mt. Monadnock from Silver Lake). Undoubtedly the most striking difference, however, is that foliage strongly reflects IR light, transforming green leaves and grass into what may be mistaken for a frosty winter landscape. The overall effect can range from Ansel Adams dramatic to wildly surrealistic depending on the choice of subject and the processing. Actually Infrared images are not colorless. Digital IR images are recorded strongly in the red portion of the spectrum. Often the strong red tint is eliminated by conversion to B&W, but the color can also be used to manipulate the final photograph. In a couple of examples here I was able to bring out a blue color in the water and sky by switching the red channel for blue in Photoshop. Lifepixel has a nice tutorial about how to make this particular switch, but the same technique can be used to bring out other color effects. Finally Infrared is generally horrible for portraits. Skin is turned to a pasty anemic white, contrasting with demonic black eyes. Great for horror movies, but not something that will enamour you to the bridal party.

There is an abundance of information on Infrared photography on the web, but in the end I think the images tell the story best.  Needless to say, over the last week, I have been running about visiting many of my old favorite locations to see how IR can provide a new perspective. I have literally been seeing my world in a new light and that is what gear should be all about.

For more Infrared Images check out my Flickr Set