|
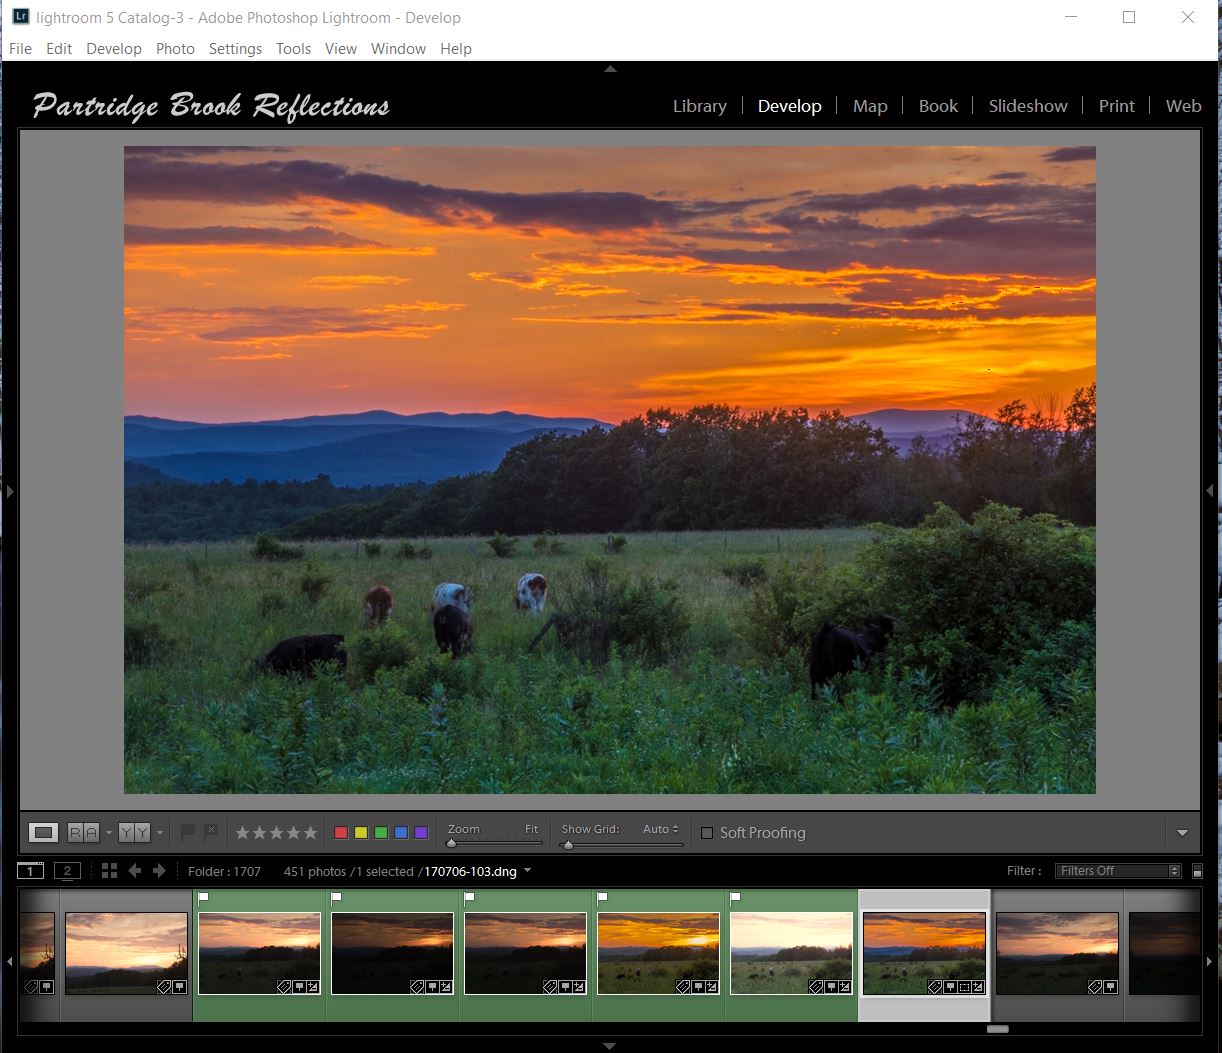
My Lightroom Catalog
Actually, Melk Abbey Library, Austria |
I’ve
just finished my Introduction to Adobe Lightroom Class. This was
the fourth time I have offered the course and I have found two important themes
that have been consistent throughout each of the sessions.
 First
I am amazed how much I learn each time I prepare the material for the classes.
My students always seem to come up with questions that challenge my own
understanding of this remarkably capable program, and I am invariably
stimulated to come up with refinements of my explanations. Perhaps, at some
point, I will get it all right, but then it will be time to move on to
something else.
First
I am amazed how much I learn each time I prepare the material for the classes.
My students always seem to come up with questions that challenge my own
understanding of this remarkably capable program, and I am invariably
stimulated to come up with refinements of my explanations. Perhaps, at some
point, I will get it all right, but then it will be time to move on to
something else.
The
other persistant issue that seems to come out of every class is the
confusion over the functions of the Lightroom Catalog. This is so
essential for the understanding of how Lightroom works  that I spend much of my
first two hour class discussing the topic, and yet the misunderstandings always
seem to linger. Mostly, it must be my fault, but I think sometimes the students
are so excited to get to the “sexy” parts, especially the powerful editing
functions, that they blow right past the boring nuts and bolts of how the
program actually works. At the end of this last class I asked everyone to
suggest topics that could have benefited from greater emphasis and it all
seemed to come down to the care and feeding of the Lightroom Catalog. It
was only after they had manipulated some images, tried to understand where
those changes were to be found, and how to translate them to actual flesh and
blood image files, that they appreciated the importance of that obscure
catalog.
that I spend much of my
first two hour class discussing the topic, and yet the misunderstandings always
seem to linger. Mostly, it must be my fault, but I think sometimes the students
are so excited to get to the “sexy” parts, especially the powerful editing
functions, that they blow right past the boring nuts and bolts of how the
program actually works. At the end of this last class I asked everyone to
suggest topics that could have benefited from greater emphasis and it all
seemed to come down to the care and feeding of the Lightroom Catalog. It
was only after they had manipulated some images, tried to understand where
those changes were to be found, and how to translate them to actual flesh and
blood image files, that they appreciated the importance of that obscure
catalog.
I’ll
try to spend more time on the catalog in my next class, but here is another run
at a few questions that might help to clarify what the Lightroom catalog is,
and perhaps more importantly, what it is not.
Where do
Image Files Go When they are Imported to Lightroom
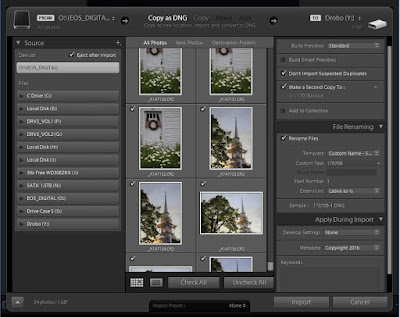 The
first problem is the word “Import”. Import suggests that the image files
are physically added to Lightroom and this is never true. When images are
imported, it is only information about the files that is stored in the
Lightroom Catalog. Rather than “Import”, a better term might be “Referenced”
since the original image file is not moved or altered. Lightroom’s import
process only involves “telling” the program essential pieces of information about the files, such as that the files exist, where they
are located, and how they have been edited in the program. This is
easier to understand when Lightroom is importing information about images that
are already on the computer, but confusion can occur when the files are being
uploaded to the computer from memory cards. Lightroom provides a convenient
mechanism to import file information
into the Lightroom Catalog, at the same time that image files are being uploaded to the computer, but it is important
to understand the difference between uploading the physical image file and
importing the file information to the Catalog. Careful study of this overly busy flow diagram may be helpful in separating the two processes.
The
Database Advantage
Unlike
Adobe Bridge, Lightroom is not a file based management system. Lightroom
is a database, that keeps track of information about each image file. For
each image, the program registers only four pieces of information:
- A set
of previews used to display and manipulate the image
- A list
of all the editing that's has been applied from within Lightroom
- The
Metadata recorded within the file
- The
physical location of the file in the computer
 |
| Contents of Lightroom Catalog Directory |
- Catalog Data: [catalog name].lrcat
- Image Previews: [catalog name] Previews.lrdata
- Smart Previews (Lightroom 5 and later): [catalog
name] Smart Previews.lrdata
 Because
Lightroom is a database, which manipulates relatively short text files, it can
perform tasks, such as searching and sorting, much more quickly than file based
programs, such as Adobe Bridge. This becomes more important when dealing with
a large or scattered library. When my own image library exceeded 400,000
pictures, Bridge became impractically cumbersome, and to take advantage of the
efficiency of the database model, I finally made the jump to Lightroom.
Because
Lightroom is a database, which manipulates relatively short text files, it can
perform tasks, such as searching and sorting, much more quickly than file based
programs, such as Adobe Bridge. This becomes more important when dealing with
a large or scattered library. When my own image library exceeded 400,000
pictures, Bridge became impractically cumbersome, and to take advantage of the
efficiency of the database model, I finally made the jump to Lightroom.
I can't resist pointing out that, although Melk Abbey's ancient library contains about 100,000 manuscripts, incunabula (printed works before 1500), and books, my catalog has over 400k files, of course of slightly less antiquity.
Keep
it in Lightroom : A Disadvantage
As
an image management program, Lightroom is amazing, but it  does have
disadvantages. Because Lightroom
manipulates information about the images and not the image files themselves, it requires more care with the movement of
files. It is important to establish the habit of only moving files from
within Lightroom. In one sense, Lightroom doesn’t “know” where an image
file is, it only knows where we have told it that it is located. Files
that are moved outside of Lightroom will be lost to the program, generating the
dreaded "!" flag on the files, and "?" marking their directories. These orphans can be found and re-registered, but, a lot of
pain can be avoided by following the “Keep
it all in Lightroom” mantra.
does have
disadvantages. Because Lightroom
manipulates information about the images and not the image files themselves, it requires more care with the movement of
files. It is important to establish the habit of only moving files from
within Lightroom. In one sense, Lightroom doesn’t “know” where an image
file is, it only knows where we have told it that it is located. Files
that are moved outside of Lightroom will be lost to the program, generating the
dreaded "!" flag on the files, and "?" marking their directories. These orphans can be found and re-registered, but, a lot of
pain can be avoided by following the “Keep
it all in Lightroom” mantra.
 |
| Found It : Catabane Falls, Now gone |
Where is the
Lightroom Catalog?
The
Lightroom Catalog is stored in a directory that can be located anywhere in the
computer, but, by default, is found at:
Windows:
\Users\[user name]\Pictures\Lightroom
Mac OS:
/Users/[user name]/Pictures/Lightroom
 If
it is in a different location, it can be found in the Catalog Settings of the
Lightroom Preferences.
If
it is in a different location, it can be found in the Catalog Settings of the
Lightroom Preferences.
You
can have as many catalogs as you wish. Some photographers keep separate
catalogs for work and personal images, but without a compelling reason to
compartmentalize your work, a single catalog may be a simpler option.
What Happens
when I Edit Images in Lightroom
 |
| Image Edited in Lightroom |
The
essential thing to understand is that all editing in Lightroom is
nondestructive. Repeat after me, “Nondestructive”.
Changes that are made during editing are applied to the preview image in
Lightroom, but not to the actual physical images.
 |
Actual image is not altered on the drive while
Lightroom Adjustments STAY in Lightroom |
These changes can be
thought of a series of instructions that are saved with the image information
in the Lightroom Catalog. They affect the appearance of the preview image
but are not applied to the pixels of an actual image until the
file leaves
Lightroom. Stepping out of Lightroom occurs when editing switches to an
external editor, such as Photoshop, or when the image is“Exported” to a physical file format, such as jpg, tif or psd. This also occurs when
images are shared such as in books, web pages or on social media.
 |
| Export Dialog, Leaving Lightroom |
The key point
is that all the editing changes you make are simply a set of instructions that
don’t get applied until the image ventures from the warm safety of Lightroom into
the dark, pixel based, world, and even then the original Raw file stays intact.
That is why there is no “Save” command in Lightroom.
 |
Wall's End, Guilford Vermont,
Final image with Lightroom Adjustments Exported the file |
The Nondestructive Life
I
hope this discussions has helped clarify some of the confusion about Lightroom
Catalogs. The more I try to simplify, the more complex it seems to get.
I have not covered many related topics such as how to move, combine,
rename, back-up or delete catalogs. This could be a topic for a future
blog, but all of these details are clarified in numerous articles on the web.
Summing Up
The
essential thing to understand is that Lightroom is a database program used to
keep track of images on your computer.
When
you edit photos, rate them, add keywords to them, or make other changes, as long
as you are in Lightroom, the changes are stored in the catalog, but
the photo files themselves are never touched.
 Don’t
you wish life was like this. Try anything you want, take any risk, make
disastrous mistakes, and it is ALL “nondestructive”. When you finally
like the results just press “Export”.
Don’t
you wish life was like this. Try anything you want, take any risk, make
disastrous mistakes, and it is ALL “nondestructive”. When you finally
like the results just press “Export”.


 The camera is light, with a
small sensor, but has a 24-1200mm fixed lens! With that focal length
range, why would you need other lenses? Susan and I tend to choose different
hikes on our tours. I generally stay with the photographers, making
frequent stops for shots, while Susan moves more quickly with the non-photographers,
who are often called the “natural history” groups. Since we are usually
exploring different areas, I assumed Susan would want her own camera to capture
the action, especially if she is the lucky one to be charged by the angry grizzly.
The camera is light, with a
small sensor, but has a 24-1200mm fixed lens! With that focal length
range, why would you need other lenses? Susan and I tend to choose different
hikes on our tours. I generally stay with the photographers, making
frequent stops for shots, while Susan moves more quickly with the non-photographers,
who are often called the “natural history” groups. Since we are usually
exploring different areas, I assumed Susan would want her own camera to capture
the action, especially if she is the lucky one to be charged by the angry grizzly.  The camera is light, with a
small sensor, but has a 24-1200mm fixed lens! With that focal length
range, why would you need other lenses? Susan and I tend to choose different
hikes on our tours. I generally stay with the photographers, making
frequent stops for shots, while Susan moves more quickly with the non-photographers,
who are often called the “natural history” groups. Since we are usually
exploring different areas, I assumed Susan would want her own camera to capture
the action, especially if she is the lucky one to be charged by the angry grizzly.
The camera is light, with a
small sensor, but has a 24-1200mm fixed lens! With that focal length
range, why would you need other lenses? Susan and I tend to choose different
hikes on our tours. I generally stay with the photographers, making
frequent stops for shots, while Susan moves more quickly with the non-photographers,
who are often called the “natural history” groups. Since we are usually
exploring different areas, I assumed Susan would want her own camera to capture
the action, especially if she is the lucky one to be charged by the angry grizzly. 

 Sorry for that unfortunately long
diversion, but I had to get it off my chest. The bottom line is that I
have a nice little camera to bring to athletic events such as the Red Sox, or
to third world countries where a big “fancy” camera could be a dangerous
attraction. Obviously, the 1200mm focal length on the SX50 HS allows me to get
closer to the action, but the camera also has a full range of controls, and
although the small sensor can show problems with noise at high ISOs, it does
result in a deep depth of field in macro images. And, perhaps most importantly,
the camera shoots in RAW!
Sorry for that unfortunately long
diversion, but I had to get it off my chest. The bottom line is that I
have a nice little camera to bring to athletic events such as the Red Sox, or
to third world countries where a big “fancy” camera could be a dangerous
attraction. Obviously, the 1200mm focal length on the SX50 HS allows me to get
closer to the action, but the camera also has a full range of controls, and
although the small sensor can show problems with noise at high ISOs, it does
result in a deep depth of field in macro images. And, perhaps most importantly,
the camera shoots in RAW! Children's Day


 Capturing action shots from far back
in the stands can be a challenge. Obviously, a long lens can be helpful,
but anticipating the key moments is difficult. Your arms can get numb
continually holding the camera in front of your face waiting for the magic to
happen. As much as I would love to capture the critical play, I don’t want to spend
the whole game with a camera blocking my view of the live action. I
usually shoot in just a few situations. Catching the swings is fairly easy.
Of course, being along the right field line I could only catch the
right-handlers. Capturing the quick and unpredictable action in the
infield can be difficult, but with a man on first I can watch for a steal or a
dive back to first to avoid a pick-off. If I am on the left field side I
can look for action in the home dugout. A little scratching or spitting
is
Capturing action shots from far back
in the stands can be a challenge. Obviously, a long lens can be helpful,
but anticipating the key moments is difficult. Your arms can get numb
continually holding the camera in front of your face waiting for the magic to
happen. As much as I would love to capture the critical play, I don’t want to spend
the whole game with a camera blocking my view of the live action. I
usually shoot in just a few situations. Catching the swings is fairly easy.
Of course, being along the right field line I could only catch the
right-handlers. Capturing the quick and unpredictable action in the
infield can be difficult, but with a man on first I can watch for a steal or a
dive back to first to avoid a pick-off. If I am on the left field side I
can look for action in the home dugout. A little scratching or spitting
is  always exciting. All of this needs to be limited within
reason. There are professional sports photographers right on the
sidelines who I can trusted to shoot the key plays. I just try to get a few
images to document my attendance at the event and settle back to finish my
popcorn. After all, I’m a landscape photographer and despite years of
visiting Fenway I have yet to see a tree in the “park”.
always exciting. All of this needs to be limited within
reason. There are professional sports photographers right on the
sidelines who I can trusted to shoot the key plays. I just try to get a few
images to document my attendance at the event and settle back to finish my
popcorn. After all, I’m a landscape photographer and despite years of
visiting Fenway I have yet to see a tree in the “park”.