About Me

My photo
Spofford, New Hampshire, United States
Jeff Newcomer had been a physician practicing in New Hampshire and Vermont for over 30 years. Over that time, as a member of the Conservation Commission in his home of Chesterfield New Hampshire, he has used his photography to promote the protection and appreciation of the town's wild lands. In recent years he has been transitioning his focus from medicine to photography, writing and teaching. Jeff enjoys photographing throughout New England, but has concentrated on the Monadnock Region and southern Vermont and has had a long term artistic relationship with Mount Monadnock. He is a featured artist in a number of local galleries and his work is often seen in regional print, web publications and in business installations throughout the country. For years Jeff has published a calendar celebrating the beauty of The New England country-side in all seasons. All of the proceeds from his New England Reflections Calendar have gone to support the Pulmonary Rehabilitation Program at the Cheshire Medical Center. Jeff has a strong commitment to sharing his excitement about the special beauty of our region and publishes a blog about photography in New England.

Sunday, April 24, 2016

An April Day of Winter


Often after a season ends I will do a retrospective blog article celebrating some of the best images of the season. As I think back on this last winter, I realized that, for me at least, it was a one day season, and that one day was in April.


A Christmas Stroll
My recollections of winter 2015-16 include walking about the village in shirt-sleeves on Christmas Day, and then various dustings of snow and variable periods of cold. I admit I was gloriously absent from New England in late January, for a two week tour throughout Costa Rica, but I don't believe the region suffered any major blizzards in my absence. Sadly, for this year, my usual collection of crystal brilliant winter scenes is largely empty.


Window on the Storm
 It isn't that we totally lacked frozen precipitation. This winter, weather records show that we had about two feet less snow than average, but that was only about 30% less than usual. The problem was that the snow came in scattered dustings that seldom accumulated to a depth which could be characterized as a photographic "Winter Wonderland". 


Roads End Wall


By early April I had abandoned hope and switched to Spring anticipation mode, but then on April 4th a storm blew through and gave me my one brief taste of winter. It was just for a few hours and by the end only about 3-4 inches had accumulated, but I was able to get out and grab a few precious images of my only real winter storm of the season.


Tree in the Storm
Knowing that the blowing precipitation would only last a short time I headed out to my favorite nearby locations. I cruised the high pastures along Route 63 as it passes through Chesterfield Village, and struggled through the brush to capture the lone border tree nearly lost in the blowing snow. I moved along the pasture's edge to include the leading line of the wire fence. Falling snow always offers opportunities to highlight depth such as in the image looking down the tree-lined path to the distant barn. And of course I had to swing by my favorite local farm, Roads End.


Pointillism Barn
I love the way differences in shutter speed can affect the feel of images of falling snow and have discussed the topic in a previous article. During this surprise April storm I had plenty of opportunities to sample the various moods of the falling snow. Images with a longer shutter highlighted the angry blowing streaks of snow, while shorter shutter speeds froze the flakes creating a softer feel suggesting the pointillism of Georges Seurat.


Spring Storm


Main Street Storm


I was only out for a couple of hours before the snow faded away, but it was amazing how many different impressions were possible with just a spin of the camera dial. And then it was over. The warm April sun dissolved the scant cover in a couple of days and, although I never captured my "Winter Wonderland" shot, I'm still happy that I salvaged this one day before the "winter that wasn't" melted to a merciful end.


Now the buds are beginning to pop and I'm ready for spring.


Woodpile Spring, Hubner Farm, Chesterfield, NH


Jeffrey Newcomer
partridgebrookreflections.com

Monday, April 18, 2016

Lens Cleaning, If You Must


Golden Bog, Madame Sherri Forest

It is difficult to believe that in over 300 blog articles I have never covered lens cleaning. It is an important topic and worthy of a short, hopefully, discussion.  Included in this articles are recent images from around Madame Sherri Forest in Chesterfield NH.  All captured with a less than  perfectly clean lens. 


Partridge Brook Gold : Dusty Filter
The camera lens or overlying filters are the part of a camera’s optics most exposed to the environment. They can be protected with a lens cap, but there is no escaping the dust and smudges that seem to have a magnetic attraction to the camera’s business end. A small amount of dust on the front of the lens may have surprisingly little effect on the quality of the pictures. I have always assumed that even a modest amount of grit could soften the image and may make it more susceptible to flare when shooting into the light, but how intrusive would be the effect?


A "Little" Dust
A Nightmare, but I lost a little of the crud when I aimed the camera.
 

Tests


Landscape Image
I compared images taken through a clean lens with the same scene shot through an intentionally filthy filter and found no perceivable difference. I presumed that there would be more evidence of a problem when shooting close-up with a small aperture, but the results were the same, no perceivable difference. I try to keep my lens clean but dust is everywhere and excessively frequent and vigorous cleaning can lead to scratches and damage to the delicate coatings that are applied to all modern lenses and filters. A little dust is probably better left alone.


Max Dust Effect: Close-up & Small Aperture
 

More critical is the dust that can collect on the rear element of the lens. Particles here are closer to the sensor and are not diffused by the multiple lens elements. Projected, unaltered, to the sensor they can have a much more visible effect on the image. The back element of the lens can't be protected by a filter and I am especially careful to keep this end pointed down during lens changes.


Prevention 
Center Squeezer Lens Cap
Dust is unavoidable but it can be reduced and the less cleaning required the better. The lens cap is my first line of defense. I try to remove it only when I am about to shoot. I can’t imagine how many caps I have lost over the years but a cheap lens cap keeper has saved me many times. For lenses with long lens hoods, I add a rubber band to allow me drop the cap inside and, to make them more easily accessible, I use caps with internal, "center squeeze", releases. Whatever else you do don’t place the cap in your pocket. You will be applying a generous dose of pocket lint every time you return the cap.


The Less Precious Filter

Lost a Polarizer, Saved a Lens!
My second line of defense is the lens filter. I know that there is resistance to placing a layer of glass in front of the costly optics, but I have averted too many disasters with a simple UV or clear filter and I am much more comfortable cleaning a replaceable filter than my expensive and delicately coated lens. I will always remember when I ground a Polarizing filter to splinters in my camera bag, but my precious 100-400mm Zoom was spared.


Cleaning
Despite your best efforts dust and smudges will happen and your first rule, like that for physicians is to "Do No Harm". The least invasive, effective, measure is always the best, and the least invasive approach is not to clean. It is worth repeating that a few dust specs will have little effect on your image and compulsive cleaning my do more harm than good. With all that in mind, let’s clean that lens.


"Clean" Air

Giottos Rocket Blower
I start with air. Whenever I remember to bring it, I use my Giottos Rocket Blaster blower. It creates a forceful blast of clean air that dislodges much of the loose dust. Compressed air is also effective, but it should be avoided, since the air can contain residue of the propellant. I am embarrassed to admit that I too often will use my mouth to blow across the filter, fully understanding the risk of depositing saliva or pieces of my salami sandwich in the process. I KNOW! ..., but now you understand why I keep a filter over my lens. Anyway, do what I say NOT what I do!


Gentle Brushing
Brush

To remove more persistent grit, my next step is to brush gently with a soft clean brush. I have seen how filthy camels get, but for some reason Camel Hair brushes seem to be the most favored. The secret is to keep the brushes clean and especially to avoid getting oils from your fingers on the bristles.


Note:  Because I lack a third hand the pictures here show the lens pointing upward, but, to enlist the help of gravity, in actual practice the blowing and brushing should be done with the lens pointing down.


Lens Cloths and Paper
Lens paper is cheap and can be effective, especially when 
Microfiber Cloth and Solution
moistened by a drop or two of lens cleaning fluid. Never apply the fluid directly to the lens since this could migrate to the edges and into the body of the lens. Lens paper is clean and lint free, but should only be used once. It can do a good job, but I have always felt nervous about rubbing with a scratchy piece of paper, especially when cleaning the actual lens. I generally feel more comfortable using a soft microfiber cloth. They are cheap and widely available? I get mine from 2Filter.com in Gilsum New Hampshire, which is a great on-line source for all varieties of filters. I typically cut the large cloths into smaller squares. The cloths are usable for more than one cleaning, but it is important to assure that they remain clean. It is critical not to grind dirt into the lens or filter. the cloths can be machine washed, but avoid fabric softeners that can leave residues.


Crabapple Bark: Dusty Lens


Cleaning Technique
Blowers and Brushes are great for removing dry dust, but liquid 

Sherri Cascade
will be required to dissolve oily smudges and luncheon residue. Whether using paper or cloth the cleaning technique is the same. A drop or two of cleaning fluid can be applied to the cloth and then the surface should be gently wiped with circular motions starting from the center and moving out to the edge. I have cleaning fluid (sometimes) but I must admit that I often use the moisture from my exhaled breath. From my previous career, I know that gently exhaled breath is clean and 100% saturated with moisture. I’m sure that cleaning fluid is better but, hey, I’m only breathing on my protective filter. You will develop your own approach. If you use a cleaning fluid make sure it is formulated for the purpose. PLEASE avoid materials such as window cleaner and acetone.


It is simple.
To summarize: 

Spectral Pool


  • Protect your lens from dirt.
  • Only Clean when you must.
  • Try the least invasive
    techniques first.
  • Keep you lens cloth clean.
  • Enjoy a lovely and reasonably dust-free Spring!


Jeffrey Newcomer
partridgebrookreflections.com
603-363-8338

Sunday, April 10, 2016

Teaching Lightroom : Lessons Learned


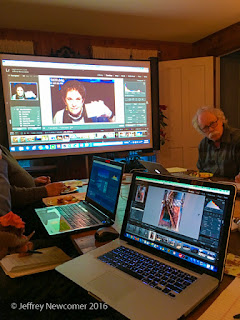
Around the Table
 
This week I finally finished my Lightroom Course. I had planned for four 2 hour sessions, but the first time you run a course it is impossible to reliably predict how long it will take to cover all the material. I was fortunate to have a lovely group whose intense interest in mastering this remarkable tool led to lots of questions. I told them from the beginning that extend the course to five or more sessions if required and it turned out that five was barely enough.


From the beginning, this course was an experiment. I had previously offered my Introduction to Digital Photography Course, through Keene Community Education, at the High School. The classroom worked well, but it was not an especially comfortable

Perspective Control
setting for a bunch of mature learners. For one thing, the desks seemed sized for 3rd graders. I wanted a more relaxed and comfortably interactive setting for my Lightroom Course and I thought that inviting a small group to sit around my dining room table might be a good option. I planned for no more than 8 but, because of various forgotten commitments, I ended with 10. I strongly believe that learning about the functions of broadly cable image editing software such as Lightroom can be best ingrained by following along with the steps on your own computer and I encourage everyone to bring their own laptops to the sessions. Despite the distractions of personal computers and the promised delicious snacks, everyone seemed able to attend to the presentations. 

Pre-cooked HDR
When delivering lectures I typically use a PowerPoint presentation,but PowerPoint is often justly criticized for encouraging overly produced and didactic lectures, as presenters tend to read off the screen.  I try to use my slides as triggers for discussion, but PowerPoint does not work for a walk through the features of Lightroom. For this course I had to use the program itself as my prompt. The challenge was to find images that would work a s examples for each of the techniques. Many of the features could be demonstrated in real time, but some, such as the HDR Merge tool could take minutes to complete. For these I had to have a version of the results completed before the discussion.


Terrible Image


I don't mean to suggest that all of this was an arduous procedure. I love introducing people to the magic of Lightroom and join in their excitement over the discovery of unexpected features. I always stress the importance of getting the best images from the camera, but the most effective examples of the power of Lightroom often started as the worst pictures. I picked a horribly back-lit image of Abigail and Grayson from Gay Head on Martha's Vineyard and was able to demonstrate how highlights, shadows and color could all be salvaged from the RAW image. 


With Apologies to Photographic Purists.
But it Made the Point.

Pet Eye Correction
I intended to get through the entire program in four, two hour sessions, but I felt that the most important elements were in the Library and Develop modules and with all the questions a discussion these two parts, along with the Map Module, required the full four classes. I promised from the beginning that if needed I would extend the course and so I added a fifth session to cover the Book, Slide Show, Web and Printing modules. And then, with some sadness, I had to release my victims to go out and try to remember all that we covered.

From the feedback, I think that everyone enjoyed the course and came away with a better appreciation of the power and capabilities of Lightroom. Most importantly I believe understand what is possible and even if they don't remember the details of how to do something, they now know where to look. They learned how to organize their images, how to back them up and how they can get the most from every pixel. They also know my phone number for when they get completely flummoxed.

As always when I set out to teach something I ended up learning much more than I could teach:

Before I started preparing for the course I only truly understood those parts of Lightroom that were required for my own narrow

Local Adjustment Tools
needs. I did what I needed to do often without understanding why I was doing things in a particular way. I uploaded images, backed them up and did some global development, before running home to Photoshop to complete my edits. I now have a much better understanding of how Lightroom works to keep tract of images and how to use metadata and labeling to better organize my library and find the images that I need. I have developed a wider appreciation of the ability of the program to do both global and localized adjustments, often with tools that are easier to use but equally effective as those available in Photoshop. I still take most images to photoshop for final adjustments, detailed selections and compositing, but I now carry out 80-90% of my editing in Lightroom.

Before the class I had done a few slide shows from Lightroom, but now I have a better feel for this tool along with the Book and Web Modules. Since I typically move images to Photoshop I will continue to use the program for printing, but I now feel that Lightroom offers a reasonable alternative.

Lessons Learned
I am already getting questions about when. I will offer the Lightroom course again, and the questions is what have I learned from this class and what changes would I make?

Home Cooking 

 The first question is whether it worked to offer the course from around my dining room table. Running the class from home has some disadvantages. The class size was limited and it did require participants to slog all the way out to Spofford each evening. For Keene people Chesterfield might as well be in a different time zone! On the positive side, I liked the fact that a small class allowed a relaxed atmosphere in which questions could be welcomed. Ten was more than I originally expected, but we were able to get everyone at the table with room for their laptops. The drive didn't seem to be a major issue and not having to pay for a venue in town meant that I could keep the price down. Besides the home environment made it easy to provide delicious snacks.

Laptop Distractions

Basic Panel Adjustments
One participant wondered whether sitting in front of a laptop was too much of a distraction from the information presented on the screen. It is a reasonable concern, but from the beginning, I thought it would be helpful to allow students to experiment as we went along. Everyone learns differently and a few folks who didn't have a laptop available felt that they were able to bring what they learned back to their home desktops. I think it is good to have the choice and throughout the course I was frequently interrupted by people trying to find that button I mentioned or make the adjustment that I just demonstrated.

Working on the Same Stuff
In future classes I may give the students a disk with my working files. I encouraged everyone to try techniques on their own images, but it may be easier to work on the same files. Another student was disappointed that I didn't take time to critique examples of everyone's work. I have done this in by Introduction to Digital Photography Course, but it became obvious that the amount of material that I had to cover was so vast that I didn't have the time to review everyone's work. It might be helpful to schedule a separate critique session a few weeks after the course ends, to evaluate how everyone is doing and answer the inevitable questions.

Mount Washington Hotel Panorama

Time

 As I prepared my course, I had no idea how much time would be needed to cover the essentials of such a vastly capable program as Lightroom. As I mentioned, I initially scheduled four sessions to last two hours each, but prior to the course, I alternately jumped from fear that I had too little, or too much, material to fill the allotted eight hours. I shouldn't have been surprised that I ended up adding a fifth class to try get everything covered. In the future I'll know to schedule at least five sessions.


The one thing that I did not find surprising was how much fun it was to spend evenings sharing my excitement for a topic that was of such intense interest to this group of enthusiastic and engaged students.  I can't imagine a nicer group, but I'm sure I will give it another try some time soon


Jeffrey Newcomer
Partridgebrookreflections.com


Monday, April 4, 2016

Favorite Meeting Houses of the Monadnock Region


 There is little more emblematic of the New England traditions of self-reliance and community as the historic town meeting houses.  This week, in my New England Photography Guild blog I am celebrating a few of my favorite meeting houses from around the Monadnock Region.  In this article I will be showing some of the images that wouldn't fit in the NEPG post.  It should be obvious why the photographic attractions of these classic structures pull me back again and again.  Regardless of the season or light there is always something new to see and, their unique history, adds to the attraction of these venerable monuments.

Check out my Guild article for more general information about New England colonial meeting houses and about my favorite local examples.


Jaffrey Meeting House
The Jaffrey Meeting House was raised on June 17, 1775, the day of the Battle of Bunker Hill.


Winter Light


Gold Ascending, Jaffrey Meeting House
Evening Spire, Jaffrey NH


Jaffrey Meeting House: Paul Wainwright
 
Meeting House Windows, Jaffrey NH


Jaffrey Center Light
 
Jaffrey Center Moon


Hancock Meeting House
 The Hancock Meeting House was built in 1820 and boasts a Revere Bell which stils rings from its spire.


Distant House,  Hancock NH
 
Trans-Spire, Hancock, NH


Meeting House Time, Hancock NH
Winter Frame, Hancock, NH


Hancock Spire
Hancock Flag


Park Hill Meeting House
The 1764 Park Hill Meeting House was remodeled in the Greek Revival style in 1824 and is considered one of the most classically beautiful meeting houses in the state


Park Hill, NH


Park Hill Autumn
Park Hill Lore


Reflected Spire, Park Hill, NH


 Rindge Meeting House
The Rindge Meeting House was built in 1797 and remains an integral part of the town center.

Winter Green, Rindge, NH
 
Meeting House Cemetery, Rindge NH


Washington Meeting House
The Washington Meeting house is now called the town hall and is part a town center which, at 1787 feet, is the loftiest in the state.


Washington Autumn


Door of Honor, Washington, NH

Washington Center Color


Washington Center Sky


Lempster Meeting House
The Lempster Meeting House was constructed in 1794.  As was true for many meeting houses the spire was a later addition, added in 1822.


Lempster Meeeting House
 

These are a few of the best meeting houses around the Monadnock region.  Others are scattered throughout New England, but many have been lost to decay or disaster.  Get out and enjoy the history where you live.

There are great resource to learn about New England's Meeting Houses.  One of the best resources is Paul Wainwright's project studying and photographing New England's Meeting House. His web site and beautifully illustrated book are great source of information about these majestic and uniquely New England structures. I thank Paul for permission to show one of his wonderful images in this article.
 Paul Wainwright Photography

My NEPG Blog : New England Meeting Houses (Published 4/4/16)

Meeting Houses and Historic Churches of the Monadnock Region

Jeffrey Newcomer
partridgebrookreflections.com