 |
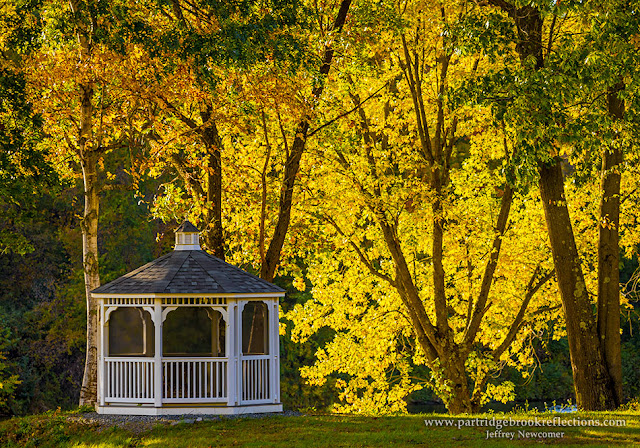
| Dummerston Sunset |
A few months ago I discussed 10 of
my Favorite Secrets of Photography. These were just a few of the “take-away”
points that have come from several of my, over 350, blog articles. As I
assembled that list, I realized that I had come up with many more than just 10
“secrets”, so here, in no particular order, are 5 more. I’m sure that
these won’t be the last.
These tips are short and sweet, but
I have included links to more detailed discussions found elsewhere in my blog.
11) Diffuser should be held as close as possible to the
subject.
A diffuser can block the harsh
contrasts created by bright light and prevent stark reflections that tend to
mute underlying colors. 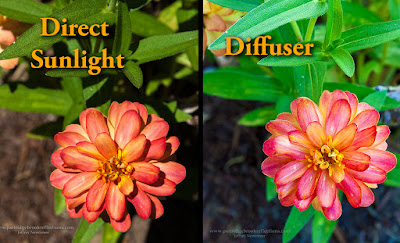 It is just one of the ways to deal with the
challenges of bright midday sun. Diffusers are available in many sizes.
Bigger is better, but regardless of size, they work best when held as
close as possible to the subject, without intruding on the frame. When
positioned close, the light tends to be softer and more diffuse, seeming to
wrap around the subject. When locating the diffuser care should also be
taken to avoid hot spots in the background created by areas not shielded from
the sun.
 It is just one of the ways to deal with the
challenges of bright midday sun. Diffusers are available in many sizes.
Bigger is better, but regardless of size, they work best when held as
close as possible to the subject, without intruding on the frame. When
positioned close, the light tends to be softer and more diffuse, seeming to
wrap around the subject. When locating the diffuser care should also be
taken to avoid hot spots in the background created by areas not shielded from
the sun.
12) Rainbows are seen when you turn your back to the sun and
look at the receding edge of a rain storm.
It’s simple physics. Rainbows
form when the droplets in a storm cloud are illuminated by direct sunlight. The
reflection and refraction of light within each drop divides the beam into its
spectrum of colors. Given the general flow of our storms from west to
east, this means that, as late afternoon fronts pass by, the
setting sun can shine on the clouds predictably creating a rainbow.
 |
| Rye Beach Rainbow |
It isn’t
Leprechaun magic, given the right conditions, it will happen every time.
To see the strongest colors all you need to do is stand with your back to
the sun and look into the dark receding rain-filled clouds. The only
other requirement is that the sun must be below 42 degrees, otherwise the
colors will be reflected into the ground.
This means that Today (June18th), in my corner of southwestern New
Hampshire, regardless of all the other conditions, I can’t expect to see a rainbow
until after about 4:30PM.
13) Get under a roof to avoid the snow blotches.
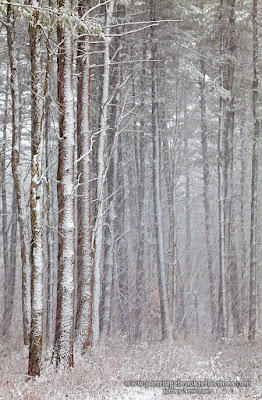 There is no other condition that so
dramatically demonstrates weather conditions in photographs as does images of
falling snow. Snow makes precipitation vividly palpable, and its appearance can
be dramatically altered by both natural factors, and how the flakes are
captured in the camera. The size of the flakes, as well as the density and rate
of the fall are important, and changes in the shutter speed can make a gentle
flurry look like a raging blizzard.
 |
| The Blotches |
Another issue is “the blotches”
which is the bane of my falling snow images. You have undoubtedly seen
beautiful atmospheric images of snow storms, but here and there are big
blotches of white that seem out of place. These white smudges come from
the snowflakes that are close to the lens when the image is captured.
They are invariably out of focus and, to me at least, extremely annoying.
Happily, there are. number of ways to eliminate the blotch.
Blotches can be removed in post
processing, but this can be a 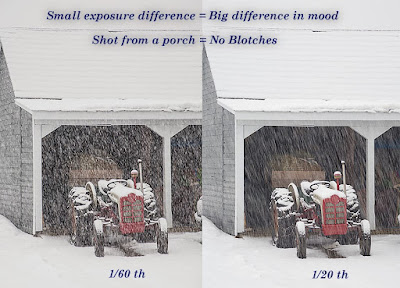 time-consuming chore. In the field, they can be
minimized by shooting with wider apertures and focusing on distant objects, but
they are most effectively eliminated by shading the lens from nearby flakes.
In the tractor comparison, I shot from under a porch roof.
Magically, no blotches. When a roof is not at hand, an umbrella or
a piece of card board can also help. Just keep your shade out of the
frame.
 time-consuming chore. In the field, they can be
minimized by shooting with wider apertures and focusing on distant objects, but
they are most effectively eliminated by shading the lens from nearby flakes.
In the tractor comparison, I shot from under a porch roof.
Magically, no blotches. When a roof is not at hand, an umbrella or
a piece of card board can also help. Just keep your shade out of the
frame.
14) Under harsh, bright midday sun, trans-illuminate the
foliage.
 |
| Ashuelot Park Bridge, Keene NH |
Bright sunlight can be terrible for
capturing the full color of foliage and flowers. This light results in
high contrast between brights and darks, and causes reflections that mute the
colors. As discussed above, there are various techniques to block or
diffuse the bright illumination, but another solution is to use the light to
trans-illuminate the foliage. Light shining through foliage or flowers
can intensify their color, creating an electric brilliance. This
technique can be a lifesaver for the midday sun, but it is equally effective
during the “Golden Hours”, when the sun is low in the sky.
15) During the Golden Hour, turn your back to the sun and
make images using the warm light.
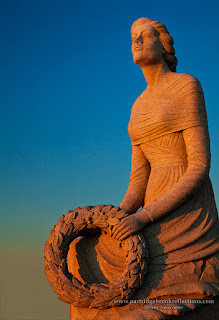 The “Golden Hours” are notable for
the opportunity to capture the audaciously brilliant colors of sunsets or
sunrises, but, while you are busy being enchanted, take a moment to turn away
from the spectacle and notice the lovely effect that the warm light creates on
everything behind you.
  |
| Sally Lightfoot at Sunset, Galapagos Islands |
Even ordinary subjects can take on a magical glow
and these often contrast nicely with the deep blues of the evening sky.
So, as the sun rises or drops toward the horizon, go ahead and capture
the garish colors smeared across the sky, but that’s the easy part. Then
turn away and explore all that can be done with the soft warm light.
 |
| Point Judith Moonrise |
That makes 15 quick tips. Stay
tuned for more.
Jeffrey Newcomer
partridgebrookreflections.com
603-363-8338



It is really very important to have right camera if you have passion for photography, great post. Thank you for sharing it, going to pass it on to my friends
ReplyDelete