 |
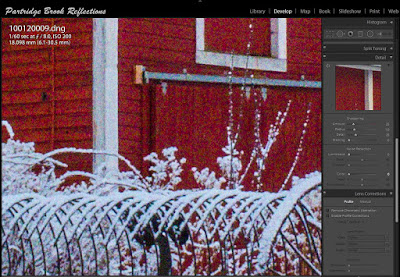
| Stonewall Farm Barn, Noise reduced, Canon G11, Small Sensor |
Last
week I discussed sharpening in Lightroom CC. It seems logical that this
week I travel down the “Detail” workflow to the next set of tools controlling
noise reduction. Actually, I think that Adobe should have placed noise reduction
above sharpening. In my work-flow, I typically sharpen only after I have
taken a first pass at reducing noise.
The goal is to avoid allowing sharpening to accentuate the underlying
image noise. Regardless of the order in the development module, lets first look
at why noise forms in digital images and what can be done to reduce it before
the image gets to Lightroom.
What is
Digital Noise
Noise
generally appears as tiny dots of contrasting tone or color across an image
area that should show smooth tones. The pixels in a sensor are not
perfect and they all emit a degree of noise along with the light signal they
detect. Several factors can make this more apparent in the final image.
 |
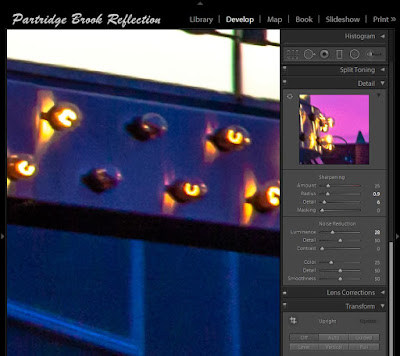
| Colonial Marquee, Noise removed and sharpened |
Bright vs
Dark Areas
 |
| Luminance & Color Noise in Shadows |
Noise
tends to be more obvious in darker areas of an image especially when the dark
areas are lightened in post-processing. It is part of the nature of
digital sensors that the dark areas of an image are recorded with a smaller
tonal range and thus a lower signal to noise ratio (S/N). In these areas,
the noise can overwhelm the recorded brightness. The noise in the bright
areas is the same, but it is overwhelmed by the strength of the actual signal.
This is one reason why it is recommended that images be “exposed to the right”.
“Blowing out” of the highlight should be avoided, but, the brighter that
the shadows are recorded, the better will be the signal to noise and less noise
will be apparent in the vulnerable dark regions. In the final image, the
shadows can be easily darkened in post processing.
ISO
 |
| ISO 1600 Noise, Obama in Keene NH, 2007 |
Noise
becomes more apparent as ISO is increased. Elevated ISOs work by
increasing the signal intensity, but the noise is also increased. Many
new cameras have built-in noise reduction for high ISOs, but it is always best
to shoot at the lowest ISO compatible with the shooting situation.
Pixel Size
and Density
 |
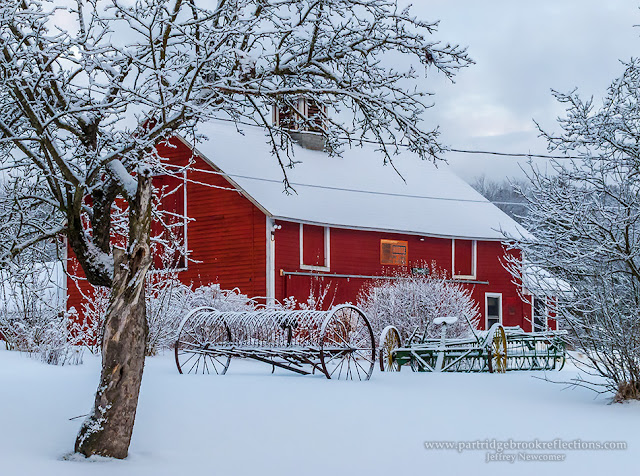
| Stonewall Barn, Canon G11, 10MP Small Sensor |
As
a rule, larger sensors produce images with less noise. If you plan to
blow-up your image to 20”x30”, don’t shoot it with your smart phone. This
related to the size of the individual pixels and how closely they are packed on
the sensor. A 14MP sensor crammed into a smart phone must have pixels
which are much smaller than those in a 14 MP sensor on a full frame DSLR.
The small pixels each “see” less light and therefore must amplify the
signal – and inevitably the noise. The image from a 21MP sensor may have
higher resolution than a 12MP sensor of the same size, but the 12 MP
pixels can be bigger and therefore result in less noise.
Exposure
Length
 |
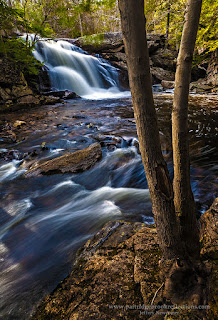
| One Second Exposure, Lower Purgatory Falls |
Longer
exposures can introduce more noise into the image. During long exposures,
the pixels heat-up which results in more noise being produced. Also, during
longer exposures, there is more opportunity for random static to add noise. The
impact of long exposures varies from camera to camera and some experimenting
might be necessary to discover your camera’s tolerance for prolonged shutter
speeds.
Balancing
Factors
 |
| Lower Purgatory Falls, Wilton, NH |
All
photography is compromise. If you lower your ISO to reduce noise, you may
need to increase the shutter speed which will have the opposite effect. When
not constrained by the need to freeze action, I generally lean toward longer
exposures, since it may take a shutter speed of a minute or more before heat
will build-up to the point of causing significant noise.
--------------------------------------------------------------------------------
Noise
Reduction in Lightroom CC
 |
| Detail Panel |
Ok,
you have pulled out your full sized sensor camera, lowered your ISO and exposed
to the right, now what can Lightroom do to reduce any residual noise?
The
Noise Reduction Panel performs separate adjustments on two types of noise, Luminance and color. Let’s start with the easier of the two.
Color Noise
 |
| Color & Luminance Noise |
Color
noise appears as spots of aberrant color seen best when zoomed in to darker
areas of the image. This noise often goes unseen since Lightroom, by default,
presets color noise reduction to 25. This is often sufficient to control
the color artifacts and further adjustments may be unnecessary. If you
reduce the setting to zero you can see the underlying noise and higher levels
of correction may rarely be required in especially noisy images. The
other two sliders seldom require adjustment. The Detail Slider sets the
threshold for what Lightroom will consider as noise. Generally the
default of 50 works well. The Smoothness slider helps to smooth out
larger blotches of color noise.
Luminance
Noise

|
| Color Noise Reduced, Luminance Noise Remains |
Luminance
noise is more difficult, both because it is generally more prominent, and
because its limitation must be balanced against a loss of image detail.
Here, as in so much of photography, only you can decide where the best
balance lies. The major adjustment occurs with the Luminance Slider.
As it is increased, the coarse appearance of the noise fads, but along
with this effect comes a steady loss of image detail, to the point that the
image can have an overly smooth plastic look. It is helpful to judge this
effect both zoomed in and on the full image. Some areas of
 |
| Luminance & Color Noise Reduced |
smooth tone,
such as the sky or skin may benefit from great greater noise reduction, but
remember Lightroom's noise reduction is a global tool. Both noise reduction
and sharpening can be applied to select areas of the image with the local
adjustment tools, but the effects don’t have the fine controls available in the
Detail Panel. In Photoshop, selective
masking allows better control of local detail adjustments.
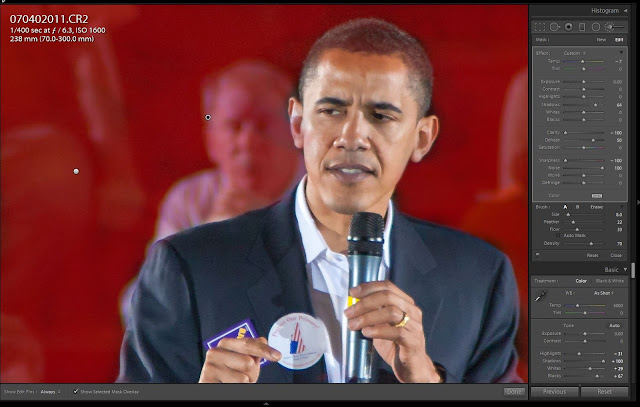 |
| Local Brush to apply Noise Reduction Selectively to the Background (Red Mask) |
The
other two sliders in the Luminance Panel control the amount of preservation of
image detail and contrast and can be adjusted to taste.
 |
| Final Obama Image, Keene State College Rally 2007 |
This
is just a brief review of the sophisticated noise controls in Lightroom CC.
A more detailed discussion could not replace what can be learned by
simply playing with the sliders. Try them from their lowest to maximum
levels, studying their effects at various magnifications. Have fun and
remember, this is Lightroom, everything is reversible, you can’t explode your
precious image.
Jeff Newcomer
partridgebrookreflections.com
603-363-8338


Really good to see this informative post. You have described everything in detail, loved every bit of it. Thanks for sharing the article
ReplyDelete