 |
| by Loran Percy |
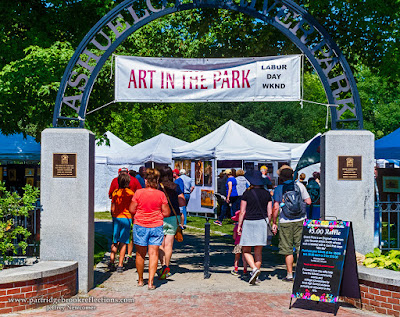 Last Saturday It was my
pleasure to give a talk about digital photography to the Monadnock Area Artists
Association. The organization brings
together artists from Keene New Hampshire and the surrounding towns. The MAAA provides training, support and
fellowship for creatives throughout the region.
Perhaps most notably, the organization sponsors the popular Art in the
Park show every autumn. The group welcomes
a broad range of artists including painters, sculptures, and even a few
photographers are tolerated. I have been
a member for years.
I have had experience talking
to fellow photographers, with presentations to many regional camera clubs, but
I had to consider what would be of interest to a group of people who create
their art with paint, chisels and such.
Why do “real artists” take pictures.
I came up with three broad
categories for their photography.
1 Enjoyment
 |
| Peterborough NH |
Photography is simply fun, and
those who devote great effort to recording the fact and the feel of the world, appreciate
the simple pleasure of quickly capturing what they see with the special beauty
and detail of a photographic image. For those who may spend hours on a single
scene, the ability to record many views in the same time frame can be marvelously
liberating. It can also be a great
scouting tool, facilitating the search for subjects that may be worth a return
visit. Digital photography has expanded these
possibilities, and the immediate feedback has made learning the technical
aspects of image capture much easier.
2 Source Images
 |
| Mary Iselin En Plein Air |
Many artists enjoy doing
their work “en plein air”, creating their art while sitting before the actual
subject . Being enveloped by all aspects
of the scene, the movement, the smells and the sounds, can inspire a fuller
representation of the feel as well as the fact of the view. Of course, photographers, by necessity, always
begin their work en plain air, but we typically realize the full power of the
image only after bringing it back to the digital darkroom.
 |
| My Source Image |
Similarly, painters often use photographs as
their source for works that they will complete in the studio. I often get requests from painters to use one of my images as the source for their work. I always say yes, but ask that I am given credit and receive a photo of the final painting. The better the source image the more
inspiration the artist will have for their final work. I thought I might be able to help with
capturing the best representation of the original scene.
Much of my presentation to the MAAA was directed
towards these possibilities. I modified
my class lecture on photography in different kinds of light. I had all of these slides safely in the can,
but there was one category that I had never addressed, the photography of art for publication and
archiving.
3 Archival Images
 |
| Mount Monadnock by Mary Iselin Stonewall Farm Raffle |
Artists frequently take
photographs of their work. This is often
for publication in print or on the web or simply as a way of keeping an archive
of their body of work. Obtaining high
quality images of art can be challenging.
Pictures need to be evenly illuminated without distortion or glare and
retain an accurate record of the colors.
This does not require expensive equipment. The requirements are simple.
Even Illumination without Glare
 |
| University of Colorado at Boulder |
In the studio, even
illumination can be achieved with the use of two large flood lights, shining in
at a 45-degree angle on either side of the work, and with an otherwise dark
room. This will minimize distracting glare,
especially if the work has an irregular nubby surface. Glare can be especially problematic if the
work is covered with glass. A polarizing
filter can reduce some of the glare, but, when at all possible, it is always better
to remove the glass.
 |
| Before Polarizer |
Under the Sky
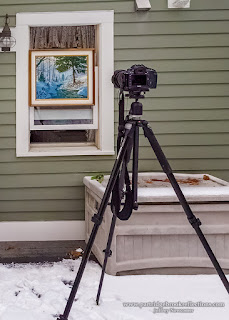 My favorite approach to lighting
is to use the massive soft box which is provided by an overcast sky. The light is soft, directionless and much
cheaper than big floods. Similar soft light
can be obtained on a sunny day by going into the shade, such as on the north
side of a building. When photographing Loran Percy’s winter brook painting, I
hung the art on a window sash. Overcast
light is soft, but it always has a color cast, usually with blue hue. Correcting for the color of the light isn’t
difficult and is discussed below.
No Distortion
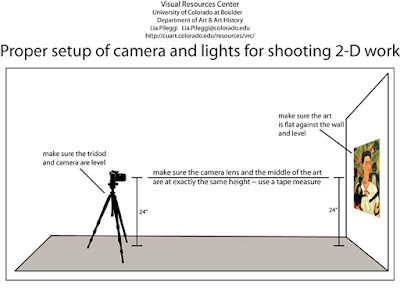 This is a simple one. You will want your rectangular artwork to be
rectangular in your image. For this, the
camera lens needs to be at the same height as the center of the painting. Seriously, it will save considerable editing
headaches if you just get a tape measure and measure the heights.
  |
| Off-Line Leads to Trapazoids |
This is one
of those situations where a tripod can be essential to lock in the correct
orientation. If you are too low the
picture will become a trapezoid exhibiting what we refer to as “Key stoning”. This distortion can be corrected in editing programs
such as Lightroom or Photoshop, but it requires added work and the results can
never have same sharpness.
 |
| Live View for Precise Focus |
Accurate Color Reproduction
The topic of color management
is complicated. Accurate color depends
on the color of the light but also on the rendering in the specific mode of display. Color profiles are available for printers or
presses, but there is no way to compensate for the infinite color variation in
all the monitors that will be displaying your work on the web. It is
enough to drive you crazy, but you can at least start with compensating for the
color of the light that illuminates your work.
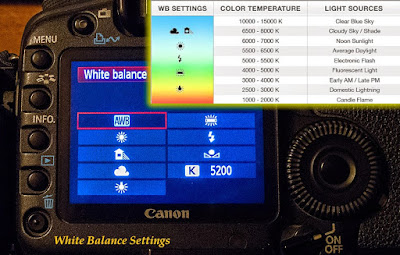 I my example, I know that the
overcast sky will tend to produce a blue cast to the image. If I were shooting JPEG images, which have
limited capability for post-processing adjustment, I would try to adjust for the light by
setting the camera’s color balance to “overcast” or “shadow”. Of course, these settings are only
approximations and may not match the actual tint of the illumination. When shooting in RAW there is a much broader
range for adjustment and here is where the “Gray Card” is magic. Also do I need to mention, Yet Again, that
you should be shooting in RAW? !
Magic Gray Card
A gray card is generally a
small piece of cardboard with a neutral 18% gray surface. It has no color tint, so when included in the
image it provides a flawless reference for color balance. I took a couple of evenly illuminated images of the art and then I grabbed a couple more, in the same light, with the Gray Card included.
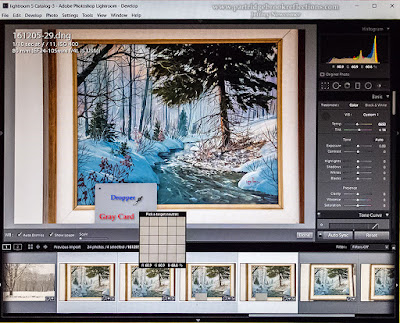 I grouped together all of the
images for editing within Lightroom. In the color balance section of the Develop Module, is a neutral
gray eye-dropper. When the dropper is clicked over any part of the image, the underlying color will be shifted to middle gray, and all the other colors will adjust accordingly. Depending on the color that is selected, this can lead to bazaar shifts in color balance, but when I clicked the dropper over the gray card
in one of the images, the card was adjusted to appear as its correct neutral
gray and instantly all the other colors in all the selected images snapped to their correct
hue. It is magic, but so simple.
There are many more
complexities on the way to a perfect color rendition of your work, but compensating
for the color of the lighting is a first essential step. Next, we can talk about different
color spaces, and profiles for your printer and monitor, but that will have to
wait for another time.
When a painter sells a one-of-a-kind masterpiece it is gone for ever, but a photograph can retain a record of the work. With just a little
effort, this archival image can be as accurate as the original deserves.


Feeling inspired after seeing you fantastic job .
ReplyDelete