In the Digital Darkroom
Last week I discussed ways to avoid or limit the impact of the wires that contaminate so many of our photographs. On happy occasions a few steps in one direction or another can be sufficient to chase the wires from the scene, without severely compromising the composition, but this "editing with your feet" is not always possible. Although, in Part I, I didn't discuss specific cloning techniques, I did talk about how more subtle changes in perspective can be enough to move the offending wires into areas that allow easier removal in the digital darkroom. The critical factor in all of this is to be conscious of the wires and do as much as possible in the field to reduce their impact making the eventual editing chores much less arduous and time consuming.
 |
| Sometimes the Wires Can't be Avoided |
An Apology to Wires
Before diving into the digital darkroom, I feel I must make a brief acknowledgment of the roll of the entangling mess of wires in our environment. YES, I know that without wires, modern communications, my blog, and all those adorable pictures of cats would not be possible. Happily our visual cortex seems adept a filtering the wires from our consciousness and memory, but our cameras have no such synapses. Hopefully I can be excused for hating the cables with a passion that allows me to feel a wonderful glee as I spend the hours required to send them to oblivion. The good news is that progressive iterations of Photoshop have made the process more effective and easier.
 |
| Autumn Morning in Brattleboro Vermont, Worth the Effort |
Die Wires Die!!
 |
| Harrisville Library with Wires |
Over the years my approaches to wire removal have evolved with the introduction of new tools in Photoshop. Early on, the Cloning Tool was the only reasonable choice, and with care it did a excellent job, but in recent versions of the software the introduction of the Healing Brushes and Content Aware capability has expanded the capability and ease of the process. As is always true with Photoshop, the addition of new option makes the selection of the best tool more complicated and the key to finding the best approach to any specific situation is to experiment with the various options.
Safe and Free To Experiment
As I work on an image I am constantly jumping among the Cloning and Healing Tools, varying the size and hardness as well as experimenting with Content Aware and Proximity Match Types and Normal and Replace Modes. I can often guess what approach will work best in a particular region of the image, but I'm never sure until I experiment. The only things I can be sure of is that no one technique will work best in all situations. Of all the buttons and keystrokes available in the editing process, the most important is the combination of "Back-Up" buttons. My left hand never strays very far from "Alt-Ctrl-Z" (PC) on the keyboard. The ability to back-up is critical to the learning process and this is enhanced by keeping your edits on a separate blank layer.
---------------------------------------------------------------------
My "Safe Editing" Rules are :
1) Perform edits to pixels and perspective early.
Non-global edits may not register correctly with changes in the pixels applied later in the process.
2) To avoid damaging you base image! place edits on a separate blank layer.Hit Ctrl-J to create a new layer and then set the tool to sample "ALL Layers" or Current and Below"
3) Keep your finger on the Back-Up buttons.
---------------------------------------------------------------------
Where are the Wires
Wire removal can be considered to fall into two broad categories depending on the nature of the underlying background.
1) Backgrounds with a smooth texture, without significant detail, such as a clear sky or those with homogeneous detail such as a dense forest canopy can be the easiest to correct and it is here that Photoshop's automatic "Smart Tools" can be most reliably effective.
2) Backgrounds with varying and structured detail such as bare tree branches or the architectural detail in buildings often require more careful and time consuming editing, frequently with classics cloning techniques.
Smooth Backgrounds
 |
| Carlton Covered Bridge |
Spot Healing
 |
| Healing Brush Line |
 |
| Patchy Result "Normal Type", Content Aware |
 |
| "Replace Type" Content Aware |
repair with the surroundings. It is possible to drag the bush along the length of the wire or click on one end and then "Shift-Click" on the other end to "heal" the wire in one stroke. If this approach fails to smoothly blend with surrounding pixels, leaving tell-tale linear artifacts, I will often move the brush in diagonals across the wire creating a less regular and noticeable patch.
Healing Brush
The Healing Brush works similarly to the cloning tool. A source location must be defined and then the brush can be drawn along the wire, but with the Healing Brush it is the source pixels are blended with the surroundings again using a "Normal" or "Replace Modes. The results can be a smoother blend than with the Cloning Tool. With either healing brush, care has to be taken to avoid contamination from surrounding pixels. As the wires approach areas with contrasting brightness and color, the healing tools can smudge some of the contrasting pixels into the blend. In these situations I will frequently switch to the Cloning tool with a hard edge to fill in the closely adjacent areas Another option is to make a selection which excludes the problem regions and apply the healing brush to the clean selection.
Whichever brush is used, The number of options that can be applied for a simple "healing" can be distressing, but, again, the important thing is to experiment until you get the best result. For example the "Normal" type setting is routinely recommended, but sometimes I find that "Replace" leads to a smoother blend with subtle areas of detail Regardless of the approach, small areas of editing artifact may need to be touched up with the healing brush before a transparent repair is achieved.
In my first screen capture video, I experimented with various settings for the best result on wire removal from a largely clear sky.
Click on the lower right of the player to expand to full screen
Backgrounds with Structured Detail
The great challenge for removal comes when the wires overlie or intertwine with areas of varying sharply structured detail. In these
 |
| Wires on the Harrisville Library |
 |
| Wire Nightmare on the Harrisville Library |
 |
| Cloning on the Blank Editing Layer |
 |
| Wires Reasonable Removed, Whew! |
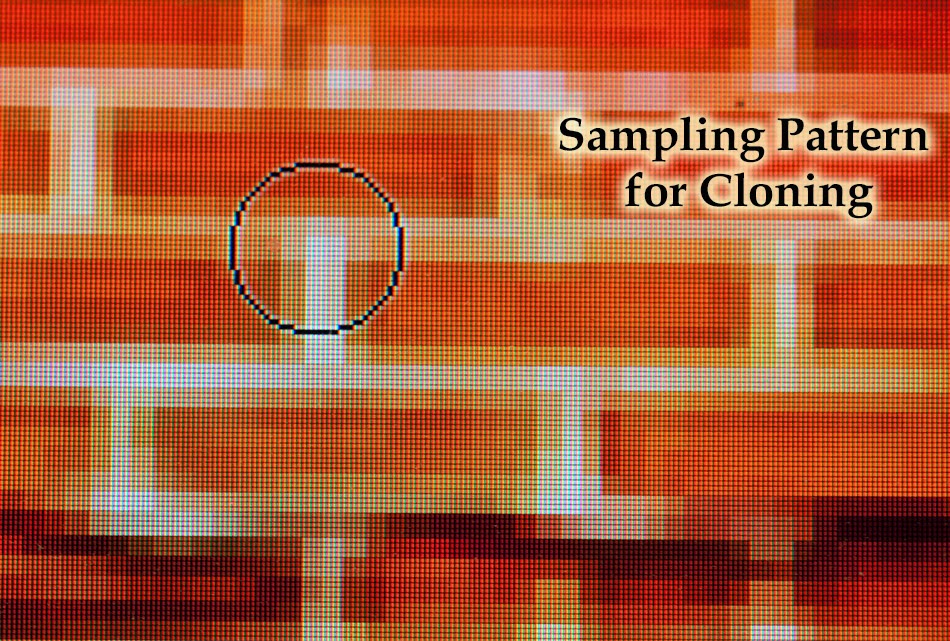
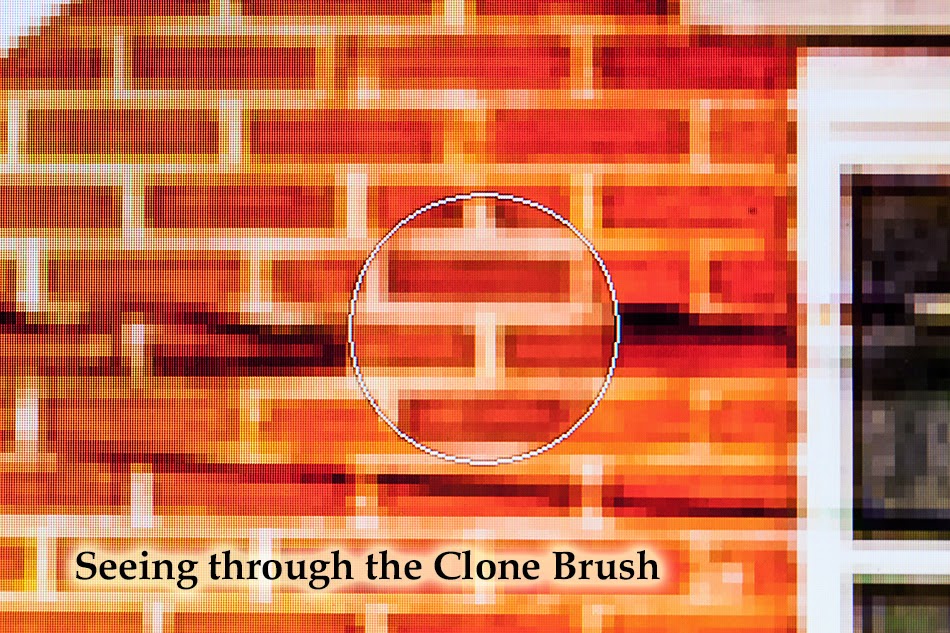
 At times the healing brush can be effective in areas of regular detail, but the cloning tool usually works best in these situations, since you have complete control over what areas are sampled and where they are placed on the image. As I look for areas to use as patches to place over scarred regions, I constantly vary the size and hardness of the brush and as always, it is crucial to have the back-up keys ready for the inevitable mistakes. The trick is to line up the patch to match the underlying
  pattern and texture. This used to be a greater challenge, but in recent versions of Photoshop, the task has been made much easier by the ability to see the patching pixels through the circle of the brush. The result is that it is much easier to line-up the pattern whether it is bricks, the edge of a roof or the intersection of branches.
  |
| Wires Cleared, Including Reflections in the Pond |
Video of Cloning out wires across the Harrisville Library.
Click on the lower right of the player to expand to full screen

It is difficult to describe the techniques for effective use of Healing and Cloning brushes. Hopefully the short, screen-shot videos will better convey some of the approaches that I have found most useful, but there is nothing that can replace repeated practice. You will find the combinations of tools, brushes and settings that work best for you in the various situations that will arise in the editing process. As I said at the end of my first article on dealing with wires, "... New and refined tools within more recent versions of the program have made the process much easier. It still requires practice and a considerable investment in time, but your artistic vision deserves no less".
DIE WIRES DIE !
Problem with Wires Part I
Jeffrey Newcomer
Partridgebrookreflections.com


No comments:
Post a Comment