About Me

My photo
Spofford, New Hampshire, United States
Jeff Newcomer had been a physician practicing in New Hampshire and Vermont for over 30 years. Over that time, as a member of the Conservation Commission in his home of Chesterfield New Hampshire, he has used his photography to promote the protection and appreciation of the town's wild lands. In recent years he has been transitioning his focus from medicine to photography, writing and teaching. Jeff enjoys photographing throughout New England, but has concentrated on the Monadnock Region and southern Vermont and has had a long term artistic relationship with Mount Monadnock. He is a featured artist in a number of local galleries and his work is often seen in regional print, web publications and in business installations throughout the country. For years Jeff has published a calendar celebrating the beauty of The New England country-side in all seasons. All of the proceeds from his New England Reflections Calendar have gone to support the Pulmonary Rehabilitation Program at the Cheshire Medical Center. Jeff has a strong commitment to sharing his excitement about the special beauty of our region and publishes a blog about photography in New England.

Sunday, February 26, 2012

Gone to the Vermont Dogs.


Perfect Face
New Hampshire Snow

After two weeks of fairly geeky photoshop blogs I am thrilled to indulge myself with something far less intense. It is important not to get obsessed with the technical aspects of photography and to remember that the most essential element of a great image is a great subject. Fully embracing this concept, this week’s blog is, of course, about my dog Nellie.


Retreat Farm, Brattleboro Vermont
A week ago I was contacted by a client in Vermont to see if I had any dog photographs to use in a planned calendar. The theme is to be "Dogs of Vermont". Of course, I happen to share my life with a dog who is generally acknowledged as the best canine in all of New England, but as I searched my archives, I was amazed to discover that I could find only one picture of Nellie actually taken in Vermont. 


Faced with the perfect subject but unacceptable backgrounds, I had no choice but to throw Nell in the car and head across the Connecticut River. My plan was to photograph Nellie around as many of my favorite, authentically Vermont, locations as I could manage?  Calendar pictures are generally supposed to look like classic representations of seasons they depict. My problem was that, on Friday, I was saddled with "Winter Without Snow Season". Given the uninspiring surroundings my solution was to zoom in on Nellie’s soulful face and include just enough softly focused background to establish location and to provide framing. 


West River, Dummerston Covered Bridge


Newfane Country Store

Nellie is a great model for this kind of work. She almost always
accompanies me on shoots and has learned the importance of staying when told to "stay". Usually the "stay" is intended to keep her out of the shot, but in this case the goal was to fix her to a location while I clicked away. The trick was finding ways to get her to look at me without inducing her to run in my direction, tail wagging, for a touch or a treat. 


More Treats
Newfane Country Store
Nellie’s hair is beautifully soft, but it definitely has a mind of its own. I brought along her favorite brush, but I soon realized that any attempt to impose order on the unruly coat would rob Nell of one of her most endearing qualities. Over a period of a couple of hours I plopped her in front of Stickney Brook Falls, the animals at the Retreat Farm in Brattleboro, the West River and The Dummerston Covered Bridge. We also visited the nice folks at the Country Store in Newfane, which is a warm and pleasantly dog friendly place. 


Nellie did great. She was remarkably patient and irresistibly cute,
Callie Needs a Home, Windham County Humane Society

but it can be difficult to appreciate her superior qualities without photographs of other, "lesser", dogs for comparison. On the way back we stopped at the Windham County Humane Society in Brattleboro. The folks there were happy to have some of their guests photographed and I have to admit the dogs were almost as beguiling as Nellie. Photographing dogs who are anxiously awaiting new homes is a challenge. These animals are generally
Chase is very friendly

thrilled to get out for more human contact. The trick is to get them settled long enough to grab a couple of pictures. They seemed alternately scared of the big intimidating camera eye and insistent on licking it. In the end I got a few nice images which I hope might help support the Societies efforts to find families for these wonderful creatures. I especially want to thank Anna Mefford of the Society who was a great help and showed remarkable patience as I tried to capture these frenetic fuzzy balls of energy. 


SQUIRREL !


I think Nellie had a good time on her photo shoot. I don’t think the experience has spoiled her. Although she nearly emptied my bag of doggy treat rewards, she seems just as excited as ever to root around in the garbage at home. 


Dusting Addendum
 

Thursday night our latest fizzled snow storm left a dusting of white on the hills of southern Vermont. I couldn't resist dragging poor Nellie out for another shoot.  The early sap run provided an additional opportunity for nice backgrounds.  Now I have more work to do.


Monday, February 20, 2012

Focus II, Getting it Right in the Digital Camera

Baker Brook in Newfane Vermont
This week I would like to complete my discussion of controlling depth of field in digital photography with a review of one additional Photoshop technique to manage especially difficult situations. If you are using a recent version of Photoshop, this is for you, if not, you may talk among yourselves.

Rant-Free Blogging
Mount Monadnock, Marlboro New Hampshire
Last week, after a prolonged rant about what it means to get images "right in the digital camera", I finally got around to discussing how digital photography has expanded our options for achieving wide depth of field. Specifically I talked about blending multiple, focus bracketed images. This approach is usually not particularly challenging, especially when Photoshop can do the work of aligning the image layers. It is easiest when the content of the image recedes from the camera uniformly from the bottom to the top of the frame, but the approach begins to fail when there is a more varied range of depth within the same region of the frame, especially up close. In these situations manual adjustment of layer masks can become frustratingly complex. 


Rosaly's Garden Peterborough NH
In my picture from Rosaly's Garden in Peterborough NH, I used three images to capture the full depth of field. The primary foreground element was the flowers, but, I found that, in the same area, the underlying leaves, stalks and grass were further away and were not sharp in the foreground image layer.


Magic of Auto-Blend
In this situation, Photoshop's "Auto-Blend" tool can be a great help. My first step is always to align the focus bracketed image layers using the "Auto-Align" tool found in the edit drop-down menu. Next I highlight all of image layers and run "Auto-Blend". This tool compares all the images and applies layer masks attempting to select the sharpest of the layers for each point on the image.

Auto-Blend Layer Masks
White Exposes the Underlying Layer
This works better with more layers, but I usually start with at least three. After the computer grinds for awhile the results that pop up are generally amazing with great apparent sharpness throughout the image. It is a remarkable piece of computer magic, but, on closer inspection, the results are seldom perfect. Typically there are patches of soft focus scattered throughout the image. It is possible to manually edit the masks to bring out the best focus, but because the process often requires not only revealing the sharp layer but also covering up the overlying soft area, it can become very complicated to get the perfect combination of masked layers.
After Patching
Area of Soft Focus Following Blending


Applying the Patch


Patching Layers (red)
I have found that it is much easier to copy a set of the aligned layers and place this "patching" set above the originals before I run the blending tool on the original layers. I mask out the patching layers so that, after the blend, I can correct any problem spots by simply painting with white on the appropriate patching layer to reveal the sharper pixels. This avoids all the problems of dealing with the complex interactions of blended layer masks below. It still requires some careful editing, but the results are worth the effort.

Wow. I have come to think of this approach as rather simple, but when I try to explain it, I'm not sure even I will be able to figure it out next time. The only way to understand the technique is to try it on appropriate images.  I guess the easiest way to sum this up is that you are creating a separate set of aligned, but unblended layers to use as the source for corrections to the original blended results. This does result in a very large image file with many layers, but once the automatic and manual blending is done, you can flatten the layers and ideally enjoy a lovely image with otherwise impossible depth of field.


I hope these last two posts have opened up some of the potential of the digital darkroom to manage the challenges of controlling depth of field. The only way to master these techniques is to get in there and play with the tools. You have nothing to loose except that fuzzy foreground.

Chesterfield, New Hampshire


Saturday, February 11, 2012

Getting It Right in the Digital Camera : Focus I


Winters Past


With yet another fizzled snow storm this weekend robbing us of great photographic material, it seems to be the appropriate time to start what may evolve into a prolonged, multi-episode rant about what it means to get a picture "right in the camera" in the digital age. I have always felt that photographers have the right, even the responsibility to express their art in any way that works best for them. There is no right way to capture, process or present photographic images. It is altogether appropriate for photographers to have their individual preferences regarding the presentation of photographs, but when they express this they do so only as a small part of the audience and not as someone with special sensibilities or taste.


Photographic Purity

It seems less common recently, but we still hear photographers, both film and digital, proudly describe their method as "getting it right in the camera", implying that those of us who process our images somehow are being lazy and sloppy, not bothering to do the work in the field to get the best image. Their "unprocessed" images are portrayed as somehow a purer reflection of the natural experience. It is my contention that the use of programs such as Photoshop merely provide another set of tools which do not replace, the careful in-field adjustments of exposure, focus and shutter, and composition but allow for better control of the final image. When I think of the often derogatory term "fixing it in Photoshop" I think of the wonderful opportunity that digital processing provides to get around the limitations that any mode of image recording has when trying to mimic what our marvelous eyes can perceive. For me, the best way I can honor the images which I carefully collect is to do everything I can at home as well as in the field to draw out the picture’s full potential, to come the closest I can to what I saw, AND felt in the field.


Enough religion. My point here is that as a "Photoshoping"
photographer my goal for getting an image "right in the camera" is very different from those who take what they can get directly from the camera. Ansel Adams said it best in his often quoted contention that the negative is the score and the print the performance. In digital photography the image file is the score and the best score is the image or images that provide the information which will allow the fullest potential for the post-processing "performance". The best digital image directly from the camera is often not the best looking and only shows its beauty when its potential is drawn out through the magic of the digital darkroom. When faced with a photographic challenge I only feel I have done my best when I have used all the tools that I have available. This includes getting the best image in the camera but also devoting the time at home to bring that image to its best performance.

To highlight this fundamental difference in approach, I plan to do a series of articles about the how digital photography has expanded our options for managing the factors that contribute to an outstanding image that fully expresses our own personal vision. Whether it is exposure, focus, color management, or coping with special challenges such as low light, the techniques available today provide an amazing degree of flexibility and control that has fundamentally altered what it means to "get it right in the camera". Let’s start with focus and I promise in the future I will leave out the lofty sermon.

Focus

The Problem

Back in the days when I was shooting with film I often shot bracketed images, but then it was almost always to assure
Dummerston Bridge, Vermont
that I was getting an adequately exposed image.  With digital, LCD previews and histograms make exposure much easier to nail. I still bracket but now it is almost always to assure sharp focus through a wide depth of field. With film, depth of field could only be controlled by adjusting f stop and focus point. To get a wide dof I had to stop down and try to find the optimal focus point. I could calculate the hyper focal distance or use the old technique of focusing 1/3 of the way into the scene. These approaches can be effective whether shooting with film or digitally, but they impose their own set of limitations. Small apertures require either longer exposures or high ISO and either can degrade the image. Long exposures can be particularly problematic when shooting subjects in motion, such as foreground flowers or grass, and even when stopped down to f22-32, sharpeness across extreme depth of field still may be unattainable. With film, the best solution is an arful compromise of aperture and exposure along with a heavy dose of hopeing the wind drops off for a few seconds.

The Digital Solution


With digital photography the depth of field problem can often be solved by bracketing focus with several images. When I arrived at Perkins Pond in Troy New Hampshire the evening light was lovely on Mount Monadnock. I wanted to include the nice foreground flowers, but despite stopping down to f22 I couldn't come close to getting everything in focus, and even with only a light wind, the long exposures that
the small aperture demanded turned the flowers into a blurry mess. The solution was to open the aperture and take three images focused on foreground, background and a spot in the middle.The result was that I could keep the shutter fast enough to freeze most of the foreground motion. None of the images was the "best I could get from the camera", but together they provided the material I needed to get the best image at the end of the digital process.

Photoshop provides a number of approaches to merging multiple images.
In this situation I was able to stack the three
Focus Layers
images, align them using the wonderful "auto-align" function and then manually adjust masks to apply each image's focus sweet spot. I usually start by completely masking the top foreground image and then paint with white to reveal the image until it appears to be less sharp than the underlying middle image. I switch from black and white until I have the best sharpness. Next I selectively black out the middle mask to reveal the distant bottom background in the same way. Sometimes I find that I can get good results using just two images, but I always start with at least three whenever I'm seeking a broad DOF.


This simple manual approach works well when the foreground is all at roughly the same distance, but begins to fail when there is more varied range of depth up close. For example when an image with flowers up-front, also has underlying stalks and grass further away, it can be very difficult to get everything sharp. But don't despair. Photoshop has some other tricks that can at least make this challenge manageable.

But that is a tale for next week's blog Focus II. In the meantime keep on getting it right in the digital camera.


Monday, February 6, 2012

Some Days the Bear Eats You.

Hampton Beach Dawn

Yesterday was a busy photographic day and it reminded me of an
axiom that I first heard in college; "Some days you eat the bear, other days the bear eats you.". One of the things that makes photography exciting is that, despite all your efforts, you don't always get what you hoped for, it just makes the occasional successes much sweeter. Yesterday started and end with disappointment, but as always you have to make the most of what is given. At least in this case the unfortunate lack of Snowy Owls in the morning and the agonizing Patriot's loss sandwiched the
Crazy Plungers
the Frozen Sections
insanely triumphant success of the Penguin Plunge. This is the third year that I agreed to photograph the Cheshire Medical Center's team, "The Frozen Sections", in the Penguin Plunge. Somehow every February, the Plunge raises thousands of dollars to benefit the Special Olympics as otherwise sane individuals run into the frigid Altantic at Hampton Beach New Hampshire. For me it has been a great opportunity to help celebrate this wonderful cause and to capture my friends in a wide range of shivering blue tones.

Lovely Dunes
No Owls


Quest for the Snowy

With all the excitement about the unusual numbers of Snowy Owls along the mid New England coast, I decided to come over early to try to capture these remarkably beautiful birds. I have been following the great images from a number of my new friends in the New England Photography Guild,  and although I have always been only an accidental bird photographer, I had to give it a shot. I rolled out of bed at 4AM and got to the New Hampshire coast at 6:30, just before sunrise. I slowly cruised the shore from Seabrook to Rye, stopping
NH Marine War Memorial
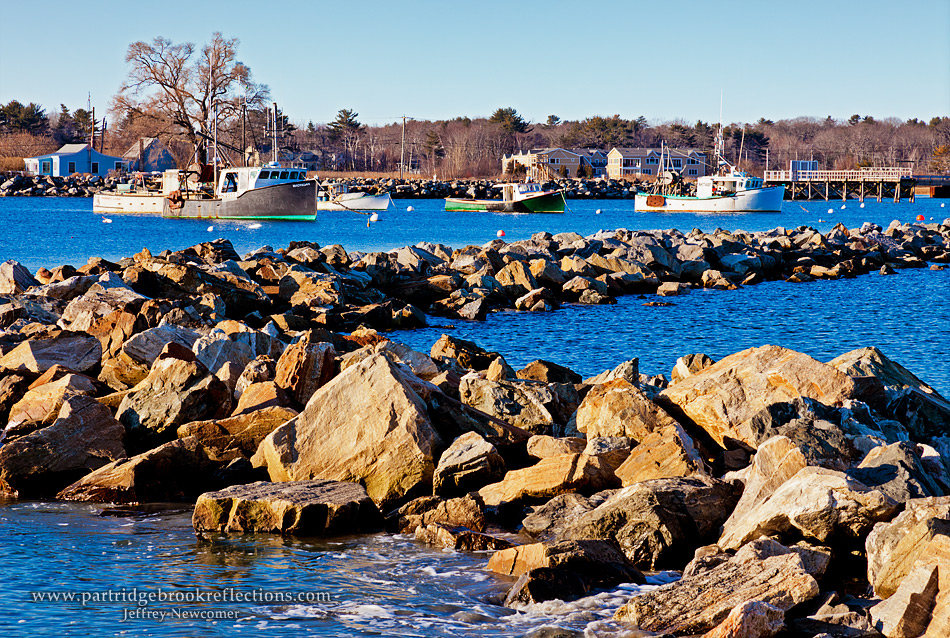
frequently to scan the rocky coast and wandered along the sea grass decorated dunes. Nothing. I know that the potential for failure feeds the excitement of the quest, but if there is anyone who was out there yesterday and found themselves tripping over Snowys everywhere they looked, PLEASE keep it to yourself. The morning was clear and crisp, but the lack of clouds made for a less than spectacular sunrise. So I ended up with more images of the reflected golden light than the rising sun. I tried some long exposure surf shots using my variable neutral density filter. The trick was not to be washed away by the rising tide and when I turned around I found that I was nearly stranded on a rock along the beach. I was mesmerized by the strikingly beautiful and powerful granite Marine War Memorial statue. The golden sunrise dramatically illuminated this proud woman gazing out to sea as she is about to throw a wreath on the water that is the grave of her child. I have seen pictures of the statue before, but this light seemed to bring the mother to life. As the morning progressed I grab a few images from Rye Harbor and along the beach. I don't get to the coast anywhere near often enough and I wanted to take advantage of my short stay.   Even without birds the ocean really recharges my battery.


Rye Harbor


The Plunge

Eventually duty called and I had to reluctantly surrender the search and report to the Casino where the Plungers were gathering. Photographing the Plunge primarily involves getting shots of the excited folk enthusiastically running to the water, which was an unusually toasty 42 degrees, and shots of the triumphant and numb faces as they run back up the beach to the welcoming towels. The event is exciting and the plungers have a surprisingly great time, but, thank you very much, I will stick to the Photography. Once again this year our Frozen Sections won the "Super Flock Award" for raising the most money, over 32 thousand dollars, but the Special Olympics was the big winner raising a total of over 500 thousands dollars. For more about the Plunge you can check out my blog from last year.


Frozen Sections Victorious

The primary focus of the trip home was trying to stay awake. Thank goodness for books on tape and a mix of photography and political podcasts. Despite the exhaustion, I couldn't resist stopping to check out a favorite brook just off route 9 in Antrim New Hampshire.I was rewarded with a nice cascading flow and interesting light. Finally something worked out the way I had hoped.

North Branch River
Antrim, NH


As for the Super Bowl, all I can say is that we hosted a nice group of friends, the food was excellent, the game was exciting and the ending sucked. I guess some days the bear does eat you. 


Only Birds in Sight

Saturday, January 28, 2012

Celebrating the Snow


Red Cape, Roxbury, New Hampshire

It is mid January and we finally have some snow to photograph, but with more rain predicted for the end of the week, this is a good time to celebrate the qualities of this magical crystalline substance. It is an oft repeated legend that Eskimos have hundreds of words for describing snow. It makes sense since snow is such an essential factor in their daily lives, but the disappointing truth is that they have no more descriptive words than we have in the English language. For photographers, the character of snow is every bit as essential as it is to the Eskimos and fortunately our visual lexicon for representing its infinite varieties of texture and color goes far beyond what we could hope to express in any language. Snow often begins as a blank canvas which comes to life only when it is painted by the light; its appearance varying widely depending on the angle and color of the illumination. For me the challenge of winter photography is to portray snow as more that just one half of a stark black and white composition. Here are some thoughts about how to bring forward the rich complexity of this white stuff that we are FINALLY beginning to see around us. Specifically, let's talk about brightness, color and texture.


Stay Out of the Mud

Over Brook, Dummerston, Vt
I should start with the most commonly discussed problem with snow photography. Your light meter doesn't know or care about what you are shooting. Its only job is the render the scene in middle gray and the results is that, without compensation, images of bright snow will be reduced to a dark, muddy and unnatural mess. The simple solution is to increase exposure by a stop or two, but when the goal is to find interest in the snow, it is critical to avoid over compensating and blowing out the highlights.
Break Trail, Spofford, New Hampshire
A margin of safety can be secured by bracketing your exposure, but with digital cameras a quick check of the histogram can confirm that the exposure is not shifted too far to the right. The use of bracketed images with HDR software has added an additional powerful tool to tame the high contrast in winter scenes, preserving highlights without blocking out shadow detail. The important thing to remember is that post-processing software can perform magic, but nothing can salvage highlight detail when all the information has been blown away. In order to preserve the highlights it may be necessary to produced images coming out of the camera appearing a bit darker than will be your eventual goal.


Painting the Snow

Unless desecrated by road grim, the color of snow is a direct reflection of the quality of the light.
Depending on the time of day, the color can vary all the way from the intense blue of the sky through the spectrum to the warm glow of the fading evening light. The color may also be dominated by reflected light from other sources such as from a bright red barn or from the green tones of a cool pine forest glade. This provides wonderful creative opportunities to "paint" the snow, but care is necessary to avoid letting the colors become overpowering. Fortunately the color intensity and hue can be managed in post to avoid over saturated or clashing tones. Most notably, I often find it necessary to slightly desaturate the brash blue tones that can appear in areas of deep shadow on bright winter days. When the reflected light comes from a gray overcast sky, the selection of the appropriate white balance becomes much more an individual artistic decision. Interest can be added to a flat, steel gray image with the addition of even a subtle drift toward warm or cool tones. The important thing is to pay attention to the light and use it to fulfill your vision. 


Texture


Although a dramatically effective composition can be obtained by enhancing the contrast in winter scenes, I feel that an important part of the experience is lost when the snow is rendered as a pure flat white. For me the most interesting quality of fallen snow is the subtleties of texture that can present with endless variety. The simplest way to reveal snow’s texture is to photograph when the sun is low in the sky. The effect of the warm illumination, highlighting and coloring the detail in the snow, makes this my favorite time to shoot. At other times, when the sun is high in the sky or is diffused by overcast, the snow texture can be much more difficult to appreciate.
Split Birch, Chesterfield NH
This is where a little post-processing can help. The goal is to mute the spectral brightness of the snow and enhance the contrast to a point that allows the texture to become apparent. The challenge is to do all this while avoiding making the surface appear unnaturally gray and muddy. There are various approaches available from within Photoshop to achieve this result and although other image editing programs will manage this problem with different tools, the range of options are generally similar.  So for those not using Photoshop, please resist the urge to insert “Blah Blah Blah” in this entire section. 


Red Cape Unprocessed


Curves Adjustment
Greater contrast in the bright tones can be most directly salvaged with a curve adjustment restricted to the bright end of the curve, perhaps using masking to limit the effect to the desired areas. This can be a bit delicate, but once you master curves you will find an infinite potential for control.


Shadow/Highlight Filter
If you are fortunate to use a relatively new version of Photoshop, I would recommend starting off with the nearly miraculous “Shadow/Highlights” option. A slight increase in the highlight slider can add just the touch of detail that you want and the effect can be limited to the brightest areas by pulling back on the “Tonal With”. I often will go a bit beyond what seems optimal and then use the opacity slider to pull back to the best level. Excess correction can begin to make the snow look pasty and artificial. The “Shadow/Highlight” adjustment may also be done from within a “Smart Object” allowing further adjustment as the editing process proceeds.


Tone Mapped

High Dynamic Range software is another tool especially suited for taming high contrast situations, and any of the currently available programs can do an effective job salvaging the highlight detail in snow. As with all HDR approaches the decision about how drastic the adjustment should be is in the realm of individual artistic expression. In general I prefer a light hand to retain a more natural appearance, but there is no "wrong" approach.  The example is a tone mapped single image.

Across Pastures, Chesterfield, New Hampshire


First Light Monadnock
Winter photography in New England provides opportunities to see the landscape in refreshingly different ways, but it also presents us with a unique set of challenges. This year the greatest challenge has been just finding some actual snow to photograph, but rest assured that it will come back and when it returns don't forget to harvest all the complex beauty the snow has to offer.