
About Me

My photo
Spofford, New Hampshire, United States
Jeff Newcomer had been a physician practicing in New Hampshire and Vermont for over 30 years. Over that time, as a member of the Conservation Commission in his home of Chesterfield New Hampshire, he has used his photography to promote the protection and appreciation of the town's wild lands. In recent years he has been transitioning his focus from medicine to photography, writing and teaching. Jeff enjoys photographing throughout New England, but has concentrated on the Monadnock Region and southern Vermont and has had a long term artistic relationship with Mount Monadnock. He is a featured artist in a number of local galleries and his work is often seen in regional print, web publications and in business installations throughout the country. For years Jeff has published a calendar celebrating the beauty of The New England country-side in all seasons. All of the proceeds from his New England Reflections Calendar have gone to support the Pulmonary Rehabilitation Program at the Cheshire Medical Center. Jeff has a strong commitment to sharing his excitement about the special beauty of our region and publishes a blog about photography in New England.

Sunday, March 2, 2014

Seeing the Unseen


This week I would like to celebrate the amazing capability of modern photography to help us to see the unseen.  My goal is only to touch on what is possible and to provide links to more detailed explorations.

From its invention, photography has been a medium that was prized for its ability to capture what we see in flawless detail, freezing more of "reality" than could ever be absorbed by our limited visual perceptions.  Without special forethought, my photography has tended toward images that celebrate the beautiful detail of the natural world.  I have tried to use the remarkable powers of digital photography and editing to place viewers in locations as I have seen them, working to display the mood as well as the reality of the remarkable world around us.  But photography has always provided a means to see things beyond our normal perceptual capacity, that are not accessible to the naked eye (THERE, I got the word "naked" into the article - TWICE!  Watch my hits soar!). 


Anyway, In the beginning photography captured "Reality" in its own way based on its technical limitations.  It has always had the
remarkable ability to freeze time, not only for moments but for centuries.  As initially a black and white medium, photography washed the color from the world and forced a new focus on light and pattern that had always been hidden under a gaudy chromatic layer in our perception.  Photography has expanded and altered our vision in many other ways and, digital photography, although not required for many of these advances, has made them more easily accessible and pushed opened the door to these unseen new worlds.  I have discussed many of these techniques in much greater detail in previous articles, but here is a brief list of some of the ways that photography can open our eyes to a new worlds.  Let the journey begin.  


Infrared
Infrared photography is perhaps the best example of seeing the
unseen.  Infrared is the portion of the electromagnetic spectrum beyond deep red.  Although these longer wave lengths are beyond the ability of our eyes to detect, infrared photographs have been captured since the early 1900's.  Today a digital camera can be modified to respond to the infrared making it much easier to capture this invisible world.  The infrared spectrum shows foliage in brilliant light, making summer scenes appear like winter landscapes.  It cuts through haze and reveals puffy clouds in stark contrast against inky black skies.  With infrared photography it is often possible to capture powerful images on days when the light is too flat and dull for strong conventional images.  I found it well worth the expense to modify my old Canon 20D doorstop to become my IR camera.
For More Information:
 Infrared, Seeing Photography in a Different Light


HDR

High dynamic range photography can be used to overcome the 
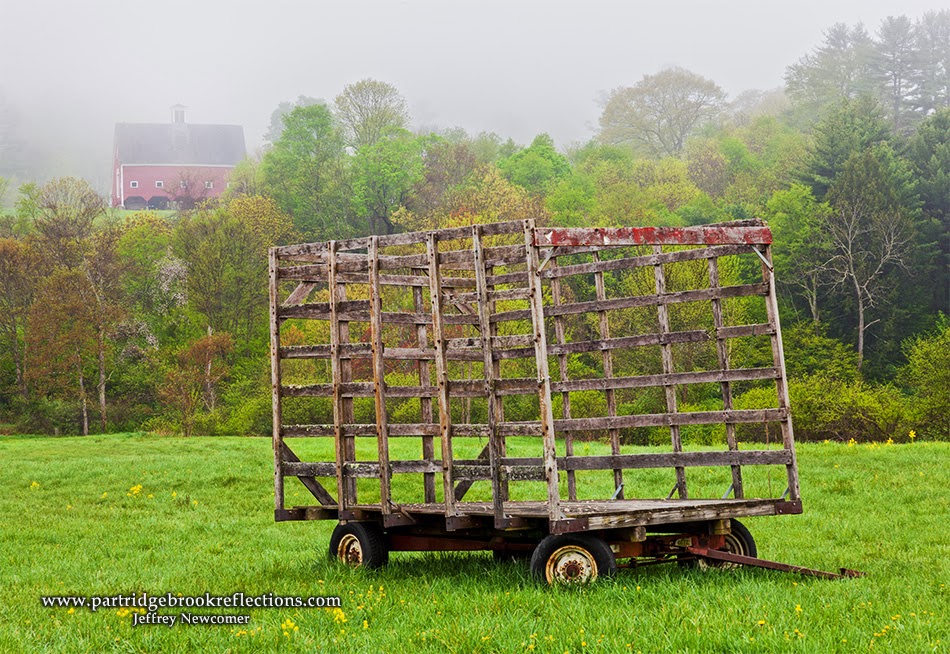
Improving Dynamic Range
limitations of film and digital sensors in recording the full range of light and dark apparent to our eyes.  In this sense it actually improves the ability to capture what we can already perceive, but HDR and its evil twin, tone mapping, has the seemingly unbounded artistic capability to mutate reality, 
turning a mirror on the artists mood and
fancy rather than the reality of the moment.  I love HDR because it provides such an unlimited opportunity for self-expression.  I generally use these tools to render images that better reflect the dynamic range that was apparent in the field, but occasionally it is fun to go crazy, jump through the looking glass,  and produce something that truly would never be apparent to the eye.
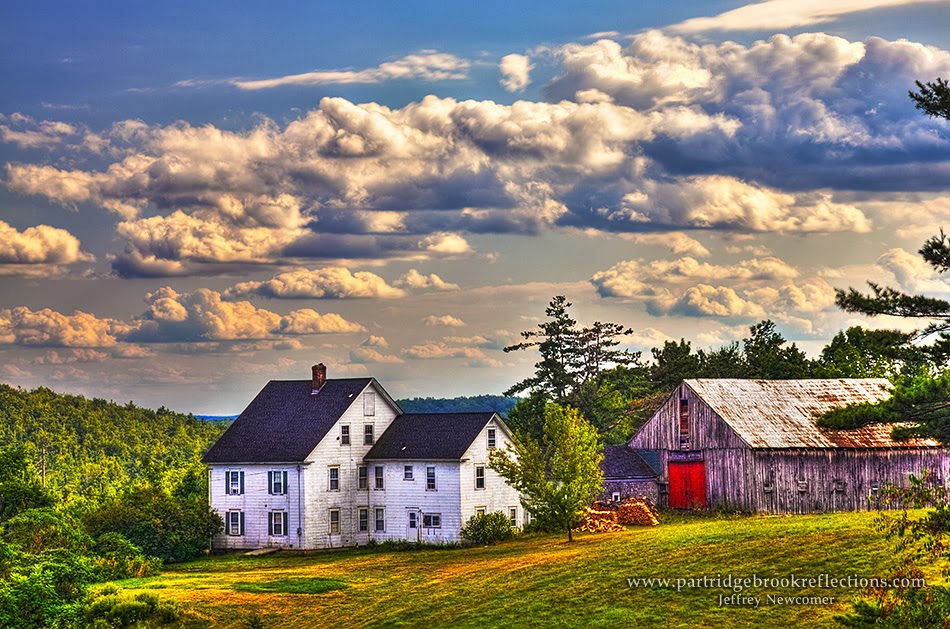


Going Crazy

For More Information:
HDR: Bon Appetitt
Taming the HDR Beast


Stop Motion:

Stopping motion requires fast shutter speeds that the high ISO
capability of new digital cameras has made more practical.  I remember, from the ancient past, when loading the camera with  ASA 400 film was a considered reckless, trading speed for the assumed damage to image quality.  Based on the lighting, I can now easily dial up the ISO to whatever is required, to allow a shutter speed fast enough to freeze the action or capture images in inky darkness..  The combination of the improved low light sensitivity of new digital sensors and the capability of software noise reduction algorithms has made it possible to maintain acceptable image quality at ridiculously high ISO levels.
For More Information:

 Accidental Bird Photography
Great Blue Heron on Harvey Pond


Long Exposure;

Long exposures have always been a capability of photography.  In 
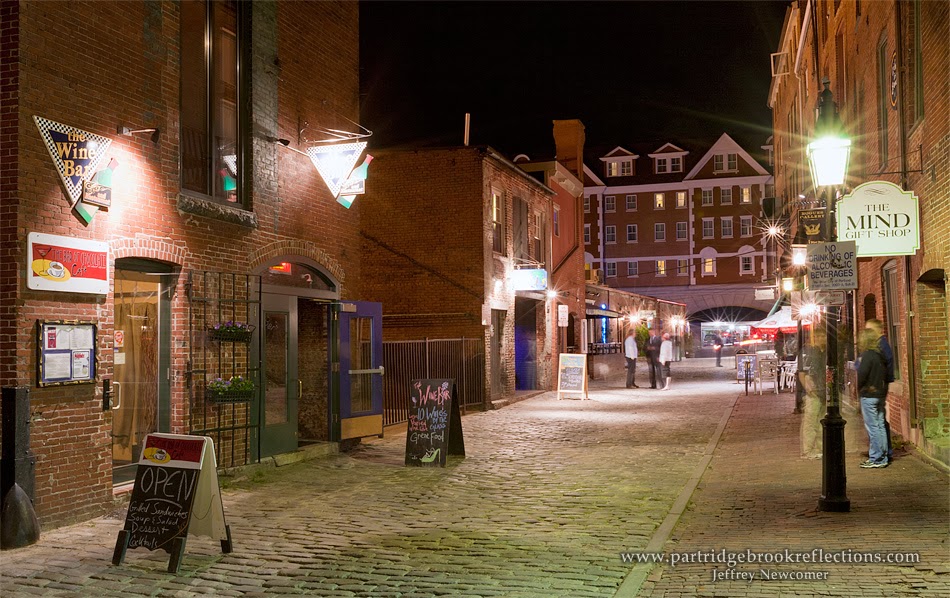
Crowded Portland Street
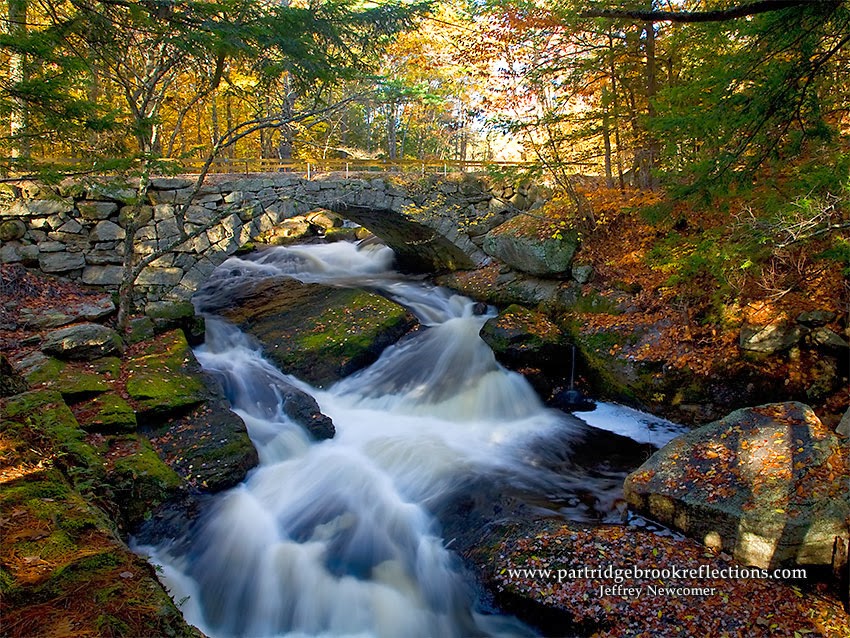
fact in the early days it was a requirement. Daguerreotype portraits required an exposure of 2 or more seconds. Today long exposures can accomplish a long list of magical effects.  An exposure of a even a second or less can transform a roaring chaotic stream into a soft dream-like confection, looking nothing like the original scene, but providing a sense of frozen movement.  Long exposures of a busy street can remove all the distractions of moving cars and annoying people,  magically focusing on the stationary scene.  Star tract images of the night sky transforms individual stars from points of light into majestic arcs rotating around the north star. All of these technique are made much simpler by the ability, in the digital camera, to immediately review the results and adjust exposures accordingly

For More Information:
Photographing the Magic of Velvet Water
Long Exposure Crowd Control
Star Track Photography


Deep Space:

While we are talking about night sky images, I think one of the
most impressive ways that digital cameras have altered our sense of nighttime wonder has come from the ability that long exposures and high ISO have to extend our vision into deep space. ISOs ranging from 1600 to 6400 and exposures of 20-30 seconds brings a dense sea of stars into view that are invisible to our eyes even on the darkest night.  Beyond doubt,  the celebrity of this celestial show is our own galaxy, the Milky Way.  The most impressive images usually show the Milky Way's brilliant band in some appropriately interesting setting, and there are now many programs and Apps that can tell us precisely when, and where to stand to place a lighthouse, a tree or a silo in front of the show.  I live in the country and I often get a clear view of the sky, but even here the digital camera easily converts a subtle smug into a breathtaking view of our galactic disc.
For More Information
Night Time Photography, Searching for the Milky Way
Photographing Comet PanSTARRS


Time Lapse
Time lapse photography compresses time allowing us to see in a few seconds what occurred over hours.  All that is necessary is a sturdy tripod, an intervalometer to time the exposures and software to assemble the hundreds of images into a video.  For quick and simple time lapse videos I have used Quick Time, but many other options exist. I'm still a novice, but I have enjoyed creating videos of the setting sun, billowing clouds,  or stars moving majestically across the sky.  I even have one of Susan and I decorating the Christmas tree. 


Monadnock Sunset


Tree Trimming


For More Information
Time Lapse Time


Focus Stacking
It may seem that the use of focus stacking to achieve a deep depth of field only replicates what our eyes can capture, but in fact eyes
have the same focusing  limitations as any lens and iris system.  The only reason that we feel we can see everything from near to far in sharp focus is that our eyes are constantly and subconsciously adjusting focus as we move our attention around the scene.  A photograph with sharp focus throughout is actually a representation of the world beyond the capability of our vision, but it does match the dynamic nature of our perception.
For More Information:
Focus I
Focus II
Hand-Held Focus Stacking


Of course there are more ways that digital photography allows us to see the unseen. Editing software can alter our vision and a world without a tangle of wires in front of every beautiful scene is a priceless gift of Photoshop. It has been thrilling to explore some of the photographic options available, but It is also humbling to realize all that I need to learn.  But then again the endless opportunities to learn are what make photography endlessly exciting.

Jeffrey Newcomer
Partridgebrookreflections.com

Sunday, February 23, 2014

Hand-Held Focus Stacking


Snow Peak, Mount Monadnock, Marlborough, NH
Using Auto-Focus Points to Hold the Frame

This week I wanted to share a simple technique to obtain multiple (or at least two) images for focus stacking while hand-holding the camera.


Focus Stacking
I have previously discuss in considerable detail the technique of focus stacking to achieve deep depth of field.  This approach

requires multiple images focused at different planes of the scene which are then combined in post processing to achieve sharpness throughout.  A key requirement of the technique is that the images all be framed to match when aligned in the computer.  With sophisticated software, such as Photoshop, the match does not have to be perfect, but typically this is best achieved with the camera locked down on a tripod.  It can be quite challenging to manually vary focus while trying to hand-hold the framing perfectly constant.  This is where my camera's auto focus points can come to the rescue.

I have never been a big fan of auto-focus for my landscape
Hibernation, Pomfret, Vt.  Two focus planes.
photography.  Even as the technology has improved, I tend to prefer to assure sharpness by manually focusing, often on a tripod and, in poor light frequently, using the Live View Screen.  But when I am faced with a scene which contains a discrete foreground and distant background,  I can often get good results with a two image stack, one focused on the foreground detail and the other on the background.  This is the situation where auto-focus can save me the chore of getting out my tripod, if I have it on hand.


Mount Monadnock
Most photographers are familiar with the technique of holding the shutter down half-way to lock focus on a part of the scene and then
recomposing for the final shot.  This is most frequently used when focusing a subject that is off center, but the same technique can be used to grab a couple of images for a simple focus stack.  In the example of Mount Monadnock shot from Marlborough, New Hampshire, I locked focus on the detail of the fence and then re framed to include the distant mountain.  The first image caught the fence in clear focus and then without moving the camera I locked focus on mighty Monadnock and shot again.  As I shot the first image I carefully noted the position of the central focus point square to assist in close alignment of the second image.  In more complicated situations, fully sharp focus stacking can require more than two images, but in bright light, when I can stop down, two are often enough to get good results, especially when there are just two discrete planes of interest. 

Canon 5D Mark II Focus points


Mill Ice, Harrisville, New Hampshire
My Canon 5D Mark II has 9 focus points displayed on the screen, but only the central square is a cross sensor, vertical and horizontal, and therefore the most accurate.  When possible I try to use the central point for focus stacking but there are many times when the central point aligns with neither the foreground or background in my desired composition.  Faced with this situation I can usually find one of the other focus points that will provide the coverage I need.  In my image of the frozen mill pond in Harrisville, New Hampshire, I angled the camera down to using the top focus point to lock in the sharpness of the foreground ice and then recomposed.  In my second image, the focus point was in perfect position to catch the iconic Harrisville Public Library. 


Mill Freeze


Using one of the 8 peripheral focus points can reduce the reliability of the auto-focus, especially in dim light or low contrast. To help, I have switched my focus lock from the shutter to a button on the back of the camera that doesn't require continuous pressure to maintain the focus.  In the mill pond image, I could lock the foreground focus with the central point and then switch to the upper point ready for when I refocused on the background.  Not all cameras can switch the focus button. The directions for mine were buried in an obscure corner of my manual, but, with practice, the ability to lock focus without having to hold the shutter down, works well for me in most situations.


Focus Button on Back of the Camera


Ashuelot River, Keene, NH,
Multiple Focus Planes


The trick with this technique is to hold the camera steady as you re-press the shutter and to learn how to move the focus point around the screen.  I have gotten good enough that I will occasionally try to move the focus point within the screen to catch more than just two images for stacking.  The more manipulations I try, the harder it is to maintain the frame, but Photoshop can do some amazing things with auto-alignment.  Still it is about at this time that I grab for the tripod.


The speed and accuracy of auto-focus in modern cameras is amazing and improving all the time.  I still like to use manual focus in many landscape situation but it is important to understand your camera's focusing capabilities and to use them when the time is right.

Jeffrey Newcomer
partridgebrookreflections.com

Sunday, February 16, 2014

Photographing a Winter Sunset


Chasing the Last Cold Light
As we in New England have been struggling through this year’s bone chilling winter, it is nice to recognize the first tentative promise of the coming spring, the days are getting longer.  In the depths of winter, I typically go to work and return home in the dark.  Even with the sparkling crisp winter days and the warm glow of our wood stove at night,  it is hard to escape at least a touch of Seasonal Affective Disorder depression.  But then, usually sometime in February, it suddenly hits me.  I’m heading home and there is still light in the sky.  It may be 10 below, but that sudden revelation fills me with an invigorating sense of hope.


Spring is Coming


Steeple Light, Westmoreland, NH
It was earlier this week that the revelation struck.  I was heading
from Keene, New Hampshire to my home in Spofford and I suddenly became aware of the beautiful evening light playing against the snow.  Actual warm sunlight!  I called Susan to warn that I might be a little late for supper, and then the only question was where should I go to chase the light.  I decided to head north.


I headed north from Westmoreland to Walpole New Hampshire generally along Route 63.  The images here where all (except one) captured as
Westmoreland to Walpole
the sun dropped below the horizon, over a period of about forty minutes, covering just eight miles, last Tuesday evening. Winter sunsets have a different quality than those during the warmer months.  Perhaps it has something to do with the clearer air or ice crystals diffusing the light as then float weightless in the sky.  I suspect that the glow from the snow cover affects the drama above, but the winter white certainly helps to strengthen the appearance of the foreground as it reflects the colors from above.

On this evening my first question was whether to find a dramatic spot and sit still as the light changed or to keep moving looking for various locations that might work with the evolving glow.  I decided to hit the road.  It is amazing how quickly the mood changes as the sun dips toward and then below the horizon.  Moment to moment the light provided different opportunities and challenges.  It helped that I knew this route extremely well and could anticipate how the illumination would compliment the lovely rural countryside.

 Gizmo's World

My first stop was at a favorite farm in Westmoreland on the Old Westmoreland Road just outside of Spofford.  Of course, if you
Gizmo's World
were going from Westmoreland to Spofford, you would call it the “Old Spofford Road”.  The sun was still above the horizon casting a warm glow on the snow in the pasture.  Gizmo, the farm’s prize bull, was warming himself in the evening light.  Yes the bull’s name is Gizmo, and I’m sure he finds that name endlessly annoying.  Regardless, he is a powerfully proud animal who seemed quite content to pose for the shivering photographer.


Park Hill Light

Park Hill Meeting House, Not at Sunset
My next goal was to reach Westmoreland’s Park Hill before the warm light faded from the buildings.  Park Hill is a lovely collection of classic houses arranged around one of the most beautiful white churches in New England.  It is just west of Westmoreland’s main village, but it is really a place unto itself.  The church, which stands on a small hill above village, has been the subject of many of my photographs, but on this evening the direct sunlight was fading fast and was best seen complimenting the red bricks of a house at the edge of the green.  The glow quickly slipped away, but while it lasted it seemed warm enough to cut with a knife.  And then it was gone, but I kept moving to enjoy the afterglow of the developing “Blue Hour”.

The Blue Hour
 The Blue Hour is the 45 - 60 minutes after sunset when the sky retains a cool blue tone before all descends to black.  I found a spot
on a hill that allowed me to contrast the deep blue with the sunset reds and gold reflected off the clouds on the horizon. I especially liked the detail of the farm house and the tangle of tree branches that dominated shadowy foreground.  Just a few minutes later, and from the same location, the sunset glow could only be seen in the reflections off the windows across the cow pasture.


Orchard's Last Light

In order to get one last shot at the fleeing light, I went to the hilltop
Alyson's Orchard, Walpole, NH
of Alyson's Orchard in Walpole.  From this high vantage point, there was just enough light in the sky to illuminate the ranks of apple trees.  It was interesting to see how the chaotically pruned branches contrasted with the careful linear order of the orchard rows.  The hill was lovely, clear and cold, but the light was nearly gone and I was ready for the warmth of our wood stove heated kitchen.  Of course I was also excited to see what magic I had captured on my innocent appearing CF card.


People often say that photography is about the light, almost as if "the light" was one thing.  Of course, we all know that light is always changing and that is what makes photography so endlessly fascinating.  The surprising variety of colors and moods in the sky over the short duration of a winter sunset is a magnificent example of this restless of quality of light and it is a privilege to be able catch even a small taste of that wonder.  And yes, I have seen the light, and can assure that spring IS coming.


Jeffrey Newcomer
Partridgebrookreflections.com

Sunday, February 9, 2014

Galapagos Islands a Photographic Journey, Part 2


Like No Place on Earth


It is now about four years ago that Susan and I went on a dream trip, 600 mile off the coast of Ecuador,  to the magical Galapagos Islands.  It was our most unique journey and I'm not sure why it has taken me so long to finish posting about the experience.  Back last spring, I posted about the first part of the trip, and I' am only now getting back to complete the story.  I'm giving a talk next week about the Galapagos to a women's group in Keene and that finally gave me the excuse to finish part 2.


In December of 2010 we joined a photography cruise among the Galapagos Archipelago aboard the National Geographic ship the Endeavour.  This trip focused on photography with the timing and pace of our explorations arranged to meet the needs of serious photography.  The Galapagos is a paradise for wildlife and nature photographers and in this discussion of the second half of our trip I will focus on the images.  Check out my first post for more information about the trip and the Galapagos Islands.  I will only repeat my admonition from last time.  If you have a chance to go to the Galapagos, don't think, just go!


Isabela and Fernandina Islands
Cave Along the Punta Vincente Roca
On the morning of our fourth day we had traveled around the north end of Isabela, the largest island of the Galapagos Archipelago and in the process  crossed the equator twice.  In the morning we boarded Zodiacs to explore the rugged lava cliffs of Punta Vincente Roca.  The western islands are
Galapagos Peguin
younger with more active vulcanism resulting in a terrain that is dominated by barren lava flows, but, because of cool, nutrient rich, up-flowing currents, the shore was teaming with wildlife. The show included Sea Lions, Marine Iguanas, Sea Turtles, and the Galapagos Penguins.  Later we snorkeled among the amazing variety of ocean fauna.  I had a
Cormorant "Wings"
chance to tail a giant Sea Turtle and watch schools of fish reacting to the presence of Black Tipped Sharks.  In the afternoon, we explored Punta Espinosa on Fernandina Island. The ropy lava flows provided perfect cover for the carpets of Marine Iguana, and we got a close look at the comic appearing Flightless Cormorants.  These birds improved their swimming capabilities by evolving away from winged flight.  Their useless stubby wings look ridiculous, but, since the birds have no predators that might require an airborne escape, wings no longer provided a survival advantage .


 Wing Drying


Santa Cruz (Day 5)
Puerto Ayora Fish Market with Friends
Although the Galapagos Islands are 97.5% uninhibited park land there are a few small settlements. Puerto Ayora is a town of 15,000 people on Santa Cruz Island.  It is the home of the Charles Darwin Research Station which works to understand and protect the unique qualities of
Baby Tortoise Learning a Lesson
at the Darwin Station
the Archipelago.  The station is noted for its  Giant Tortoise breeding program and, until recently, the presence of "Lonesome George".  George was the last surviving member of the subspecies of Pinta Island Tortoises.  Sadly years of attempts to crossbreed George with willing mates failed and he died, without progeny, on June 24th 2012.   He was over 100 years old.
Lonesome George, Rest in Peace

After a touch of civilization in Puerto Ayora, we traveled into the damp and surprisingly verdant highlands of Santa Cruz and had the opportunity to mingle with migrating Tortoises.  These magnificent ancient beasts travel at a glacial pace across the fields and seemed little concerned with our approach as long as we matched their slogging pace.  We discovered that the migrating Tortoises are all male.  The females  are smart enough to let the males do all the work.
 A Quick Video of Slow Tortoises

Cerrro Dragon and Sombrero Chino (Day 6)

Cerro Dragon is know for its restored population of Land Iguanas.
Land Iguana
 The color of these animals has evolved to match the arid brown soil of their surroundings.  They provide a  stark contrast with the black Marine Iguanas that bask on the lava flows by the sea.  Cerro Dragon means "Dragon Hill" and refers to a beautiful peak which dominates the island.  I was lucky to catch a Gray Pelican lounging in front of the hill during our sunrise visit to the beach.

Dragon Hill and Grey Pelican

The afternoon included more snorkling and a lovely sunset across the aptly named Sombrero Chino, or "Chinese Hat".

Sunset Over Chinese Hat

Bartolome & Santiago (Day 7)
From Bartolome Peak


 In the early morning of our last full day of the cruise, we climbed the 359 foot peak on little Bartolome Island.  To avoid erosion the trail has a wooden walkway with 372 steps.  The climb was challenging, but the view was well worth the effort.  We were treated to a stark volcanic panorama across the moon-like landscape of the eastern shore of Santiago.  Later we had time to leisurely explore two beaches populated by frolicking Sea Lions, Sally Lightfoot Crabs, Sea Turtles and flocks of Frigates and other sea birds.  
Sally Lightfoot Crab

Lava Heron
Our last hike of the cruise was along the shore of Puerto Egas on the western side of Santiago.  The point overlooks Buccaneer Cove, which was once a favorite anchorage for pirates.  The hike was notable for the wide variety of sea and coastal birds wandering the shore.  These
Yellow Warbler
included Yellow Warblers, Lava Herons and American Oystercatchers.  The Sea Lions appeared to be enjoying the warm early evening light, basking on the Lava rocks and gazing at the
American Oystercatcher
surf as the swells crashed against the shore. It was a lovely evening and a fitting conclusion to an amazing trip.  We all were reluctant to board the Zodiacs for the ride back to Endeavor.

The next morning we were back in Baltra.  After the flight to Guayaquil Susan and I flew to Ecuador's mountain capital of Quito to spend a couple of days with friends who live in the city.  We then spent a few days birding at Maquipucuna in the Andean cloud forest.  It was a fascinating experience, but that will be another story, or blog.

 Our Galapagos trip was truly a once in a lifetime experience. Lindblad and National Geographic did a wonderful job designing a cruise with the serious photographer in mind.  And the food was great.  We will be doing another Lindblad photography cruise to Alaska this summer and I expect a fantastic experience, but it seems unlikely to match our cruise among the totally unique Galapagos Islands.

I can only repeat, if you get a chance to go to the Galapagos, Don't Think, Just GO!


Surf on James Bay

For more images of the Galapagos :


Jeffrey Newcomer