About Me

My photo
Spofford, New Hampshire, United States
Jeff Newcomer had been a physician practicing in New Hampshire and Vermont for over 30 years. Over that time, as a member of the Conservation Commission in his home of Chesterfield New Hampshire, he has used his photography to promote the protection and appreciation of the town's wild lands. In recent years he has been transitioning his focus from medicine to photography, writing and teaching. Jeff enjoys photographing throughout New England, but has concentrated on the Monadnock Region and southern Vermont and has had a long term artistic relationship with Mount Monadnock. He is a featured artist in a number of local galleries and his work is often seen in regional print, web publications and in business installations throughout the country. For years Jeff has published a calendar celebrating the beauty of The New England country-side in all seasons. All of the proceeds from his New England Reflections Calendar have gone to support the Pulmonary Rehabilitation Program at the Cheshire Medical Center. Jeff has a strong commitment to sharing his excitement about the special beauty of our region and publishes a blog about photography in New England.

Sunday, March 25, 2012

Seeing in the Dark

Using Live View to Get Focus Right in the Digital Camera


There are times when deadlines seem to pile upon each other.

Library on Harrisville Pond, Harrisville New Hampshire
Harrisville, New Hampshire
This is one of those weeks. I am currently completing an article for the May edition New Hampshire To Do Magazine about Harrisville New Hampshire's remarkable efforts to protect their unique mill village. I am also working on my first official article for the New England Photography Guild Blog. I feel very honored to accepted among this talented and tireless group

Sap gathering the old fashion way with horse drawn sled and buckets, Stonewall Farm Keene New hampshire
Sap Gathering Tradition
Stonewall Farm
of photographers who are committed to celebrating the special beauty of our region. My first contribution will be about Route 124, one of the most beautiful roads around Mount Monadnock. Finally, I just finished shooting the Annual Sap Gathering Contest for Stonewall Farm in Keene New Hampshire. It is always great fun, but a tough slog for the horses this year without snow, or even mud to lubricate the skids. With all of this going on, I'm happy to have a quick tip to share on my blog this week


In two recent blogs I discussed stacking multiple images

Using Live View to focus in the dark I
Pick the desired focus point
with varying focus points to achieve extreme depth of field in the digital darkroom ( Check out : Focus I, Focus II ). I hope that these techniques did not seem too difficult and complex, but for me, and my aging eyes, the biggest challenge of this approach is getting the focus right for each 


Using Live View to focus in the dark II
Zoom in to focus
of the images in the field. The
 viewfinders in the newer digital SLRs have become brighter, but, especially when the scene is dark,  it can still be impossible to focus precisely. Increasingly, in these situations, I have been using my camera's "live view" capability to nail the focus. Many inexpensive point and shoot cameras use the live view on their LCD screens as their primary or sole mode of framing and focusing, but for many DSLRs this is a newer feature growing out of their expanding video capabilities.


A week ago I was shooting deep in the gorge formed by Catsbane


catsbane Brook West Chesterfield New Hampshire
Catsbane Brook Falls
Brook in West Chesterfield New Hampshire. I wanted to bracket my images to get sharp focus from the foreground leaves to the cascading water, but the fading light made it impossible for me to see where I was focusing. By switching to live view I was able to zoom in on the area of desired sharpness for each image. The LCD screen was bright enough to allow easy adjustment of focus and I came home with my images perfectly prepared for stacking in post-processing. I'm sure many of you are already using this simple technique, especially those who are my age, but there are a couple of points to mention. First, it seems obvious that this approach generally requires you to firmly lock down the camera on a tripod. Secondly, and perhaps less obviously, I always switch out of live view after focusing and before I take the shot. Depending on your shooting mode, exposure can change from shot to shot based on the brightness of the portion of the image that has been isolated for focusing. Of course this is not an issue if you are shooting in manual mode.
That's it. This kind of stuff is like the designated hitter in baseball, keeping us old farts shooting long after we should have hung-em up. I apologize to those whose cameras do not have live view capability, but, for you, I have another quick tip. Carry a pocket flashlight to illuminate the scene while focusing.

THERE, now if everyone is happy I have deadlines to meet.

Sunday, March 18, 2012

Controlling Perspective in the Digital Darkroom


 Getting It Right in the Digital Camera
Michigan Ave Chicago, Skewed


One of the most common problems in architectural photography is skewed perspective.  When we look up at a tall building our brains process the image projected on our retinas so that we see the structure as expected, with straight vertical walls soaring into the sky, but cameras do not have our marvelously sophisticated cerebral processors. The camera dumbly sees converging vertical lines which usually only become glaringly apparent when the picture comes up on the monitor. Converging vertical lines, often called key-stoning, can also affect landscape photography. Tall trees appear to lean in menacingly when viewed upward from the ground and, although this is often an interesting effect, it does not reflect a natural appearance. Perspective control has been a challenge since the earliest photographic images, and solutions in the field are the same for film and digital imaging. The cheapest approach is to find an elevated view point such as a ladder, building or hillside, or by moving away from the subject, anything to reduce the upward angle of view. With a digital camera the effect may also be reduced by holding the camera above your head, using the LCD for framing. View cameras with independent front and back rise/fall adjustments and Tilt-Shift lens can compensate for these effects in a much more elegant and precise manner, but at a very hefty price. The new Canon Tilt-Shift 24 mm lens costs $2200 at B&H Photo. Happily, for those of us with budgets less that a small industrialized country, the digital darkroom provides some effective and inexpensive solutions. Really, Photoshop is much cheaper than $2200!

As always the process starts in the field by getting it right in the digital camera.  The end result of any required post-processing will be much more natural in appearance if the severity of the original distortion can be minimized by adjusting camera position and angle. It is also important to remember that digital adjustments of perspective inevitably require cropping around the edges of the image. When capturing a picture that will need perspective adjustment it is helpful to pull back on the framing, providing a buffer for the eventual crop. Again this will not produce the best picture "straight from the camera", but it will save a ton of arduous cloning later.

Once you get home, perspective adjustment is actually quite straight forward. The following specific procedure applies for recent versions of Photoshop, but the concepts will be applicable to other photo editors.


Getting Ready


  1. First it is important to make the perspective adjustment early in the editing process. If you try to do this after you have applied masked adjustment layers, the masks will no longer match the proportions of the image layer and will have to be redone.

  2. Start by correcting any rotation in the image. Perspective adjustments will be simplified if the horizon starts out flat and any vertical lines in the center of the image are plumb. Check out my blog on an easy way to straighten horizon lines.

  3. To make room for adjustments it is helpful to reduce the size of the image on the screen creating "gray space".  Without this space the selection handles may quickly disappear outside of the image window.

  4. Press (Alt+") to apply a grid to the image. This will help in applying a more precise adjustment.

  5. Create a selection of the entire image (CTRL+A) or "Select All" from the Selection drop down menu.

The Magic


Choose "Perspective" or "Skew"


  1. In "Edit" menu >Transform> then choose either "Perspective" or "Skew".

  2. Drag the upper right and left corner handles outward to correct the key-stoning. When the "Perspective" tool is used, pulling one handle causes the other side to move as well. This applies the same adjustment to both sides of the image, but I prefer to use "Skew" in this operation since the handles can be moved separately to more precisely and independently adjust each side.

  3. Press enter when the perspective appears best and Photoshop's rendering will begin.


  4. When finished press "Ctrl+D" to deselect.


Finishing Touches
The image can now be cropped to the desired proportions. If the original image was framed too tightly cloning may be necessary to salvage lost pixels on the edges.


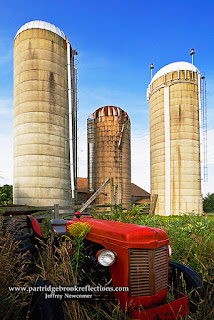
Of course there is a price to be paid for shoving pixels around in such aggressive ways. The proportions of the components of the image are unavoidably altered especially when more drastic adjusts are required. In the farm picture, the tractor became noticeably squatter in the altered image, but, in the final picture, I was able to minimize the effect by extending the vertical dimension upward using the "Scale" tool.  Unfortunately, when drastic adjustments are required, the areas that are subject to the greatest stretching can begin to loose sharpness.  This is where minimizing the "key-stoning" in the camera can be critical to a good post-processing result.


Loss of sharpness in the
stretched upper region

That's all there is to it. Now, take the money you saved on a tilt-shift lens and buy me dinner. You pick the place.


Sunday, March 11, 2012

Star Track Photography

Back Porch Milkyway,  Chesterfield New Hampshire

In the last several weeks I have been exploring star field and star trail photography. It have dabbled in these areas in the past including taking long star exposures on film years ago, but recently my interest has been renewed by a new project. Over the last year or so I have had the wonderful opportunity to work with Rabbit Ear Films, a small local group of dedicated, talented people, on a documentary film about Mount Monadnock. I am a rank amateur at video but have taken the opportunity to learn while contributing in small ways to this exciting project.  Our goal is to produce a feature length documentary, meeting the high broadcast standards of PBS. Leading our group is Steve Hooper a veteran editorial photographer for the Keene Sentinel and Dan White who works with Florentine Film, Ken Burn's production company. My role has largely been to collect high resolution "B Roll" video of views around the mountain. This works well for me since it is largely video versions of the still images that have been a major part of my portfolio. It is the kind of work that the 5D Mark II handles especially well.


Recently I began thinking about using time-lapse techniques to record star fields moving across the iconic profile of Mount Monadnock. I thought it would make a nice addition to the film.  I have experimented at home using an intervalometer and my old Canon 5D.  I decided to dedicate my 5D for time-lapse to spare the shutter on my newer Mark II. Recently Steve Hooper and I spent a clear cold evening recording the stars over Monadnock from the lovely home of friends in Marlborough New Hampshire. Over about 2 hours we record more than 200 images and after processing we were rewarded with about 13 seconds of a dramatic moving star field video. Unfortunately the lower resolution video here does not reflect the impact of the full resolution version.
Canon Intervalometer
A key component for this process is an Intervalometer which is essentially a remote trigger that permits precise control of exposures longer that the Canon's max of 30 seconds. Importantly for star photography the intervalometer also allows the capture of multiple exposures set at any interval desired. In this case the 200+ images were all 20 seconds long and taken every 30 seconds. You can set the parameters and then go get coffee or even better, take a nap. At the end the images can be assembled into a video using a number of different software solutions (I have been using QuickTime). As you might expect there are many important details that make for a spectacular video and I am still learning. I will discuss this in more detail in the future when I have more experience, but today I would like to discuss another use for these images.


Star Track Photography


Back Porch Star Tracks Chesterfield NH
Densely Packed
You have all seen pictures of the night sky taken over minutes to hours which show the stars tracing concentric circles around the north star, my Northern Hemisphere bias is showing. The pictures are a palpable demonstration of the rotating earth, but they also can be quite beautiful especially when the star trails are framed by interesting foreground elements. Years ago, when I experimented with this using film, I opened he shutter on "bulb" and timed long exposures with my watch. The results were great but noise was always a problem. The same long exposures can be captured on digital cameras with or without the use of an intervalometer, but there is also a noise problem with such long exposures on digital sensors.


Over prolonged exposures digital sensors heat up and the result can be increasing amounts of distracting noise. The severity of the problem varies with different cameras but with longer exposures it becomes a issue for them all. The digital solution is to take multiple images and combine them into a single picture using stacking, blending the layers to create a array of smooth continuous arcs. In my examples, I created the star track by using a selection of the images originally collected for the moving star fields. I experimented with the number of images, fewer creating a less densely packed sky as in the tracks over Monadnock. In the tracks over my back porch, more images created a much busier perspective.


The procedure starts with collecting multiple sky images. I hope I don't have to mention that a tripod is a necessity - don't be offended. You want a clear sky without a great deal of light pollution or intrusion of the moon, but some foreground elements can provide pleasant framing and context.

With the camera on manual you can experiment with exposure. Longer exposures will cut down the number of images required and increase the number of visible stars. The nice thing about the multiple-image approach is that, when you get home you can fine tune the final image by adjusting the brightness and the number of
Beaded Star Tracks with 10 Second Pauses
300x
images that you include in the stack. Shooting in RAW would allow the greatest leeway for post processing, but since QuickTime doesn't take RAW images, I use high resolution JPGs. It is generally best to take pictures immediately one after the other to avoid gaps that could result in a dotted line effect.  I was able to use my star field images, which had a 10 second pause between images, without any grossly apparent  gaps, but a close inspection shows that even this short pause leads to noticeable beading at high magnification.


Once home I pull up all of my images in Adobe Bridge;


Edit Single Image in Adobe bridge
I start by editing one representative image, adjusting brightness, contrast and color, and I try to find a balance between sharpness and noise reduction. When I'm happy with the results I save the settings and then load them to all the other images


Load Images Into a Stack of Layers
In Photoshop, from the "Files" drop-down menu, I select "scripts" and then the "Load Files into Stack" option to create a single file with each of the images as a separate layer. The result is a single image file with all the original images as layers in a stack. Because the camera was locked down on the tripod I haven't found it necessary to align the layers. 


Apply "Lighten" Blending Option to each layer
In order to get the stars to shine through all of the layers the blending mode must be changed to "lighten" on each image layer. This blending mode allows anything in a layer which is brighter than the layers above to shine through. This can be done manually, but I have created an action to make the change on each layer with a single click. There are a number of programs available which do this manipulation automatically, but I find it helpful and entertaining to reveal the layers one at a time, watching the arcs build until they reach the a level which seems best. 


Once I am pleased with the blended image, I flatten the file and can
Plane Trails from Boston
then fine tune the, much smaller, image. One inevitable subject for editing are the ubiquitous airplane trails. In the time-lapse videos these flash by like shooting stars, but on star track images they are random streaks across the image. It is of course a matter of taste, but I think it is worth the time to edit out these scars. Of course airplane trails can be reduce by shooting away from busy flight routes and by shooting later at night. Air traffic falls off significantly after midnight.
Star Tracks over Monadnock (Cleaned)
Less Densely Packed


That's about it. Not too complicated, but with impressive and unique results. Just a couple of other technical points. First if you plan to record many images over an extended period of time you should be sure to use a fresh battery. This is especially important when you are out in the cold. Once you have all the settings locked in, switching off the camera's LCD monitor can extend battery life. If you decide to get a intervalometer you will find that the official Manufacturer versions are quite expensive. The Canon intervalometer is $135, but you can get knock-offs for around $30 that look and work the same. My intervalometer came from China, it cost $25 and has worked without any problems.


So get out on the next clear dark evening and give star photography a try.  There is a lot to learn and I feel I am just beginning. As spring arrives it will be much less uncomfortable and we can come home with something truly special.

Sunday, March 4, 2012

Showing Off


Finding the Best Places to Exhibit Your Photographs
Brattleboro Vermont Works Bakery Cafe


I never miss an opportunity for self-promotion so this week I would like to talk about what makes a great venue for an exhibition of your work. It is not by accident that I just hung twenty pictures for my March show at the Brattleboro Vermont Works Bakery Cafe, one of the nicest commercial locations in my corner of New England.
Keene New Hampshire Wor
The Works started in Keene New Hampshire and has expanded to six locations across New England. The store in Keene was one of the first places in which I ventured to show my work and over the last few of years I have shown there three times as well as at the Cafes in Portland Maine, Portsmouth New Hampshire and now in Brattleboro. In addition to great food the Works has always been committed to providing a quality venue for local artists. There are many restaurants in our region who allow artists to display there work, but too often it is an afterthought with little if any investment in providing a setting in which the art can be well presented. I have said this before but a romantic candle lite restaurant is about the worst place to show pictures on the walls. The Works Cafes are a happy exception to this rule. Richard French and his staff have invested in sturdy hanging systems and nice lighting to make the art a part of the experience and not just an avoidable distraction.
Morning Mist, Peacham Vermont


So what are the features of a good exhibition venue. Here I am speaking mostly of restaurants, but the criteria are essentially valid in any location. I have seldom found the ideal location but here are some factors to consider as you explore your neighborhood for places to "show the work".


Audience :

Moss Glen Falls, Granville Vermont
It is important to show to people who will appreciate and hopefully buy the work. I apologize for the snobbery, but a nice restaurant is likely to be more productive than the local pizza joint or sports bar and the pictures will be less likely to be sprayed with beer. Where possible it helps to think of your audience when you select pictures for the exhibition.  Glorious autumn foliage is obviously great for an October show, but moody cemetery images are probably not the best choice for a hospital waiting room. Traffic is also important. I once hung my pictures along an isolated back hall of a local church where it was greatly appreciated by several lovely members of the choir who walked by once every Sunday. Finally, and perhaps most importantly, when exhibiting at restaurants, one of my absolute rules is that I don't show where I wouldn't want to eat.


Hang in There:


Over the years I have seen every kind of hanging system,
Hanging Strip at Brattleboro Works
and non-system. In many places the hanging system involves a hammer, some nails and an instruction to "not damage the walls". I have never understood how an owner of an otherwise nicely decorated establishment could allow artists to pound fresh holes in their walls on a monthly basis. Permanent hanging systems are much cheaper than the cost of replastering the walls, they come in all forms and can make a great difference.
They improve the attractiveness of the show and make installation much easier and more secure.
Hanging at the Keene Works
The Works in Brattleboro uses inexpensive wood strips installed about 2/3 up the exhibition walls. The pictures are easily arranged and adjusted hanging from metal hooks. There are much more expensive solutions, but this allows a nice clean and consistent presentation. The Works Cafe in Keene uses a serpentine wood skeleton with hanging screws that, by itself, is a piece of modern art. There are many solutions, but the one important factor is to confirm the system can handle the weight of your pictures


Lighting:


For me lightening is the most important factor in a venue. The one or two people who regularly read my blog know that complaints about inadequate or non-existent lighting are a recurring issue.
Track lighting at the Brattleboro Works
Photography comes alive with good illumination and it dies in the dark. Restaurants often have soft lighting scattered about the tables which either causes hopeless glare or impenetrable gloom. Sadly good lightening is expensive, but when used properly it can make the art a key element of a regularly refreshed experience. At the Works, track lighting is designed to highlight the walls and can be adjusted to maximum effect. Heaven! 

Dump Rake in the Mist, Dummerston Vermont

Timing is Everything:

Lupines, Sugar Hill New Hampshire
As I plan my shows I always pay attention to the calendar. Nobody buys art in January, and it is helpful to select work that either celebrates the current season or anticipates the next.  I try to be in my favorite locations during autumn and the Christmas holiday season, but here is never a bad time to show the work.  The ideal exhibition slots always seem to go early, so it is crucial to plan ahead.  The best time to ask an owner about a future exhibition is when you are taking down the last one.


Security:

Velvet Surf, Pemiquid Light
Missing in Action,
I hate to have to bring this up but, since I did have a picture stolen from a show, I feel it is important to mention. My picture was snatched from an unattended wall in a local mall. After being angry and then a little flattered, I ended up with an appreciation of the importance of having people watching the work. And if you happen to see this picture hanging in someone's home and notice a small crack in the glass at the lower right corner give me or Law and Order a call.


I am writing this as I sip my coffee at a corner table at the Works. Nice place. Wonderful photographs. I never tire of watching people look at my work, so if you are in the area drop by. Unfortunately right now the place is mostly populated by pimply teenagers, awash with raging hormonal angst. Not the best audience. Add that to my list.

Invitation, Hinsdale New Hampshire
Winters Grip, Spofford, New Hampshire


If you can't make it to Brattleboro this month, check out the images on my Brattleboro Works Flickr Set: