About Me

My photo
Spofford, New Hampshire, United States
Jeff Newcomer had been a physician practicing in New Hampshire and Vermont for over 30 years. Over that time, as a member of the Conservation Commission in his home of Chesterfield New Hampshire, he has used his photography to promote the protection and appreciation of the town's wild lands. In recent years he has been transitioning his focus from medicine to photography, writing and teaching. Jeff enjoys photographing throughout New England, but has concentrated on the Monadnock Region and southern Vermont and has had a long term artistic relationship with Mount Monadnock. He is a featured artist in a number of local galleries and his work is often seen in regional print, web publications and in business installations throughout the country. For years Jeff has published a calendar celebrating the beauty of The New England country-side in all seasons. All of the proceeds from his New England Reflections Calendar have gone to support the Pulmonary Rehabilitation Program at the Cheshire Medical Center. Jeff has a strong commitment to sharing his excitement about the special beauty of our region and publishes a blog about photography in New England.
Showing posts with label Depth of field. Show all posts

Sunday, April 22, 2018

Aperture Size and Depth of Field, The Jesus Factor

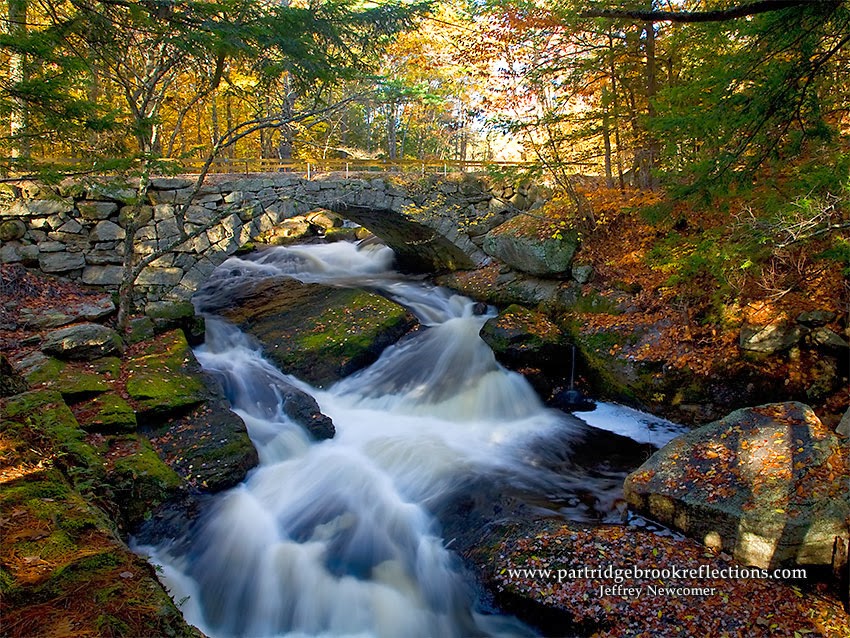
Garwin Falls, Small Aperture / Deep Depth of Field

I often say that much of what I know about photography comes from teaching classes and writing my weekly blog.  That is particularly true when I get asked questions that I can't easily answer.

Whence Cometh f Numbers?


f numbers, Where Dragons Dwell
A few years ago, I was observing one of Steve Hooper’s great photography class sessions at Keene State College’s Cheshire Academy for Lifelong Learning.  A student came up to me after the class to ask a seemingly simple question, “Why do the f numbers form such an apparently random sequence, and why do they go in the wrong direction.  


Of course, I have always known the f stop sequence.  I understood that f/8 represented an aperture that is half the size of f/5.6, but I never felt that I needed to understand the origin of this, seemingly nonsensical progression.  


Suddenly, it bothered me that I had such a minimal understanding of this fundamental aspect of camera function.  The result of this revelation was a two-part search.  The first to understand the explanation myself, and secondly to find a way to explain it to future students.  It wasn’t easy, especially because the explanation involves MATH!, including inverse ratios and squares, but it was worth the effort.  Not only did it clarify the weird f stop sequence, but it also explained other mysteries of lens function.  You can check it out in my Exposure article from November 2014 (I hid my explanation at the bottom of the article!). 


It was a valuable process of exploration and discovery, all coming from a simple question, and a question that I never thought required an answer.  Just one example of how my need to explain photography to my students has led to my own education.  And, this week, it happened again.

Introduction to Digital Photography - The Question
Abby at f/3.5, Nice Shallow DOF
I am currently in the middle of my Introduction to Digital Photography course at Keene Community Ed.  This week’s class was all about Exposure.  I was explaining how aperture size impacts the amount of light reaching the sensor, and also affects depth of field.  You know the drill, wider apertures lead to brighter images but also result in shallower depth of field.  But then the question came, “Why does a wide aperture result in a small depth of field?”


Peggy's Cove Sunset, Nova Scotia
Small Aperture: Deep Depth of Field
I responded with my usual insightful answer that I use when I don’t know how to explain something, “Because if does!  Jesus made it that way!”  Surprisingly, that seemed to be a sufficient explanation for most of the class, but it is more likely that they just realized that they couldn’t expect any more enlightenment from me.


But the question was asked, and I knew that I couldn’t expect any sleep until I understood the answer sufficiently to explain it to my students.  Happily, the solution is straight forward and in no way related to a deity.  I thought I had a superficial understanding, but I  found a diagram from Wikipedia that I was able to modify to demonstrate the phenomena more clearly.  


The upper and lower figures show the imaging of three objects at different distance from the lens.  The top is seen through a wide aperture and the bottom through a smaller.  In both cases the lens is focused on the center dot (2) and dots 1 and 3 are further and nearer respectively.  For me the essential thing to note is that, regardless of aperture, all three dots are brought to a point of sharp focus (purple dot), but only 2 (blue) reaches that focus on the surface of the sensor.  The rays from Dot 1 (red), which is the most distant, converges on a point in front of the sensor. By the time the rays reach the sensor plane they have spread, and therefore the image does not appear sharp.  The focus point for the near dot (3) (green) is at an imaginary point converging at the back of the sensor, and therefore also leaves a blurred image.   


In the top figure, the wide aperture gathers more light, but the wider opening results in a more drastically splayed distribution of rays, leading  to a bigger area of blur.  These areas of blur are often referred to as “Zones of Confusion” (Green Bracket) and, when the zone is big enough, the subject will appear out of focus.

In the bottom figure the smaller aperture leads to a more columnated distribution of the rays.  This leads to a darker exposure, but also the most drastically splayed rays are blocked.  The focus point for each dot is the same but, because of the small aperture, the rays reach the sensor with a smaller area of blur, and the “Zone of Confusion” can be small enough that our eyes may see them as sharp.  Furthermore, with a small aperture, the subjects can be further from the point of perfect focus before the dot spread (the zone of confusion) is enough to appear blurry.

This is why a large aperture has a smaller depth of field.  
QED.  


Shifting Sensor Plane
Shifted Sensor for  Increased DOF
One more thing to notice from this diagram.  Because all of the dots reach a sharp focus point somewhere, it can be seen that the sensor can be angled so that all of the points can be captured in sharper focus ( see figure).  This is why view cameras and tilt-shift lenses can record greater depth of field, by shifting the back or, more often, the lens to intersect with a broader range of focus points. Nobody asked, but I’ll throw that one in for free.

I can’t wait to lay this stuff on the next meeting of my class!  That will teach them to ask questions I can’t answer!


Sunday, January 3, 2016

A Vertical Rut ?


Image 1

A Rambling Compositional Self-Examination

Today I was backing up the last three images that I had processed and suddenly realized that I could be in a compositional rut.

Image 2

I have always been a fan of depth of field, but I couldn't miss that, without any forethought, those three images all followed the same compositional theme. They all showed a distant barn, but with the focus on an interesting foreground. In two I highlighted the contrast between the dusting of snow and the protruding remnants of the autumn leaves and grass. The other pictured the field before the snow had FINALLY fallen. In all cases the distant barn is, to varying degrees, a point of interest, but the real focus is the detail in the foreground. I like all three images but I had to worry that I was suffering from a worrisome lack of creative imagination.

Image 3


I tell myself that I let the scene dictate the composition, but sometimes its possible to rely on the same old tricks. A survey of images on the internet shows that the vast majority are shot in horizontal or "landscape" orientation, but for some reason I seem drawn to the vertical. Perhaps I need to create a new year's resolution to change things up, but first I needed to understand the scope of the problem. I started by scanning through my winter photographs from the last few years. I couldn't actually review all of my images but rather studied those on which I had chosen to devote significant editing efforts. After this critical review I came to a few, not so startling, conclusions. 

 
  • Yes, I have a fascination with foregrounds, but I continue to believe that, when attention begins within an interesting foreground, the viewer starts with a sense of being present and grounded in the image. After that we can drawn the eye anywhere else in the scene while the feet remain firmly planted.


  • Just a Barn?
    Whether it be the pasture in the foreground, the mountains seen in the distance or a combination of layers of interesting detail, I have always believed in the importance of placing the predominant subject of a photograph within context. As I reviewed my select winter images I was happy to discover that I could find almost no examples of a barn, a covered bridge or barnyard animal that was portrayed as an isolated "thing". Instead of finding pictures that I could describe only as, "This is a picture of a pretty barn.", I was happy to find most with fuller stories, "This is a picture of a barn in the mist at the end of pasture bordered by a wire fence".  It is all about context. 


  • I do tend to compose many of my images within a vertical "portrait" format to emphasize the foreground, but this emphasis does not require a portrait orientation and many of my images are grounded nicely with a landscape perspective. Manipulation of lighting, focus and subject can be highly effective at drawing attention to the foreground regardless of the orientation of the image.

     
  • Aspect Ratio
    In fact I was relieved to discover that I don't shoot predominately in the portrait orientation. This is where Lightroom came to the rescue. Within the metadata portion of the Library Filter it is possible to display "Aspect Ratio". When applied to my subset of edited images I was surprised to discover that only 45% where shot in Portrait, not even a majority! This group of images included many from more than ten years ago and it occurred to me that my artistic sensibilities might have matured over the years. I then looked at the Aspect Ratio of the images captured over just the most recent couple of years and discovered that the percentage of portraits was exactly the same, well actually dropping to 44.7%. Not much change in my "sensibilities". This may be seen to confirm my lack of artistic growth or may demonstrate that I have found my compositional sweet spot. At any rate, I can say emphatically that I DON"T shoot solely in the vertical.


  • Ok, I must be honest. One reason that I have so many landscape images is that I am always thinking about my next calendar. The monthly images for my New England Reflections calendar are always in landscape and so after shooting a scene that cries out for portrait orientation, I will often rotate the camera and search for an effective "calendar view". 


    Apart from calendar shots, there is great value in forcing yourself to capture images in both 
    orientations. You never know when a client might decide that your picture is lovely, but that it's too bad that what he really needed was the shot in the other orientation.  Since most people shoot in landscape, the standard rule is, "The best time to shoot in portrait mode is right after you shoot in landscape". For me the rule is true, but the exact opposite.
Glad I Shot the Landscape


This is a startling amount of ramblings, being triggered only by a chance viewing of three similar images, but if you take anything away it should be:


  1. Context is important.
  2. Foregrounds are often important.
  3. And if that means shooting more verticals, then whose counting.
  4. Except me.

Jeffrey Newcomer
partridgebrookreflections.com
603-363-8338


Sunday, November 23, 2014

Exposure - The Basics Part II


Everything in Balance

In my first exposure article I discussed how aperture, shutter speed and light sensitivity of the sensor work individually to affect 
proper exposure, but I 

Exposure Control with the Histogram
never explored what proper exposure actually is or how it is evaluated.  A simple definition might be that proper exposure is achieved when the recorded image matches the appearance of the original scene in brightness and tonal range. Simple enough, but no photographic media can fully reach this goal.  Pictures are always a compromise, but with the tools available in modern digital cameras, there is no longer any excuse for poor exposure. The challenge comes from the choices you make to get there.  

In previous articles I've talked about the use of the histogram to monitor  and  adjust exposure.  There is an infinite number of ways in which the three factors controlling exposure can be balanced to achieve an acceptable result, and although all can  appear the same on the histogram, the real challenge is to find the best balance among the secondary effects of these adjustments, so that the depth of field, motion control and image noise all conspire to achieve your vision.  This week I will suggest one, step by step,  approach to the balance of exposure control.


To briefly review from Part I, the camera controls of exposure include two which govern the amount of light and one which controls the sensor's sensitivity to the light which falls upon it. As the exposure triangle showed, each adjustment has a secondary effect that must be consider as the 3 factors are balanced.


Amount of Light:
1) Aperture: Effects Depth of Field
2) Shutter Speed:
Effects the Ability to Stop Motion

Sensor Sensitivity
3) ISO: Increased Sensitivity Increases Image Noise

Taken Individually, the effects of these basic controls are easy to understand, but the challenge and the real art of photography comes from how these adjustments are balanced in different situations of light, composition, action and the purpose of the image.


A Matter of Priorities
 Ok, you are standing in front of the perfect vista. A glance at the Exposure Triangle would suggest that proper exposure is achieved through the simultaneous consideration of the effects of all three factors, aperture, shutter speed and ISO, but it can be unnecessarily complicated and confusing to try to balance the three components of exposure at the same time. Happily, most photographic situations inherently dictate which of these factors is most important and the resulting prioritization can provide a more reasonable step-wise approach to finding the best compromise among the factors contributing to exposure. The first step is to decide whether the control of aperture or shutter speed is the most important for the specific photographic situation.

This is usually referred to a Aperture or Shutter "Priority".  Happily most cameras provide modes that allow you to lock in your priority.

"Priority" Settings

Aperture & Shutter Priority
http://www.101-learn-dslr-photography-basics.com/
Most cameras have settings for aperture or shutter priority. In "Aperture Priority" the aperture is fixed and adjustments in exposure compensation affect only the shutter speed. In "Shutter Priority" it is the shutter speed which is fixed. Of course these same adjustments can be done in Manual mode, but in manual, the exposure does not automatically change when the meter detects a change in light. The Manual setting is great when you are learning about the functions on your camera, but many photographers shoot on Aperture or Shutter priority based on the requirements of the subject. On Canon cameras Aperture Priority is marked as "Av" and Shutter Priority "Tv" on Nikons it is "A" and "S".  
------------------------------------------------------------------------------

Baby Steps: A Systematic Approach
Ok, we start by considering the effects that changes in the aperture and shutter have on the final image, then step one is to study the scene and :


  • 1) Decide whether aperture or shutter speed is most important to control for the desired effect.


Aperture Priority and Depth of Field

 
Broad Depth of Field
As I discussed in my first article on exposure, the camera aperture affects exposure based on the size of the opening allowing light to strike the sensor. I went into an involved discussion of why increasing aperture numbers (f/stops) resulted in smaller openings and less light. Happily, the aperture's secondary effect on depth of field follows a more intuitive progression with larger numbers resulting in larger bands of sharp focus. Small apertures with high f/stops, such as f/ 22 or f/32, lead to broad depth of field which is often preferred in landscape photography where sharp focus from
foreground to infinity is needed. With wide apertures, such as f/2 or
Shallow Depth of Field
f/4, the narrow depth of field can help to isolate and draw attention to a subject, de-emphasizing distracting elements in the foreground and/or background. Traditionally, narrow depth works well in portrait photography where the attention is usually centered on the eyes, but it can also be effective in many other situation to mute distractions such as in macro or wildlife photography. 


In these situations, control of the depth of field may be the most important factor and therefore the "priority". You can set your desired aperture in "aperture priority" mode and then achieve optimal exposure with changes in the shutter speed.  As predominately a landscape photographer I stay in aperture priority for about 90% of the time.


Stopping the Jump


Shutter Priority and Motion


Shutter speed controls exposure by governing the length of time that the sensor is exposed to the light and the shutter's secondary effect is on the ability to freeze motion. When capturing athletic events, running animals or birds in flight a fast shutter speed can keep the subject from becoming blurred, and in these situations the shutter speed adjustment may be the primary priority with the aperture allowed to drift to maintain the overall exposure. On occasions a
Slow Shutter
slow shutter speed might be preferred, such as when capturing a soft image of flowing water or when a blurring of motion can be used to imply movement. In many of these situations the specific depth of field may not be critical and setting the camera on Shutter Priority would be the best first step.


Considering the Side Effects
As we've seen
, for any ISO, the Aperture and Shutter Speed settings are locked together to generate the exposure. Once aperture is fixed there is only one shutter speed which will result in proper exposure and the same fixed relationship is true when shutter speed is set as the fixed priority. In other words, once the priority setting is fixed the other  "secondary" factor, whether aperture or shutter is strictly dependent. So step two is :

  • 2) Whether it is Aperture or Shutter that is the "Non-Priority" or dependent setting, you must decide whether the effect of that setting on the image is acceptable.


Deep Depth of Field
Consider an example that I frequently experience. I'm shooting a grand landscape and I want to get the maximum possible depth of field to record both the foreground flowers and the distant
mountains in sharp detail. I set my camera to aperture priority and stop down to a small fixed aperture of f/22.  Great, everything from foreground to background looks sharp, but when I take the picture I find that the shutter speed that was required to maintain the desired exposure for that small fixed aperture had drifted to 1/4 second and, what seemed like a gentle breeze, had been enough to smear my beautiful flowers into a messy abstract blur. I could wait for a, usually nonexistent, lull in the wind or I could consider focus stacking (beyond the scope of our current discussion), but it is at this point that an ISO adjustment could save the day.

  • 3) Apply the ISO Fudge Factor if Needed

As in my example, it often happens that the optimal adjustment of your priority setting leads to unacceptable side effects from the resulting secondary or dependent factor. In my landscape scenario I might be able to get by with a wider aperture, perhaps f/16 or f/18, which would allow a faster shutter, but these "compromises" too often yield unsatisfactory results in both DOF and shutter. A change in ISO is often a better solution. Adjustments in sensor sensitivity or "ISO" shift rather than break the aperture/shutter connection. In my example an increase of ISO from 100 to 800 (3 stops) will allow an increase of shutter speed to 1/30th of a second which may be fast enough to freeze the flowers without affecting my exposure, aperture or depth of field.


Adjustments in ISO is the new third control on exposure which digital photography has made practical. ISO has no effect on the
amount of light hitting the sensor, but by managing the chip's sensitivity it can make possible a selection of aperture and shutter that does not force a compromise in either depth of field or control of motion. Of course the magic of ISO Adjustment is balanced by the effect of increasing ISO on the amount of digital noise in the image. As I discussed in Part One, digital noise can be muted in post processing, but in the end it must be balanced against all the factors that contribute to the quality of the final image.


Consider one more example. Assume you are set up to capture a

Pick-Off
baseball player streaking down the line to beat out a base hit. You set a fast shutter speed of 1/1000th of a second, in shutter priority, to freeze the motion. Your ISO is set to 100 and the resulting f/stop is at f/4. This wide aperture and resultant narrow DOF works well to isolate the runner against the blurred grandstands. A great choice, but if you want to see the faces of the screaming fans in the background you could increase the ISO to 1600 causing the f/stop to shift 4 stops to f/16. Both the runner and the fans would then be in dramatically sharp focus. The only question would be whether the increased image noise at ISO 1600 is acceptable.

I would love to show you an picture to fully illustrate this scenario, but, give me a break!, I'm a landscape photographer. Use your imagination! The best thing I could do was to show Youk (Kevin Youkilis, for non-Red Sox or, ick, Yankee fans) diving for first.

Light Modification


There are many schemes and techniques which work to control exposure by modifying the light.  Natural changes in light happen all the time, just wait for the sun to come out from behind that cloud, move from bright sunlight to the shadow of a tree or just come back when the light is better.  Natural light can also be modified with  filters, diffusers or reflectors and artificial light can be added with flash. These can all be effective, but the basic relationships between aperture, shutter and sensor sensitivity are always there and a system for balancing these fundamental adjustments makes achieving the perfect exposure much easier and sensible.


So to summarize this approach:

No triangle, but maybe a flow a diagram will help

1) Decide whether aperture or shutter speed is most important 
to control for the desired visual effect. It is usually easiest to use the Aperture or Shutter Priority setting on your camera to fix your desired priority.

2) Whether it is Aperture or Shutter that is the "Non-Priority" or dependent setting, your next step is to decide whether the effect of that setting on the image is acceptable.

3) If the resulting depth of field or motion effect is not what you want, it is time to consider applying the ISO Fudge Factor to shift the Aperture/Shutter relationship into a range that controls all of the important issues. Hopefully without an unacceptable level of noise in the image.


Simple !?

There are many other systemic approaches to achieving perfect exposure. The important thing is to pick one and start using it regularly. Happily
with digital photography we get immediate feedback on the LCD screen, making the learning much easier. I hope that you will, quite quickly, find that the considerations, that I have so painfully presented, will become second nature.  Your camera will feel comfortable in your hands, like a familiar hammer. So go out and pound some nails.


Other Articles About Exposure


Jeffrey Newcomer
Partridgebrookreflections.com


Sunday, March 2, 2014

Seeing the Unseen


This week I would like to celebrate the amazing capability of modern photography to help us to see the unseen.  My goal is only to touch on what is possible and to provide links to more detailed explorations.

From its invention, photography has been a medium that was prized for its ability to capture what we see in flawless detail, freezing more of "reality" than could ever be absorbed by our limited visual perceptions.  Without special forethought, my photography has tended toward images that celebrate the beautiful detail of the natural world.  I have tried to use the remarkable powers of digital photography and editing to place viewers in locations as I have seen them, working to display the mood as well as the reality of the remarkable world around us.  But photography has always provided a means to see things beyond our normal perceptual capacity, that are not accessible to the naked eye (THERE, I got the word "naked" into the article - TWICE!  Watch my hits soar!). 


Anyway, In the beginning photography captured "Reality" in its own way based on its technical limitations.  It has always had the
remarkable ability to freeze time, not only for moments but for centuries.  As initially a black and white medium, photography washed the color from the world and forced a new focus on light and pattern that had always been hidden under a gaudy chromatic layer in our perception.  Photography has expanded and altered our vision in many other ways and, digital photography, although not required for many of these advances, has made them more easily accessible and pushed opened the door to these unseen new worlds.  I have discussed many of these techniques in much greater detail in previous articles, but here is a brief list of some of the ways that photography can open our eyes to a new worlds.  Let the journey begin.  


Infrared
Infrared photography is perhaps the best example of seeing the
unseen.  Infrared is the portion of the electromagnetic spectrum beyond deep red.  Although these longer wave lengths are beyond the ability of our eyes to detect, infrared photographs have been captured since the early 1900's.  Today a digital camera can be modified to respond to the infrared making it much easier to capture this invisible world.  The infrared spectrum shows foliage in brilliant light, making summer scenes appear like winter landscapes.  It cuts through haze and reveals puffy clouds in stark contrast against inky black skies.  With infrared photography it is often possible to capture powerful images on days when the light is too flat and dull for strong conventional images.  I found it well worth the expense to modify my old Canon 20D doorstop to become my IR camera.
For More Information:
 Infrared, Seeing Photography in a Different Light


HDR

High dynamic range photography can be used to overcome the 
Improving Dynamic Range
limitations of film and digital sensors in recording the full range of light and dark apparent to our eyes.  In this sense it actually improves the ability to capture what we can already perceive, but HDR and its evil twin, tone mapping, has the seemingly unbounded artistic capability to mutate reality, 
turning a mirror on the artists mood and
fancy rather than the reality of the moment.  I love HDR because it provides such an unlimited opportunity for self-expression.  I generally use these tools to render images that better reflect the dynamic range that was apparent in the field, but occasionally it is fun to go crazy, jump through the looking glass,  and produce something that truly would never be apparent to the eye.


Going Crazy

For More Information:
HDR: Bon Appetitt
Taming the HDR Beast


Stop Motion:

Stopping motion requires fast shutter speeds that the high ISO
capability of new digital cameras has made more practical.  I remember, from the ancient past, when loading the camera with  ASA 400 film was a considered reckless, trading speed for the assumed damage to image quality.  Based on the lighting, I can now easily dial up the ISO to whatever is required, to allow a shutter speed fast enough to freeze the action or capture images in inky darkness..  The combination of the improved low light sensitivity of new digital sensors and the capability of software noise reduction algorithms has made it possible to maintain acceptable image quality at ridiculously high ISO levels.
For More Information:

 Accidental Bird Photography
Great Blue Heron on Harvey Pond


Long Exposure;

Long exposures have always been a capability of photography.  In 
Crowded Portland Street
fact in the early days it was a requirement. Daguerreotype portraits required an exposure of 2 or more seconds. Today long exposures can accomplish a long list of magical effects.  An exposure of a even a second or less can transform a roaring chaotic stream into a soft dream-like confection, looking nothing like the original scene, but providing a sense of frozen movement.  Long exposures of a busy street can remove all the distractions of moving cars and annoying people,  magically focusing on the stationary scene.  Star tract images of the night sky transforms individual stars from points of light into majestic arcs rotating around the north star. All of these technique are made much simpler by the ability, in the digital camera, to immediately review the results and adjust exposures accordingly

For More Information:
Photographing the Magic of Velvet Water
Long Exposure Crowd Control
Star Track Photography


Deep Space:

While we are talking about night sky images, I think one of the
most impressive ways that digital cameras have altered our sense of nighttime wonder has come from the ability that long exposures and high ISO have to extend our vision into deep space. ISOs ranging from 1600 to 6400 and exposures of 20-30 seconds brings a dense sea of stars into view that are invisible to our eyes even on the darkest night.  Beyond doubt,  the celebrity of this celestial show is our own galaxy, the Milky Way.  The most impressive images usually show the Milky Way's brilliant band in some appropriately interesting setting, and there are now many programs and Apps that can tell us precisely when, and where to stand to place a lighthouse, a tree or a silo in front of the show.  I live in the country and I often get a clear view of the sky, but even here the digital camera easily converts a subtle smug into a breathtaking view of our galactic disc.
For More Information
Night Time Photography, Searching for the Milky Way
Photographing Comet PanSTARRS


Time Lapse
Time lapse photography compresses time allowing us to see in a few seconds what occurred over hours.  All that is necessary is a sturdy tripod, an intervalometer to time the exposures and software to assemble the hundreds of images into a video.  For quick and simple time lapse videos I have used Quick Time, but many other options exist. I'm still a novice, but I have enjoyed creating videos of the setting sun, billowing clouds,  or stars moving majestically across the sky.  I even have one of Susan and I decorating the Christmas tree. 


Monadnock Sunset


Tree Trimming


For More Information
Time Lapse Time


Focus Stacking
It may seem that the use of focus stacking to achieve a deep depth of field only replicates what our eyes can capture, but in fact eyes
have the same focusing  limitations as any lens and iris system.  The only reason that we feel we can see everything from near to far in sharp focus is that our eyes are constantly and subconsciously adjusting focus as we move our attention around the scene.  A photograph with sharp focus throughout is actually a representation of the world beyond the capability of our vision, but it does match the dynamic nature of our perception.
For More Information:
Focus I
Focus II
Hand-Held Focus Stacking


Of course there are more ways that digital photography allows us to see the unseen. Editing software can alter our vision and a world without a tangle of wires in front of every beautiful scene is a priceless gift of Photoshop. It has been thrilling to explore some of the photographic options available, but It is also humbling to realize all that I need to learn.  But then again the endless opportunities to learn are what make photography endlessly exciting.

Jeffrey Newcomer
Partridgebrookreflections.com