|
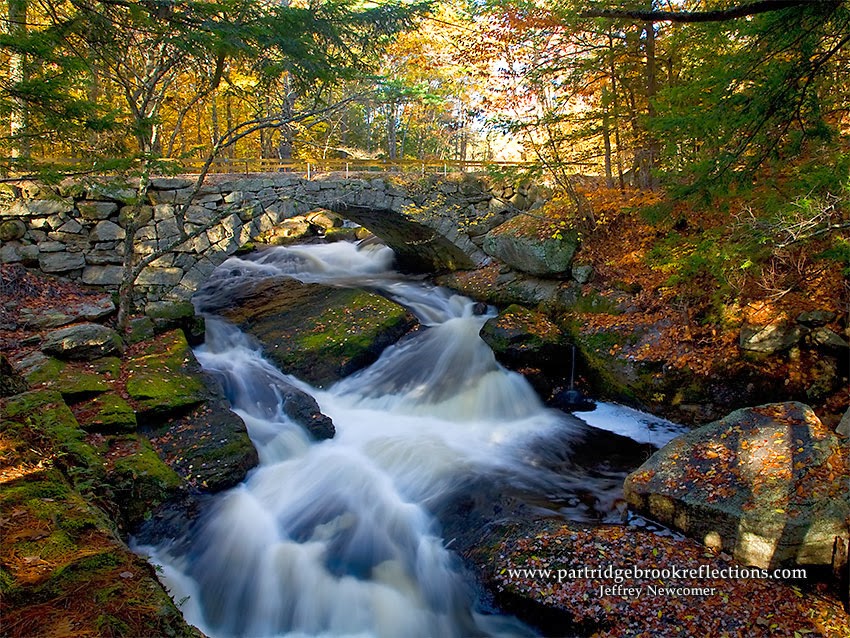
| Garwin Falls Veil |
I’m getting things together
for my Spring Waterfall Workshop, coming up this weekend. I have been scouting many of my favorite
regional waterfalls, and although I know that some of the more ephemeral falls
can dry up quickly, so far, the flows are looking good. Still I am praying for a little more rain
this week.
The workshop begins Friday night with a meet and great at the house We
will plan our rough itinerary for Saturday and I will have a chance to review some
of the essential elements of waterfall photography. So here is a review are a few essentials for capturing falling
water.
1 ) Being There
It should be obvious, but the first step
is to get out to the falls when there is a vigorous flow of water. The spring run-off can be a reliable source,
but later, the results are usually best following a significant rain storm.
 |
| Polarizer & Graduated ND Filter Arethusa Falls, Livermore NH |
As
always, the right conditions are critical. Overcast or rainy weather is often
best. Bright sunlight produces brilliant reflections and hot spots that can
make exposure impossible without heavy application of HDR techniques. Soft
diffuse light allows all of the detail in the rocks and water to shine through
and the lower illumination makes it much easier to use long exposures that
create the soft look that is so popular. In brilliant sunshine, even your
smallest aperture and slowest ISO will not be enough to adequately slow the
shutter speed. A fully applied polarizing filter can take away a couple of
stops, but when more light reduction is needed a neutral density filter may be
needed to extend the shutter duration to render that magical, cotton candy,
effect.
2) Getting Steady
It seems silly to have to say this, but
waterfall photography requires a sturdy tripod. My only advice about tripods is
spend the money to get a good one. If you buy a cheap tripod, you will be
replacing it every few years and all you will ever have is a CHEAP tripod. An
expensive tripod will be the only one you will ever need. It will save money in
the long run and you will always have a GREAT tripod.
3) Filters
 The one essential photographic filter is the polarizer, and this is
especially
true for waterfall photography. The polarizer performs the magic of blunting the
reflection on rocks and water allowing the native colors to shine through, but
the maximum effect is not always the best. Some reflection may be helpful to
add definition to the flowing water. Experimentation is the best way to
 |
| Non-Polarized |
find
the right amount, but at times the optimal polarization for the rocks may be
too much for the water. Here is where the fun of stacked images and masking can
come in, but, seriously, you can drive yourself crazy with this stuff. Most of
the time a comfortable compromise is available. Finally, as I mentioned above, the
polarizer blocks one or two stops of light making it easier to capture
the long exposure required to "velvetize" (my word, feel free
to steal it) the water.
 |
| Polarized |
4) Shutter Speed
I am often ask about the correct
shutter speed for waterfall photography, and I have struggled to find a simple
rule that can be generally applied.
 |
| Forty Foot Falls Cascade |
A
few years ago, I tried to apply some scientific rigor to the problem. I spent a couple of hours at one of my
favorite local collection of falls and cascades, Forty Foot Falls,
along Merriman Brook in Surry New Hampshire. These falls, include drops of varying
heights and can be easily approached from different distances. I took multiple
images from various locations with shutter speeds in increments from
1/30th to 4 seconds. The weather was perfect, a dark overcast shortly
following a significant rain storm. After careful analysis, the results of this
non- randomized, single blinded study were conclusive and a
failure.
 |
| Forty Foot Falls Test |
 The best shutter for any waterfall is dependent
on too many factors to surrender to a simple formula. The most important
confounding factor, of course, is individual taste. We all have our own preferences for the degree of "velvetization". My
overall goal for waterfalls is a shutter speed which is long enough to provide
the velvety look without being so long as to render the water without
The best shutter for any waterfall is dependent
on too many factors to surrender to a simple formula. The most important
confounding factor, of course, is individual taste. We all have our own preferences for the degree of "velvetization". My
overall goal for waterfalls is a shutter speed which is long enough to provide
the velvety look without being so long as to render the water without  any
texture and interest. On average I find this to range between 0.25 and 1
second, but the best result is dependent on a number of factors, including the speed
of the water, the depth, interruptions to flow and the distance from the falls. I love the soft look, but a fast shutter can work to freeze the random calamity of a boiling cascade
any
texture and interest. On average I find this to range between 0.25 and 1
second, but the best result is dependent on a number of factors, including the speed
of the water, the depth, interruptions to flow and the distance from the falls. I love the soft look, but a fast shutter can work to freeze the random calamity of a boiling cascadeThe Speed of the flow depends on the height and steepness of the falls and the degree to which the water falls unobstructed. Faster flows are best captured with faster shutter speeds to preserve a sense of texture.
Deep falls obscure the underlining rocks and depend on the water detail for visual interest, making faster shutter speeds necessary.

Obstructions such as rocks and ledges slow the flow, diverting and fanning the water into streams that can be captured at longer shutters before detail is lost.
 |
| Pond Brook Falls in Time |
 |
| Moss Glen Falls |
All
of these effects are blunted by greater distance from the subject. My more distant image from
Moss Glen Falls in Granville, Vermont
was
taken with full polarization and a 10 second exposure, but from this distant
the interest came from the streaming and fanning of the water and was not
weaken by the loss of surface texture.
5 ) Exposure
It can be challenging to achieve good exposure for both the bright
 |
| Gentle HDR : Catsbane Brook |
falling water and the surrounding dark rocks.
Multi-image HDR techniques can work well, but capturing the full dynamic
range in a single image is more difficult.
The best compromise is one that results in an image that allows the
salvaging of both the highlights and shadows.
In this situation, “exposing to
the right” (ETTR) can be critical.
Increasing the exposure as far as possible, without blowing out the
highlights, will allow for better detail in the shadows as the image is
processed. It is important to avoid blowing out the highlights. Even a small area of pure white, without detail, can shine out awkwardly and no amount of processing can retrieve detail where none exists
To allow for long shutter speeds, the f
stops are typically quite high. I
usually try to avoid the diffraction caused by extremely small apertures, but
waterfall photography often forces me to accept f stops in the 18-22 range.
6) Safety (This should really be number one)
 |
| Steep banks below the Ashuelot Arch Bridge |
Special attention to
safety is seldom more critical than when standing precariously on slippery
rocks, inches from a precipitous drop to raging water, or while sliding down a steep bank to reach a roaring brook. The basic rules are
the same.
First: Most of the best shots are seen from difficult to
reach locations, where your life may be in danger. More importantly, your equipment will be at
risk of loss or damage. Start by
assuming the worst WILL happen.
Second: A
few simple precautions, faithfully followed, can substantially reduce the risk
of disaster. The key is to slow down and focus on your gear and your feet.
Generally, the beautiful stuff will still be there once everything is secure.
Slow Down
 |
| Scary spot over Lower Purgatory Falls |
Think before you move and
never assume that your foot will hold on the leaves and wet rocks. Have a back-up, a tree, a hiking pole or just
your other foot. When adjusting your
equipment try to keep at least two points of control, two hands, a hand and a
neck strap or hands and the tripod.
 Never fully trust the
tripod. Whenever my camera and tripod
are over water, I always keep my neck strap on.
At times it can be awkward, all it takes is a gust of wind or a slipping
leg for your camera to end up in the brook.
A few years ago, I was shooting by a stream in Harrisville. I turned away for a second to grab something
from my bag and my tripod toppled over dunking my camera in the icy water. It
was a costly way to learn an important lesson.
Never fully trust the
tripod. Whenever my camera and tripod
are over water, I always keep my neck strap on.
At times it can be awkward, all it takes is a gust of wind or a slipping
leg for your camera to end up in the brook.
A few years ago, I was shooting by a stream in Harrisville. I turned away for a second to grab something
from my bag and my tripod toppled over dunking my camera in the icy water. It
was a costly way to learn an important lesson.
Painful experience has also
taught me to keep the holder under my filter as I unscrew. The filter always seems to come off as you
re-grip.

Changing lenses can be
especially scary. When I am in a
vulnerable position, I try to avoid switching, but, if absolutely necessary, I
stop, put everything down and try not to juggle more than one thing at a time.
I secure one lens before taking another out, and position myself to screen
everything from the mist.
Waterfall photography
provides many exciting opportunities and challenges. Hopefully these suggestions will help
encourage you to get out there and enjoy one of this season’s greatest
attractions.
Jeff Newcomer
partridgebrookreflections.com
partridgebrookreflections.com
603-363-8338