About Me

My photo
Spofford, New Hampshire, United States
Jeff Newcomer had been a physician practicing in New Hampshire and Vermont for over 30 years. Over that time, as a member of the Conservation Commission in his home of Chesterfield New Hampshire, he has used his photography to promote the protection and appreciation of the town's wild lands. In recent years he has been transitioning his focus from medicine to photography, writing and teaching. Jeff enjoys photographing throughout New England, but has concentrated on the Monadnock Region and southern Vermont and has had a long term artistic relationship with Mount Monadnock. He is a featured artist in a number of local galleries and his work is often seen in regional print, web publications and in business installations throughout the country. For years Jeff has published a calendar celebrating the beauty of The New England country-side in all seasons. All of the proceeds from his New England Reflections Calendar have gone to support the Pulmonary Rehabilitation Program at the Cheshire Medical Center. Jeff has a strong commitment to sharing his excitement about the special beauty of our region and publishes a blog about photography in New England.

Sunday, November 2, 2014

Lightroom Map Module, Finding That Red Barn

 
Green River Bridge and Falls, Guilford, Vermont

There are just TOO many red barns in New England and not enough space in my aging brain to keep track of all of their locations. For that reason I have been forced to be compulsive about labeling my images with their GPS locations. Over the years, I've used a number of different techniques, but I'm happiest with my current approach which depends on the amazing power of the Lightroom Map Module.  If you don't have Lightroom or haven't used the Map Module to its full potential, consider this your wake-up call.

Past History 

 I started recording GPS coordinates using a separate GPS logger and special software to synchronize the images based on the time they were taken. It worked reasonably well, but added several, often time consuming, steps to my work-flow. A few years ago, while on a trip to Yellowstone and the Tetons, I misplaced my small logger and, of necessity, began using my iPhone to capture GPS labeled images in key locations. I would then manually add the coordinates to the metadata of the images taken in those spots. I just needed to remember to grab the iPhone picture in each location. All this was a bit complicated, but it worked, as long as I stayed rigorous in my work-flow.  Then I finally broke down and got Lightroom 5 and everything changed.
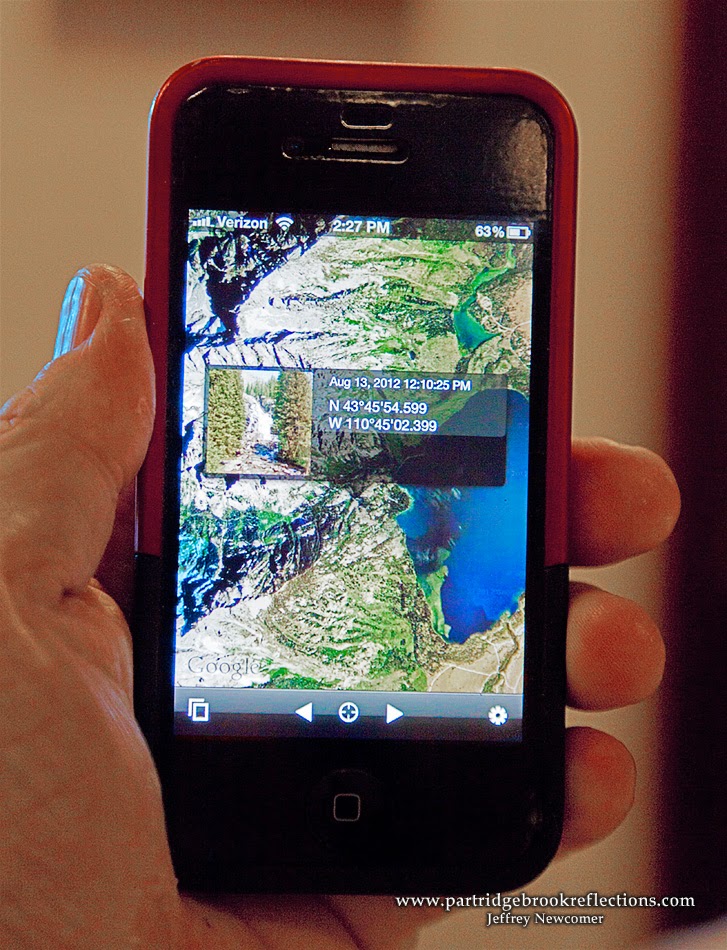
 I purchased Lightroom primarily to simplify the organization and accessibility of my hundreds of thousands of image files, but in a short time I found myself using it to streamline file uploading and to do the majority of my editing, finishing the process in Photoshop. Since Lightroom 4 the program has also included a nifty Map Module which makes it much more intuitive and easy to add and use GPS Coordinates in your images.  Here's how it works.

Finding Yourself
Upon return from a photo shoot I usually have a good idea about
the locations of most of my images, especially when my shots are close to home. The Map Module portrays a Goggle Map in the display. It does require that the program has a connection to the internet to allow access to Google Maps, but then it is easy to click and drag groups of images to their known locations on the map.  Immediately the images are labeled with their coordinates and a small tag (or "Pin") appears on the map including the number of images placed in that location. Hovering the cursor over the tag reveals a thumbnail showing the top image from that spot and an arrow allows scrolling through all of the other images in the stack. I'm usually able to place tags for familiar locations within a couple of minutes. I can drag the map for nearby spots or use the search box to jump to more distant locations. I still use my iPhone images to fix less familiar locations, and I can find them on the map by typing the GPS Coordinates into the search box. I just need to remember to put the negative sign in front of the longitude coordinates to avoid ending up in Kyrgyzstan.  
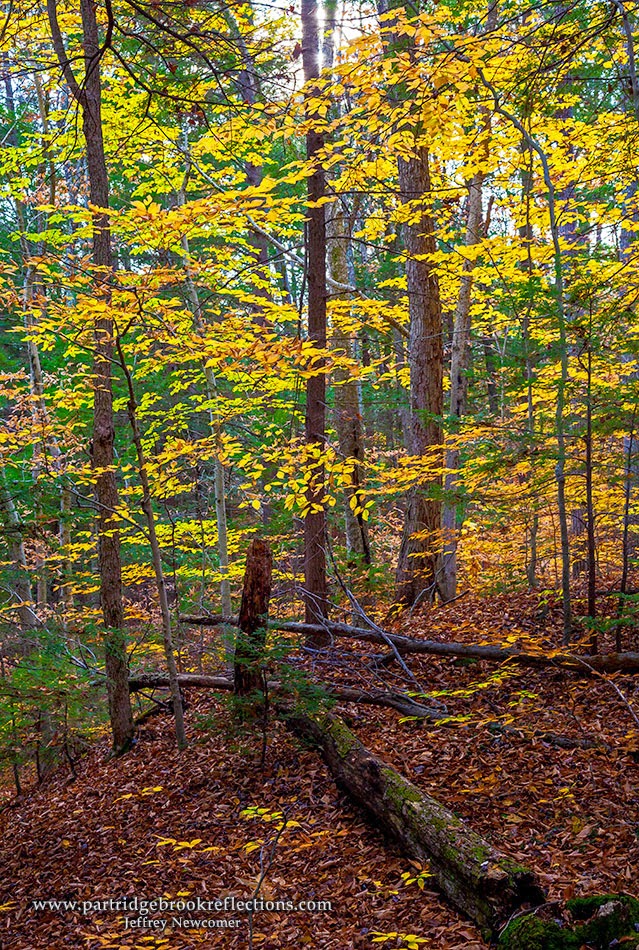


Ancient Red Oak in Friedsam Forest


Randon Aside
Actually if you dig straight through the earth from New Hampshire you don't end up in Kyrgystan or, as tradition would suggest, China, but actually in the southern Indian Ocean north of the isolated French island of Kerguelen.  There!, you must admit that you have learned something from this post.


The Map Module provides a fun way to quickly see where you have traveled on your photography shoots and quickly preview the images taken in any area.


Pins marking nearly 60 thousands images in the Monadnock Region


Tracking
A Hike in Friedsam Town Forest
I have just begun experimenting with the use of GPS Logging to
follow me on shoots. Lightroom allows the input of logging files (gpx format) which can then be synced to the images taken during that time frame. I use "myTracks", one of a number of simple, free GPS Logging Apps. The app regularly records locations into a file, which, after moving it to Evernote,
Forgotten Wall, Friedsam Forest
I am able to email to my desktop. For accuracy the camera's clock must be synchronized with the time on the iPhone. A few days ago I took a hike through a section of the Friedsam Town Forest in Chesterfield.  Most of the images here are from that hike.  I started the logger and then placed my iPhone in the top pocket of my backpack. Once home I was able to upload the track to Lightroom and the location of each photo was shown on a detailed track of my hike. It actually worked, but the logger is a hog on the iPhone battery, 90 minutes of use dropped power to about 20%.  For longer hikes I will bring a power backup unit, but in the car I can hook the iPhone to a power adapter. So far it seems that the logger will tick away even when I answer the phone or adjust my music.


Friedsam Town Forest, Chesterfield, NH  (pin # 8)


Putting the Data to Work

 
Spofford Lake & Harvey Pond
Once in Lightroom, the database of locations can be used in a number of helpful ways. If I'm trying to find the location of a particular image, all I need to do is click on it in the Map Module and it will be bring me right to the spot.  Within the Library Module, you can click on the small Pin Icon at the bottom of the any thumbnail and the map location will appear.  Alternatively, if I am looking for all the images around a certain location, I can click on "All Photographs" in the Library Module and then switch to the Map Module to bring up tags to all the labeled images in any area on the map.  


Map Location Icon


 Zooming the map out to include much of Cheshire County, you can see that I have taken more than just a few images in my home region, nearly 60,000. Tags with a pointer refer to a single location and rectangular tags indicate that more than one location is under
Harvey Pond with resolved locations
that spot. As I zoom in, these markers separate to the discreet locations. Another particularly nice function in the Map Module is the ability to produce customized "Locations" of photographs from a defined area. By drawing a circle around a region the program will pull all of the images from that area into a separate "Location" and will continue to add images to the collection as pictures are uploaded. 


"Location" including Cheshire County
 
Defining a location makes it easy to jump to that spot and by clicking on a Map Location in the Library metadata filter, all the images within that circle can be selected for editing. 

Filtering for the Cheshire County Location


Red BarnSearch

Lightroom is a remarkably capable program with more features than I can sensibly be expected to understand, but much like Photoshop, it is a constant adventure finding new toys to help me manage and fulfill the potential of my images. And now I DO know where that red barn is.


The Red Barn, Windsor, Vermont


Julieanne Kost  of Adobe TV has an excellent video describing the features of the Lightroom Map Module. 


Jeffrey Newcomer
partridgebrookreflections.com


Sunday, October 26, 2014

Road Safety and Etiquette for Photographers


Autumn is always about being out on the road. It starts sometime in September when I head north in an effort to catch the early color. As the leaves change closer to home the trips can be shorter but often more frequent. It is not unusual for me to spend most of many days out wandering the back roads looking for new and familiar color. All this driving has reminded me of the importance of driving safety and etiquette. I used to tell people that I expected that I would die in a fiery crash when, distracted by some colorful tree, I wrap my car around a tree, but over the years, I think I have learned to be more careful when out on a shoot. I am still susceptible to distractions from the breathtaking beauty of New England, but I try to follow a few simple rules in hopes of extending years that I have to enjoy splendor.


Keep Your Eyes On the Road
Duh. This seems too obvious to require mentioning, but it can be

Fly by Foliage
the most difficult to control. On a shoot I am always scanning the sides of the road for photographic opportunities. I look for those sudden moments when foreground and background features snap into alignment creating a special balance, but I have to constantly reminding myself that the road ahead must be the primary focus of my attention. While looking forward, I try to anticipate oncoming features and consciously limit sideward glances to fractions of a second. If I can see an approaching opportunity, I will slowly pull off the road, but often these magic alignments fly by before I realize their passing. Here is where my most important rule comes into play.


Drive Past and Come Back
Drive Past
My most dangerous driving behavior was my tendency to slam on the breaks when I suddenly became aware of a beautiful scene.
This often occurred without any recognition of the condition of the roadside or who was behind me. It is amazing that I'm still here, but somehow I survived to adopt my most important driving mantra, "Drive By and Come Back". It is really very simple. When I see something that might turn out to be good opportunity, I don't dwell on it. I continue down the road until I can safely turn around and then find a safe place to pull over to study the scene. Often when I return the vista is not what I had hoped, but I've only lost a few minutes of time and I get to live to see the next spectacular view just around the corner.


Get Your Car Off the Road
Off the Road
Being essentially lazy my natural tendency is to try to park right next to the spectacular vista. Unfortunately this often means pulling over on a narrow shoulder with my car hanging precariously into the road. This is not only unsafe, but also incredibly rude. To avoid tarnishing the reputation of photographers everywhere I try to find a place that allows me to get out of the way of passing traffic. This may require a hike back to my goal, but what the hell, after hours in the car I can really use the exercise. If my best angle places me in the middle of the road, I try to get completely off the road well in advance of any passing car. Again, this may seem an obvious precaution, but it can take patience to find a moment when I can catch the scene without being a hazard to myself and passing traffic.


 Let Them Past 
Even on what would appears to be deserted back roads, it is amazing how often cars will come up behind me. It is certainly, at least in part, because I tend to amble along as I survey my surroundings. It is good manners to let these innocent folks pass and I always feel more comfortable when my frequent scans of the rear view mirror show no impediment to my slow progress and occasional stops.


Limit Distractions
The Look


Do I really have to say, "Don't text while driving!"?  On a shoot I
have many potential distractions. My GPS and iPhone are mounted at the corner of the windshield, away from my view of the road, but still crying for attention. I usually have a map on the passenger seat, coffee and a sandwich and of course Nellie clamoring to be let out to pee. I do what I can. My phone is now set up for hands free operation. I select my music before I hit the road and I usually mute the lovely voice of my GPS as she constantly tries to send me down roads that are actually unnavigable cow paths. I have no easy solution for Nellie. I just try to let her out whenever it is safe. 

Ok, I Don't Hang the Map on the Dash


Most of these "Rules of the Road" should seem self evident, but it is a valuable exercise for me to state them more formally. Hopefully it will increase the chances that I may actually follow them and perhaps survive to enjoy for a little longer the wonders of New England. Drive Safe.

Jeffrey Newcomer
Partridgebrookreflections.com

Sunday, October 19, 2014

Lessons from Autumn


Ancient Sugar Maple, Guilford, Vt.

The fall colors are still building in the Monadnock Region, but my October file directory is already filling with stuff that I can't
Spofford Lake Fog
wait to bring into the digital darkroom. Right now I am spending much of my post-processing time uploading, naming, labeling and assigning GPS locations, but as I go along, I can't resist diving into some of the most promising images. My favorite pictures all seem to have there own stories and I've realized that they also seem to illustrate various aspects of photography, many of which extend beyond the special challenges and opportunities of autumn. This week I thought it would be fun to show a few of my most recent images and use them to illustrate a collection of quite random thoughts about photography. Ok, It is really just a lame excuse to show some of my fall pictures. This time of year, the volume of new material makes it difficult to decide which few deserve to be splashed across the social networks.

So, in no particular order:


Color Doesn't Need to Overwhelm
Through Birches
With so much color around this time of year, it is easy to overwhelm the viewer with a cacophony of brilliant reds and golds, but this is a situation in which less is often much more. It is important to consider what you want the color to accomplish in your image. In the picture of the birches in Reading Vermont, the small colorful tree provides a nice focus of contrast against what would otherwise be rather oppressive columns of black and white. 

Dummerston, Vt


I have always liked the way the grassy road leads to the small house in Dummerston, Vermont, but the bright orange trees were just enough to, even more strongly, draw the eye.


 Small Compositions 

Harrisville, NH
I must confess that I generally hate pictures of broad hillsides dominated by a chaotic blend of fall colors. No matter how richly saturated, I get a bit dizzy as my eyes have no idea where to go. With fall foliage, the smaller you go, the easier it is to create an image that draws the eye to a strong focus. The guidelines of good composition apply
Climbers Pomfret, Vt
equally for small subjects as they do for grand landscapes. As I drive the autumn backroads, I am always scanning for these small tableaus, usually with a strong single color and contrasting elements. On my way to Harrisville last week I saw this simple combination of bright red and gold leaves splashing behind a white birch trunk. All I needed was a simple two image focus stack to get both elements in sharp focus.


Bad Weather is Your Friend
Spofford, NH
It may seem surprising, but we photographers generally hate strong light and it is especially true in the autumn where reflected sunlight can prevent the rich colors from shinning through. Cloudy skies, mist and even rain are great times to get out and capture the foliage. Sadly wind and rain also tends to knock the leaves to the ground, but while it lasts, foul weather is great weather to capture the full beauty of the season. A couple of days ago I took Nellie for a early morning walk to Spofford Lake. The fog was slowly rising, but I was still able to use the mist to provide a sense of depth and drama to the color. Nellie had no idea why I was running around trying to place the fog in as many interesting places as possible. 


A week ago I was cruising central Vermont for foliage. The weather began bright, but, as is often true, the clouds gathered as the day progressed. As I explore the road through Pomfret I found this old barn engulfed in foliage that was enriched by the soft light. Even in the overcast my polarizer helped to bring out more of the deep colors.


Focus on the Foreground
"Focus on the foreground", is an often heard axiom of landscape

photography. A strong foreground provides depth to an image and
Jenne Farm, Reading, Vt
gives the viewer a sense that they are in the scene, what I like to call "the feet on the ground effect". The spectacular hillside color of autumn can sometimes draw our attention away from the foreground, but it remains a key part of many strong compositions. The Jenne Farm in Reading, Vermont is thought to be the country's most photographed farm. You have undoubtedly seen the iconic images from the hill overlooking the farm, but I always try to find different angles. When I circled by a couple of weeks ago, I was early for the peak color, but I went to one of my favorite views, down the hill looking along the serpentine fencing that leads the eye to the classically red barn and farm house. Here I could focus more on the interesting overgrown fence in the foreground making the lack of full color less important. 


Sleepy Hollow Drop


Another over done classic is the Sleepy Hollow Farm along Cloudland Road in Pomfret, Vermont. On this day the imposing, video monitored, gate was inexplicably open and I was able to sneak to the side of the drive to focus on the colorful foreground leaves. This seemed to add warmth to this often cold and too perfect scene.


Soft Focus to Draw the Eye
Landscape photography is about clearly seeing the landscape, and I spend a great deal of my photographic efforts trying to get images that are sharp, front to back. The argument is that this best duplicates the way we see a scene with our own remarkable eyes,

Marlborough, NH
but that is demonstrably false. Just stare at your thumb held at arms length and you will notice that everything beyond that point falls off to soft focus. The remarkable thing about our visual system is that we rapidly and unconsciously shift our focus to keep whatever we are looking at clear and sharp. Cameras, at least most cameras, don't work that way. I often use a small aperture or focus staking to bring everything into unnaturally sharp  focus, but what our eyes do so remarkably is to allow us to pay attention to what we are looking at while letting other parts of the visual field fall off to non-distracting soft bokeh. This is an overly apologetic way of saying that everything doesn't have to be sharp. Selective focus is a wonderful way to draw attention to the subject of an image in a way that more  closely approximates how we actually see the world. I frequently visit a classic sugar shack hidden in the woods of Marlborough, New Hampshire . I've captured the shack from all angles, generally trying to keep everything sharply in focus, but a few days ago, I decided to let the mist and selective focus draw attention to the lovely ferns that engulf the stone wall, suppressing the eye's natural tendency to follow the line of stones to the shack. Autumn is dominated by strong, colorful themes and sometimes it is nice to let the eye rest a bit as it explores an image.


Travel Both Ways
A few days ago I was exploring the fall color around Harrisville and Nelson, New Hampshire. It happens less often these days, but I

Harrisville, NH
actually found a few roads that I had never traveled before. I was attracted by a "Dead End" sign and traveled until it began to look like I might soon have trouble turning around. It was a nice dirt road with some patches of bright foliage, but nothing especially notable or spectacular. Then I turned around. Heading back on the road, I came upon  what appeared on the way out to be an ordinary sheep pasture, but from the new direction I realized that Mt Monadnock was beautifully visible, looming over the field. It was a perspective that I noticed only because I had been  forced to turn around. It happens all the time.  The lesson is never to  think that you know a road until you have traveled it both ways. Sounds like this could be an important life lesson, but I'm not quite sure how to apply it too the world.


Never Trust a Cow
The challenge of cow photography is to try not to be seen. Whenever I find a classically bucolic scene with cows randomly grazing in a pasture, I know that I have to be quiet and stealthy. As
soon as they are aware of your presence cows typically stop doing cow-like stuff, turn toward the camera, often wandering over to say hello. They consistently follow this pattern EXCEPT when you want them to do it. A few days ago, I was shooting a cow grazing a field in Chesterfield. She was wandering along the fence and I wanted to frame her looking at the camera with the background of fall foliage along the road. No way. She stubbornly presented me with her business end and no amount of clicking, stomping or arm waving could induce her to say hello. I had to settle for an image of the lonely heifer gazing down the road for, who knows what. Cows are very undependable animals.


Keene, NH


So these are just a few thoughts from my recent autumn photography. Most are not restricted to the foliage season.  Every picture we take has its own story and lessons to teach.  By carefully considering why each image succeeds or fails you can steadily improve your ability to communicate and inspire.  

It looks like the coming week will be persistently stormy and that may blow away this year's color, but, while some color persists, get out there and have fun and learn something.  November is fast approaching.


Jeffrey Newcomer
Partridgebrookreflections.com

Monday, October 13, 2014

Fall Foliage Photography, The One Essential


It has been a lovely Columbus Day fall foliage weekend. In this weeks blog, I have already whined about being stuck at home entertaining autumn peepers in my studio while the color outside has been peaking. I feel a bit guilty, not only about the whining, but also about posting before my usual Sunday time-frame. The Studio Tour has been a success. I saw a steady stream of visitors and actually sold some pieces. Most enjoyably, I got to spend two whole days showing and talking to folks about my work. As partial atonement for my whining, I'm doing a short bonus blog about the one essential piece of gear for fall foliage shooting, the polarizing filter.

For many of my readers, the importance of a polarizing filter will go without saying. In the past I have discussed the use of a polarizer to enhance leaf photography, but this week I was reminded of the fact that the most important lessons can always

After I escaped from the "Studio"
bare repeating. I have been helping my friend Steve Hooper with his continuing education course on nature photography at Keene State College. Steve is a great photographer with many years of experience shooting for our local newspaper. His class at Keene State was quite large and I agreed to lead half of the group on the class shoots around the campus. This Friday, I was surprised to discover how many of my group weren't aware of the uses of a polarizer especially as we discussed approaches to fall foliage photography. So here it goes again. To those of you who already know this stuff, turn off the computer and go out shooting, Now!

For the Rest of You
A polarizer is designed to cut through reflection and is the landscape photographer's most essential filter. Direct sunlight reflecting off most surfaces becomes polarized to a specific angle which can be filtered by rotating the polarizer to block that angle. The degree to which a polarizer can filter out the glare is related to the direction of the light, being most effective when it is at 90 degrees to the subject. On the other hand, when the light is coming from behind or in front of the camera, the effect is essentially nonexistent. The filter is great for darkening skies, seeing beyond reflection into the depths of lakes and streams, but for fall foliage, its most significant effect is to improve the color saturation of the leaves. It is often noted that the ability of a polarizer to block reflection is one of the few filter effects that can not be duplicated by digital editing and it is for that reason that it is considered THE essential filter and it is why my polarizer stays on the camera for most of the autumn. 


 Examples are Best
 I've included a few examples of polarization effect. The first is of brilliant red leaves by a cemetery in Harrisville, NH. The light reflected off the leaves mutes the colors, but the polarizer cuts through much of the reflection freeing the rich color to shine through. The same effect can be seen in the pictures of the First Universalist Church in West Chesterfield. Compare the color in the leaves and the reflections in the church spire. Both images were processed identically in Lightroom and Photoshop. A number of my students in the Keene State course use point and shoot cameras with no way to screw on a Polarizer, but I was able to show them that they could get a small filter, just a bit bigger than their lens, and hold it in front of the lens.  The LCD display can be used to judge the optimal effect. I tried this with my iPhone. The difference was not as impressive, but I suspect it would be more noticeable with a filter that is better sized to tiny iPhone lens.


A Few Points
So that's it. The best approach is to get a polarizing filter and start experimenting. There are just a few additional points about the use of this most essential filter.

  • First, there are two kinds of polarizers, linear and circular. Without descending into a swamp of unnecessary detail, you should know that linear filters can adversely effect your camera's auto-focus or metering. Only use circular filters.
  • Given the optimal orientation to the sun, polarizers can dramatically darken a blue sky and this is often the most obvious effect as seen through the viewfinder. Because the polarization effect varies with the angle of the sun, the darkening of the sky can vary dramatically across the sky,
    Sky Gradient, Sugar Hill, NH
    especially when wider angle views are used. It produces an interesting, but unnatural gradient of brightness. One solution is to avoid the use of a polarizer when wide angle views are captured. Another is to stack two images, one with polarization and the other without, and then blend the images to avoid the brightness gradient in the sky. I will often reduce the polarization in these situations, but there are post-processing techniques which can smooth out the brightness gradient. A polarizer should not be used when shooting multi-image panoramas, since the effect will vary from image to image, making smooth blending very difficult.
  • By its nature Polarizers require frequent rotation and it is possible to inadvertently unscrew the filter, occasionally leading to a disastrous drop to the ground. Trust me, I know from painful experience. To avoid accidents, I try to rotate the filter only in the clockwise direction, keeping the filter tightly attached.
  • Finally, it is important to remember that polarizers reduce exposure by 1 - 2 stops. In low light situation the filter's effect may not be worth the loss of light.

The Foliage Tour ended at 5pm. It was actually nice to have a forced break from my frantic foliage chasing, but when the clock struck, I catapulted myself out of the door to try to catch some fleeting golden light. Of course my polarizer was firmly attached.

Into the Light, This Evening with Polarizer

Jeffrey Newcomer
Partridgebrookreflections.com