About Me

My photo
Spofford, New Hampshire, United States
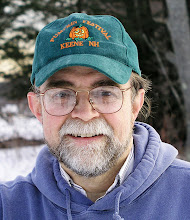
Jeff Newcomer had been a physician practicing in New Hampshire and Vermont for over 30 years. Over that time, as a member of the Conservation Commission in his home of Chesterfield New Hampshire, he has used his photography to promote the protection and appreciation of the town's wild lands. In recent years he has been transitioning his focus from medicine to photography, writing and teaching. Jeff enjoys photographing throughout New England, but has concentrated on the Monadnock Region and southern Vermont and has had a long term artistic relationship with Mount Monadnock. He is a featured artist in a number of local galleries and his work is often seen in regional print, web publications and in business installations throughout the country. For years Jeff has published a calendar celebrating the beauty of The New England country-side in all seasons. All of the proceeds from his New England Reflections Calendar have gone to support the Pulmonary Rehabilitation Program at the Cheshire Medical Center. Jeff has a strong commitment to sharing his excitement about the special beauty of our region and publishes a blog about photography in New England.
Showing posts with label framing. Show all posts

Monday, September 17, 2018

Photography Studio Set-up


I now have this box.  It is a lovely box, measuring 12’x27’, about 320 square feet.  It has beautiful new ship lap walls, extremely tight insulation and an efficient heating and cooling system.  My new studio is hidden in a quiet corner of our barn away from the distractions of the house, but now the bigger challenge is what am I going to put in my box.  It all comes down to deciding what I want to do in the space.

Studio Stuff Piled in the Barn
For Susan, the answer is simple.  She wants all my photography crap, and, by extension, me out of the house.  I admit that the tentacles of my clutter have invade most corners of our lovely old home, but I have resisted the plan to make my studio the dumping ground for all my photo stuff. The plan is to at least start off being selective 


I have started to move things into the studio and my first discovery is how quickly this “big” space is filling up.  I need a plan and that must start with a prioritized list of what I actually want to accomplish in the studio. 

1)    Matting and Framing

Cutting and utility tables and Desk
My previous studio occupied my daughter’s old upstairs bedroom, and was jammed with the materials, equipment and furnishing that I needed to cut mat board and frame pictures.  All this must be my first priority for my new space.  I have moved my utility table into a convenient space opposite my desk.  My cutting table was always a patched together affair with a piece of plywood perched precarious on a smaller potting table.  Happily, Susan remembered that the Indian King Framery was moving to a smaller space in downtown Keene, and I discovered that they were graciously willing to let we have some of their equipment that would no longer fit in the new location.  I acquired a great carpeted 4’x4’ cutting table and a lightly used CH Advantage Mat Cutter.  I also got a good deal on a professional, wall mounted mat board and glass cutter.  Very exciting, but I quickly realized that my desk, utility table and cutting table occupied more that 1/3 of my available space.  I needed to get more serious.


2)    Storage
Storage Shelving
   Studios aquire a lot of stuff; hanging wire and hardware, framing tools, cleaning cloths and solutions, tool boxes, table-top stands, and glass, just to name a few.  All these essentials must have their place and I have been busy assembling storage shelves to organize the glut.  
And, of course there is the mat board and foam core

My boxes of full-size mat board will fit nicely against the wall, but through the years I had also accumulated piles of odd pieces of board that I fancifully expect to use some day in some imaginary project.  I have donated boxes of the stuff to our local school’s art department, but even they are getting overloaded.  I know I can’t store all this material in the studio, but it is inexplicably painful to consider chucking even small pieces of this precious material.  I will save the largest pieces and then make some difficult decisions.


I know I need to escape my pack-rat tendencies, so here is my plan. 


Horse Stall Storage
First, I need to Identify those things that I use infrequently and can also survive living in an unheated or cooled environment.  These items, such as many tools, and some framing materials can be stored in the old horse stall at the other side of the barn – more shelving to be built. I may also see how mat board survives the wide temperature fluctuations in the stall.

The real problem are the things that are temperature sensitive, most importantly my bins of framed pictures.  All those that I can’t fit on the walls of the house or studio will stay in the studio bins.  The studio has an array of spots to highlight the pictures on the walls.  Now, I have to decide on a convenient and reasonably priced hanging system


3)    Studio Lighting
Mat board cutter and back wall
Lights coming
It has been my dream to build a space for studio lighting in my new studio, and I have been struggling to retain a small area in the back of the studio where I can set up my present and future lights and backdrops.  Susan keeps insisting that I should surrender this sacred territory to more storage, but, so far, I have resisted. 


4)    Man Cave
In order to fully accept my banishment to the barn, I insisted on a few creature comforts.  I realized that a pool table and hot tub were impractical, but I do have a comfortable leather couch which includes two recliners.  The initial plan called for a 65” flat screen tv, but given the size of the room, I had to downsize.  Every studio needs a comfortable reception area for clients.  I think this will serve nicely and will also provide a much needed napping location.


Paula, Bob and Tom watching the Patriots lose


Out Back
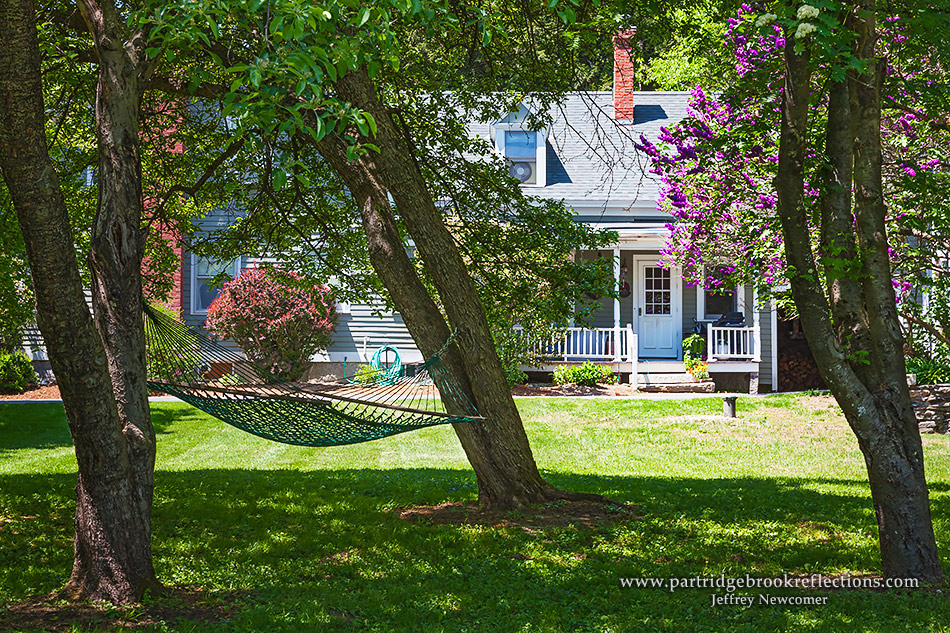
The final piece, which is scheduled for next summer, is the addition of a screened porch off the back of the barn.  Susan has been fanatically opposed to the idea, but it is MY space and my dream, and everyone else thinks it is a great idea.  Off course ”everyone else” won’t be paying for it, but I’ll just keep threatening to come back into the house if I don’t get my porch.   Beside we have already begun the necessary first steps.  We replaced the back window with a door, which currently opens onto nothing and the porch lights are already installed.  The porch will overlook magnificent cherry trees leading down to the meandering Partridge Brook.  After all, my business IS called Partridge Brook Reflections, LLC.


View Out Back


Well that is the plan.  I still have a lot of work to do.  I apologize, to those who have actually read this far, for this selfish attempt to organize my own thoughts on this project.  It has been helpful for me and I hope to others who are being thrown out of the house.


I would be interested to hear from others who have gone through a similar process of planning and outfitting their own studio.  I hope to get things reasonably arranged soon so I can get out shooting again.  Fall is coming.

Jeff Newcomer, NEPG
www.partridgebrookreflections.com

Tuesday, August 21, 2018

The Big Studio Move


I know that it is Tuesday and I am WAY late for my usual Sunday Blog posting, but you are lucky, or maybe not, to get anything at all!
I am in the middle of cleaning out my upstairs matting and framing studio and lugging it all to a disorganized pile in my barn.  I’m waiting for the floor to dry in my beautiful new studio before I can start moving things in and organizing my new space. 


Tight Foam Insulation

Meanwhile, we are cleaning and setting up two guest rooms in anticipations of Abigail’s big wedding celebration.  One-hundred and twenty people will coming this Saturday night for a big party at the beautiful Mayfair Farm in Harrisville and we will be welcoming many of them to our house Sunday morning for an informal brunch.  Needless to say, both my wife and daughter are freaking out over all the complex logistics.   I’m trying to help where I can, but mostly I am struggling to stay out of the way.


Pano from my back side Screened porch
Next years project, but the door is in!


My Studio in a Pile

Finally, and almost incidentally, I still have a photography business to run.  The Annual Art in the park is coming up in a couple of weeks, the proof for my 2019 New England Reflections Calendar needs to be reviewed, I have to prepare for my next Introduction to Digital Photography Class, I have a number of orders to fill for clients and I would LOVE to be able to get out and shoot a few pictures as summer begins to fade.


First Coat of Poly

With all that whining out of the way, this week I offer a collection of images demonstrating the progress on my future studio.  I am very excited about the results and anxious to start moving in.  If Jason was a little less of a perfectionist I would already be there.


Jeffrey Newcomer
www.partridgebrookreflections.com

Monday, July 30, 2018

Photo Studio Dream

Brief Break in the Rain, Spofford NH


I have always been a great fan of photography in miserable weather.  Blizzards, dense fog or rain can all be opportunities to capture dramatic environmental landscapes.  Of all the different atmospheric conditions, I find the most difficult to manage is heavy and blowing rain.   I have the gear to handle most situations and I always argue that terrible weather is the best time for photography,  but the last couple of weeks have been soul crushing.  We have had more or less a continuous blast of showers and torrential downpours, all combined with persistent heat and humidity.


IR Works Anytime
I have done what I could.  Last week, I cut through the haze with my infrared camera.  Mid-summer is always the best time to shoot IR.  The progression of violent thunderstorms has provided the opportunity for rainbow shots, but I never seemed to be in the right spot to capture a balanced composition. 


With challenges outside it seems like a good time to discuss my big indoor summer project, the construction of my new photography studio.  It has been a long time coming.


My Household Sprawl

Studio Work Table
To begin, I should describe my current “studio” arrangement. Beginning from when I started to take my photography seriously, and to my wife’s great frustration, my studio has been scattered throughout our house.  I have taken Abigail’s former bedroom as my matting and framing workshop.  I find it a very productive space, but Susan contends that it is a chaotic trash heap – she has a point.  


Backup Clutter
The small downstairs bedroom is now my office, where I do my photo editing and printing, not to mention storing my gear and my collection of camera bags, 15 and growing.  It is a self-evident truth that a photographer can never have enough camera bags. It all combines to create another productive heap.  To maintain domestic peace, I try to keep these two rooms closed as much as possible.  It helps that they are the only two rooms in the house that are air conditioned.


So, for my photography business, I have grabbed two rooms, and if I could limit the damage to these, I think I could have slipped by.
BUT there is more! Photography seems to have the ability to gobble up space.  Susan doesn’t mind that every wall in our house displays/stores my framed photographs, but we have only so much wall space.  Especially when I am between major shows, I have at least two large bins of pictures with no place to go other than on the floor of our gallery.  The problem is that these pictures along with all my other work can’t be exposed to the heat or cold of our attic or barn. They have to be protected in the house.  In addition to the bins of framed work, I have a couple of display racks of matted images in plastic sleeves.  It occurs to me that, if more people would just buy my work, this storage problem would go away.

Gallery Storage

Mat Board on the Bannister
Wait!  There’s more.  In addition to storage of the finished photographs, I must find places for my other materials.  I have the standing racks for cards, and the tent and display system for my annual Keene Art in the Park Show.  Much of this can tolerate temperature extremes and ends up in the barn, but my boxes of stock mat board must be protected and ends up leaning on the banister at the top of the stairs. 


Over the years, Susan has not been shy about letting me know how annoyed she has become with my photographic clutter scattered throughout the house.  My response has always been, “Where else can I put all the stuff”, and then, one day to my surprise, she responded,  “Why don’t you build your own studio/ workshop in the barn.”  Until that moment, I hadn’t realized how desperate she was to get me out of the house.


I have dreamed of having my own dedicated photography space, not only to do my matting and framing, but also to work on image editing, to have a quiet space to write and an area I could dedicate to studio lighting.  This year, a number of factors came together to make it all possible.


Coming Together

Spousal Support

First and most miraculously, I found that my wife was enthusiastically behind the project, at least until I announced that I was planning to add a screened porch to the back of the studio.   Of course, Susan was excited that I would have a space to enjoy my photographic pursuits, but she was also thrilled that she would be getting back an upstairs bedroom and uncluttered floors throughout the house.  I prefer to believe that the fact that I would be out of the house for large portions of time had nothing to do with her support.


Location
Attached to our house is a beautiful and well preserved 1870s barn.  We have tried to avoid filling the barn with trash, and with the exception of the downstairs workshop have generally succeeded.  The workshop has suffered from a slow accumulation of “stuff”.  Tools, packing materials, an old Franklin Stove and assorted broken furniture had filled the space to the point that the room was too cluttered to be functional.  It didn’t require much thought to realize that that this was the obvious space for my new workshop. 


It took work to get rid of all the junk and litter, but after the purge we found 
Workshop Door, Not exactly Plumb
a space that was in remarkably good shape and ready for the major renovation.  Of course, we have learned that with old barns, as is true for old barns, nothing goes completely smoothly.  As we opened the wall for a door in the back, we discovered an area of rotting sill and, of course nothing was plumb.  We decided to just refinish the original irregular floor boards, but a few were eaten by carpenter ants and required replacement.  All of these problems added to the time and expense of the project, but I prefer to believe that my studio permitted us to find these issues before they became more severe and the barn fell off the bank into Partridge Brook.
Open Space - Looks Simple


The Builder

Jason and Floor Boards to Replace
The final piece for our project was getting a talented builder with whom we felt comfortable.  This was not a problem.  For some time we have considered Jason as a member of our personal staff and a trusted friend.  Jason has handled all of our recent projects and has always been available whenever he is needed, whether it is watching our house when we are away, helping with shoveling snow from our roof or bringing a ladder to help a friend who was locked out get into a second floor window.   He is experienced, easy to communicate with and, what is most important for a general contractor, he does what he says he will do.  From the beginning, Jason has been enthusiastic about this project, as he is whenever it comes to spending our money.


Jason Measuring the Sill Rot

With these key pieces in place, or project is proceeding.  At this point, Jason is completing the basic rectangular box which will be tightly insulated with foam and paneled with simple, rustic ship lap.  My job has been to anticipate everything I might need in the room, specifically all the lighting, electrical service, and cable.  I am only beginning to decide about the layout of the space.  It is all about what I want to be able to do in my studio.  I have a list, but that can be a discussion for another time as the project proceeds.  Let me just say that, in addition to all the photo stuff, the phrase “man cave” has also been mentioned.


Obviously a project like this can cut into my photography, but I am sure it will all be worth distractions.  Stay tuned for more up-dates.


Thinking about the design.  Fills up quickly!


Jeff Newcomer, NEPG
www.partridgebrookreflections.com

Sunday, August 9, 2015

Working With the Light (Part 1)


Glorious "Context" - Nubble Light at Dawn


I'm beginning to panic. This fall I'm scheduled to teach a class on digital photography for our local community education program and I have to get serious about putting together the materials. I have done plenty of talks for regional groups including camera clubs, Rotaries, Audubon Societies, and retired teacher groups, but I've never tried to assemble a reasonably coherent curriculum. Over the last year I have written several blogs about the basics of photography with the idea of covering topics that I could use in an introductory photography course, but now I have to get focused on putting it all together.My biggest worry is that I have no way of gauging the knowledge and experience of those who will sign up for the classes. I tried to aim my course description toward folks with an interest in learning about controlling exposure, focus and composition in landscape photography, but I could end up with some who are only interested in using their cell phones to take snapshots of their lunch. Its a crap-shoot, but I plan to combine classroom discussion with photo shoots and critique, it should be fun.

This week's blog is intended as another prep for the course. I plan to talk about how to approach a photographic situation and the first step is to recognize the quality of the light. Each type of light provides its own challenges and opportunities and working within those bounds can result in great images in any situation. So lets briefly consider a few kinds of light.

 Also check out Part 2 of "Working with the Light" discussing some of my favorite "lights", overcast, fog, mist and extremes of weather

Golden Hour : Sunrise Sunset

One Gull Short of Pretty, but BORING?
I begin with what many photographers consider the gold standard of light, the "Golden Hour". The light around sunset and sunrise shines in beautiful warm hues of red, yellow, orange and gold. It may seem almost impossible to take a bad picture, all you have to do is snap a glowing sunset and the likes and favorites come rolling in to Facebook. The problem is that all that golden light can make you lazy. The same rules of composition and context apply and, to me, without those elements a sunset can be just a boring splash of color smeared across the frame. 


Context

 As is true in all landscape photography, the key is context and interest. When facing a spectacular morning or evening sky your first thoughts should be devoted to finding interesting stuff to put in front of all that color. Look for interesting foregrounds, reflections and framing to provide a sense of place and story. It is also helpful to show some detail in the silhouetted shadows. Expose to the right or consider a multiple image HDR rendering. Remember to keep the horizon line straight and away from the DEADLY, dead center of the image. It all comes down to the difference between a snapshot of some color and an image that allows the viewer to lean against that tree and fully experience the glorious moment. But there is much more to the golden hour than a crimson sky.


Framing


Turn Your Back On the Sun
Even mundane subjects can come alive when illuminated by the warm light of the golden hours. Don't forget to turn your back on that brilliant disc and  take advantage of the soft glow which often contrasts beautifully with the deepening blue of the evening sky.


The Blue Hour
  

 Unfortunately, many photographers arrive just at sunrise or retreat right after the sun dips below the horizon. The golden hour is lovely, but often the best light comes in the few minutes just before sunrise and after sunset. The "blue hour" is a great time to capture soft images without the harsh contrasts created by the unfiltered sun. 


Blue Hour Lights


It is also one of the best times for night photography. A little light in the sky allows foreground detail to shine through and the blue sky is the best background for evening lights and the rising moon. The difference in feel between blue and golden hours could not to more striking and it is what makes sunrise and sunset such a rich time for a broad range of images.


----------------------------------------------------------------------------------------


Bright Sunlight -  The Lead Hours


Stop Whining and Start Shooting!
After reveling in the glorious Golden Hours it is time to go from best to worst. Bright midday sun is universally considered the worst condition for landscape photography. Unfiltered overhead light creates harsh shadows, with impossibly stark contrasts and the rich colors of flowers and foliage are obscured by brilliant reflections. Perhaps the best approach is to take a nap until the sun begins to set. After all you did get up at 3AM to catch that heroic sunrise, but if you can stay awake, all is not lost.

A Beautiful Sunny Day
Midday sun is unquestionably the most challenging light, but non-photographers are always saying, "What a beautiful sunny day. You must have gotten some great pictures." We want to laugh, but there must be something these unschooled rubes are seeing that we smug photographers are missing. The truth is that the beauty is there, but the problem is in the limitations of our photographic tools to capture it.

Taming the Contrast

 Bright sunlight produces harsh contrasts that were impossible to capture with the narrow dynamic range of convention film photography. Without the use of supplemental illumination such as reflectors or fill flash, the decision always had to be made between recording the highlights or the shadows, but things have changed with digital photography. The dynamic range of digital sensors is improving, but they still struggle with high contrast. The difference is in the ability to bring a precisely exposed images into powerful software which, almost miraculously, can protect highlights while salvaging detail in the shadows, and the blending of variably exposed images and the use of sophisticated HDR software has further expanded our ability to record the midday light. To me the greatest attraction of bright sunny illumination is the cool shade that it inescapably creates and now our images can languish under the tress without being oppressed by a surrounding curtain of blown out highlights.


There Must Be Sun for Shade           


It is the contrasts between light and dark that give "bright sunny days" their special attraction.  Our job as photographers is to stop whining about the "terrible light" and start finding ways to push beyond the limitations of our medium, and capture the midday glory thiat is so apparent to everyone else.


Filling the Shadows
A Touch Of Fill Flash
For Portrait or Macro photography, shadows can be illuminated with light from a reflectors or fill flash. Happily color balance with artificial flash is not a challenge since the strobes are generally set to match sunlight. The key to reflectors is to go big and close. The larger and closer to the subject the more the light will wrap around and appear soft. I have a couple of reflector disks of different sizes but the light bouncing off the large brightly lite wall can work as well. The advantage of a wall is you don't have to struggle with with folding it up after you're done.


Taming the Reflections

The rich colors of flowers and foliage are blunted or obscured by the reflection created by unfiltered sunshine, and sadly there is no perfect solution within current editing software. Midday is not the best time to capture macro images of flowers or the full glory of an autumn hillside, but, if you must, there are a couple of techniques that can help.


Polarizers
 

Given the right angle of the sun a polarizing filter can cut deeply into reflections and unveil the underlying color. Direct sunlight reflecting off most surfaces becomes polarized to a specific angle which can be filtered by rotating the polarizing filter to block that angle. 


Colors Revealed


The degree to which a polarizer can filter out the glare is related to the direction of the light, being most effective when it is at 90 degrees to the subject. On the other hand, when the light comes directly from in front of the subject the effect is essentially nonexistent. Polarizers are often used on sunny days to darken the blue sky and highlight the clouds, but its real magic comes from its ability to penetrate the glare and when the light is right colors can explode in your images.


Shade
Tulip Tree Flower in the Shade
The other approach to both reflections and high contrast is to retreat to the shade. Shielded from the sun's glare, the sky acts like a gigantic soft box which can wrap light around your macro images and portraits. 


Full Shade


With the mix of light from the blue sky and the green of trans-illuminated foliage, color balance can be a challenge, but when shooting in RAW the color balance can be finely tuned. The sun can also be filtered or blocked with the use of a diffuser or your own shadow. Once again, the key is to get the diffuser as close as possible to the subject and to watch for distracting hot spots of bright light around the edges.


Trans-Illumination
- Glory in the Brilliance
 

When all else fails, the bright sunlight can be used as a source of trans-illumination. Even the dullest foliage flowers come alive when strongly lite from behind and the back-light can create a shimmering rim light around the edges.


YUK
Yesterday, I stopped by Madame Sherri's Castle in Chesterfield to explore my old favorite in the "miserable" brilliant midday light.  The direct view was predictably horrible. but then I circled around to the back.  The light was lovely as it illuminated the insides of the arches with a golden glow and the thick summer foliage came alive with the shimmering back-lighting.  180 degrees and I found a treasure.  The secret is not to give up on the light and adapt to what nature provides.


The Arches revealed


So the next time we are plagued with bright midday sun, avoid the nap, accept the challenge and find out why everyone else thinks clear skies and bright sun is so inexplicable beautiful


I've tried to suggest how our photography can accommodate what may be seen as the extremes of light, the glorious golden hour and the harsh midday sun, but the key to shooting in any light is to recognize what nature is providing and to modify our subjects and approach to get the most from the conditions.
Sometime the Context Can Be As Simple As a Wave
Kiawah Island Sunrise, South Carolina


Next week I will discuss a few more of my favorite "lights', including, overcast, fog, and extremes of weather. Hopefully this exercise will make it easier to face that room of students this fall and allow them to capture better iPhone images of their ham sandwiches. 
 

Check out Part 2 of "Working with the Light" discussing some of my favorite "lights", overcast, fog, mist and extremes of weather.


Jeffrey Newcomer
Partridgebrookreflections.com