About Me

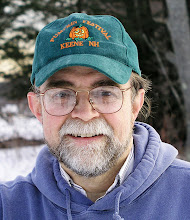
My photo
Spofford, New Hampshire, United States
Jeff Newcomer had been a physician practicing in New Hampshire and Vermont for over 30 years. Over that time, as a member of the Conservation Commission in his home of Chesterfield New Hampshire, he has used his photography to promote the protection and appreciation of the town's wild lands. In recent years he has been transitioning his focus from medicine to photography, writing and teaching. Jeff enjoys photographing throughout New England, but has concentrated on the Monadnock Region and southern Vermont and has had a long term artistic relationship with Mount Monadnock. He is a featured artist in a number of local galleries and his work is often seen in regional print, web publications and in business installations throughout the country. For years Jeff has published a calendar celebrating the beauty of The New England country-side in all seasons. All of the proceeds from his New England Reflections Calendar have gone to support the Pulmonary Rehabilitation Program at the Cheshire Medical Center. Jeff has a strong commitment to sharing his excitement about the special beauty of our region and publishes a blog about photography in New England.
Showing posts with label camera. Show all posts

Sunday, August 21, 2016

Protecting Your Camera from the Summer Heat


Camera Melt


Living and photographing in New England it seems that there is
Land Iguana of Cerro Dragon, Galapagos Islands : HOT
always some kind of extreme natural condition threatening to wreak havoc on our equipment.  Rain, snow, sleet, numbing cold, crashing waves and blowing sanding are just a few of the environmental challenges against which we must struggle, but it is important to remember that it is those same conditions that make New England photography endlessly varied and breathtakingly beautiful.  I have talked about ways to function in the bitter cold of our winters, but, given the recent unrelenting heat, this seems the perfect time to consider strategies for surviving the summer scorch. 


Heat Damage

Modern digital cameras are marvelously complex machines, with a combination of delicate coated glass, sensitive electronics, mechanical components, batteries and memory cards all of which can be damaged by excessive heat. The lubricants that keep the camera running smoothly can melt and migrate in high heat causing severe damage.   


How much is too much heat? Every camera has its own recommendations for acceptable temperature range. For my Canon 5D Mark II, the manual sets the working temperature range for both the camera and the battery from 32 deg F – 104 deg F.  Although I have gotten away with using the camera for short periods at temperatures substantially below zero, I would be nervous about pushing the upper limit.  As always, prevention is the key to protecting your valuable equipment, but first don’t forget to take care of yourself.


Protect Yourself

 
Before talking about shielding your camera equipment, it is important to remember to protect yourself from effects of the sun and high heat.  In the excitement of a great photographic opportunity, it is easy to ignore the simple measures needed to keep yourself safe and functioning at top capacity.   Light clothing, a hat and sunscreen are a start, but equally important is to keep up with your fluids.  It is hard to capture the perfect shot if you are weak and lightheaded.


Prevention

The Death Mobile

Keeping your camera equipment cool can be a challenge especially when stored in your car.  Temperature inside a closed vehicle can easily rise from 120-160 degrees.  Again, if we just think about the problem, preventive measures seem obvious.  Try to imagine that your gear is a cute little puppy that you would NEVER allow to roast in your death mobile.  Parking in the shade, providing for ventilation and using reflective window screens can all reduce the internal temperature.  In the case of the reflective screens, they can also be used as reflectors and shades for your photographs.  Inside the car, keep the gear out of the direct sunlight and covered with a light colored towel or other fabric.  An insulated cooler can provide even better protection. I've never actually used a cooler, but it sounds like a great idea.  I'll give it a try - at least until Susan figures out that I stole her cooler.  The car trunk can shield gear from the direct sun, but, especially in dark colored vehicles, the temperature may still climb to excessive levels.


Outside
When outside in intense sun and heat, a light colored camera bag or cover can help, and I feel embarrassed to mention this, but it is important not to leave your camera with the lens cap off pointed into the sun – just think about the fun you monsters had frying insects with a magnifying glass.


Internal Heat
Digital cameras can be a source of their own heat.  The biggest culprits are the Live View screen and the sensor, but the rest of the electronics can contribute to the internal temperature, especially if the camera is kept on for prolong periods.  In hot weather it is advisable to limit the use of Live View and set the Auto-Off to no more than one -two minutes.


Treatment
If your camera becomes excessively hot don’t use it until it has cooled completely.  Move it carefully to a spot with moderate temperature, good air flow and low humidity.  You might also place the camera and lenses in tightly sealed plastic bags (see condensation below).


Condensation

The most common problem that I experience on hot humid days occurs when I go from a cool air conditioned room or car into the heat and humidity.  Condensation clouds lenses, and the moisture can gather on the internal surfaces of the camera encouraging the disastrous growth of fungus.  It is the same problem that occurs in the winter when I bring a cold camera into a warm house or car and the treatment is the same.  First, try not to go crazy with the air conditioning in the car.   If you are frequently jumping in and out, try to approximate the outdoor temp inside the vehicle.  As you would in the winter, when moving cool gear into the heat and humidity, allow the camera and lenses time to warm in a plastic bag.  It may take 20-30 minutes for the surfaces to adjust to the ambient temperature. It is frustrating to leap out of your comfortably cool car to catch the perfect shot and find that you have to wait for the moisture to clear from the lens. It should take only a few times before you learn to go easy with the air conditioning.  A soft cloth may be helpful to wipe moisture from the lens, but if you suspect internal condensation consider storing gear in air tight containers with Silica gel packets to absorb the moisture.  The packets are cheap and easy to find on the internet.  


Unless you shoot only at dawn or dusk, or even better, only at night, hot conditions are unavoidable.  The most important thing is to recognize the problem and take precautions to avoid a global warming catastrophe.  And cheer-up, this is New England and soon new problems will surface.  After all - 


“Winter is Coming!”
Mount Washington, 20 degrees Below


 Jeff Newcomer
partridgebrookreflections.com
603-363-8338

Sunday, June 29, 2014

My Carry Around Camera


I have a new "Carry Around" camera and, so far I'm having fun.

Let's face it, we are photographers which means we love gear. I know that there are those out there that preach a minimalist approach to the sport, but given the opportunity and an overpowered four wheel drive vehicle to carry the gear most of us would load up on heavy stuff that we will seldom use. My approach to gear has generally been that the transient annoyance and pain of lugging around a heavy kit is generally over balanced by the years of satisfaction which comes from getting the most out of any photographic opportunity. Just so long as the tonnage doesn't limit my mobility.


While recognizing the value of having my full kit, there are situations where a light and unobtrusive “carry around” camera is nice to have on hand. A small camera is great, for street
Depth of Focus
photography where a massive "professional" device will draw immediate attention. I may be paranoid, but I have also used a small camera in situations where I fear that a big expensive DSLR might be a temptation for pick pockets and muggers. Sorry Equador, but I wasn't going to take my 5D out to capture the street fair at night in Quito. To be fair to South America, I also used my carry around to capture the monuments at night in Washington, DC. Perhaps the most important reason to have a capable small camera is to have it with you wherever you go. The classic rule is, " Your best camera is the one you have with you" and I try not to make that camera my iPhone. My brief case always has a small camera tucked inside for
those unexpected opportunities that seem to pop up on my way to or from work. Whether i'm out to diner with friends or just taking Nellie for a quick "pooper", if I don't expect to capture an 12x18" fine art image, the little camera works just fine.


 For several years my carry around has been a Canon G11. It is a powerful little
Early 1200 mm trial, West River Dragon
camera with full controls and the capability to shoot in RAW, but I never fell in love with the G11. I recently got a Canon SX50 and, although it isn't perfect, photography is always about trade-offs, so far, I think that, if not in love, I am ready at least for a more committed relationship. I have received a lot of questions about how the camera is performing, so I thought I would offer my early impression and show some examples of the images I have been able to capture. I have never done formal product reviews and this is intended as a summary of early and incomplete impressions, with much more exploration ahead.


The Carry-Around Criteria
I should start with a short list of the features I look for in a small carry around. There is no camera out there that meets all these perfectly but it is a good to have some criteria to apply to the search.

Size: The Ideal here is to be able to comfortably slide the camera into your pants pocket. There is some amazingly small camera out there, but invariably the tiny size comes with performance trade-offs including sensor size, zoom range, and controls. I have generally settled for a camera that slips into a brief case or fanny pack, rather than in my pants pocket.

Zoom: 
The zoom ranges is especially important with fixed lens
1200 mm, Spofford Lake
cameras. One of the reasons for my lack of strong affection for my G11 is that the zoom is only 5x (24-140mm). The longer the OPTICAL zoom the better, and beware of references to the “Digital” zoom. All this is doing is cropping the image and you can do that better in post. And of course, with longer zooms, image stabilization becomes increasingly important for sharp images.

 
RAW Capability: 
After I started shooting RAW, I would never want to go back the baked-in restrictions of 8 bit jpg images.

Range of Controls: 
 I want to have full control of the cameras functions including Shutter and aperture preferred, and manual control. ISO, exposure compensation, white balance and focus control are also desirable.

Ease of Control: The more I can stay away from menus the better. With practice the journey through menus on the LCD can become manageable, but I look for as many adjustments on dials and buttons on the camera as possible.

Video:
High definition on many of these little cameras is amazing, but quality sound is generally still a major issue. The old saying is true: “A great movie with crappy sound is still a crappy movie”.

Other Features:
Cable release input, hot shoe to supplement the usually rudimentary built in flash, Tilt/swivel LCD Screen (I don’t get down on the ground as easily as in the past)


Susan has Turned Returning Her Birthday Presents
into an Art Form

A couple of weeks ago I got a new carry-around camera. I started by getting Susan a small camera that would fit easily in her purse, but would have decent focal length range. We are heading to Alaska in August and, if in no other place, I thought Susan might be induced to take a picture of a Grizzly, safely at the end of a very long lens.  I ended up with the Canon SX 500. It was nicely compact and had a 30x zoom. Unfortunately  it couldn't shoot RAW, but I thought it was a nice compromise for her to have easily at hand. Happily, Susan rejected her birthday present insisting that, “You’re the photographer. Why do I need a camera”. It is usually jewelry that she rejects, but this time, a camera. Ok. Great! I went out and got the camera I wanted, but hopefully one that she might still be able to use from time to time and perhaps in Alaska.


SX50 HS
Canon SX50 HS
After some further research, I ended up with the Canon 50 HS. The camera is a little bigger, but still quit compact and incredibly light. It is a pleasure to carry it around in a small fanny pack. There are a number of excellent reviews of the camera's strengths and weaknesses and I will only mention a few of the features that I have found interesting.


Zoom!
The obvious, stand-out feature of the SX50 is its 50X zoom. This thing goes from 24mm to 1200mm!, making its lack of
1200mm and Cropped
interchangeable lens' largely mute. I have included a number of my images at the full 1200mm length and in general I have been impressed. At this length a tripod would be recommended to get maximal sharpness, but, so far, the results from my image stabilized, hand held pictures have been surprisingly good. It is helpful to have good light and a high ISO to allow for faster shutter speeds. Of course high ISO's can be an issue for noise. The SX50 has a small sensor, about 30% smaller than the G11, and at ISO's greater that 400-800 , noise can be more of an issue, but I haven't seen much of a difference from the G11. This can't compete with my full frame camera, but so far I have been able to get good results with appropriate levels of noise reduction.
24 mm
1200 mm Uncropped


RAW of Course
The second, must have feature, is that the camera shoots in RAW. Nuf said.


Macro Although the extreme zoom is the stand-out feature of this little camera, I have been espcially impressed with its macro performance. I am experienced with the extremely thin depth of focus from my full size sensor and, although the SX 50 can't match the beautiful bokeh of my 5d Mark II, its tiny sensor can often pull much more of the subject into sharp focus. I can use a single image to capture flowers in sharp focus that would require three or four stacked images from my full frame camera.


Controls
The SX 50 has the full range of controls, and those not on the camera body, are accessible though a reasonably simple menu system. I have learned my own lesson and after a short time actually reading the manual, and photographing my feet, I think I have most of the routine controls figured out. It helps that the control scheme is similar to that on my G11.


Bracketing
The camera has the capability to shoot 3 images, applying exposure or focus bracketing. I'm still figuring out how to adjust the range of exposure or focus, but, a few days ago, I did get a reasonable exposure bracket to use in an HDR image of sunset across Huber Farm. The results were not as smooth as my, tripod stabilized, 7 image DSLR version, but still not bad for a hand held three image bracket.

Hubner Sunset, 3 Image Bracket


Gripes
Of course I have a few gripes about the camera. At f3.5, The lens is
Indian Pond Frog Hunting, Chesterfield, NH
slower than I would like. The manual focus procedure is awkward. A focus ring on the lens would be a great improvement. The electronic viewfinder has poor resolution, but is still helpful when bright light makes the LCD difficult to see. I have noticed that the camera has a tendency to blow out highlights in bright light. There is a dynamic range function that is designed to mute this effect, but I'm still trying to figure out how to make it work. Of course resolution and noise does not compete with the results from my Full frame. The images here look pretty good, but remember these picture are small and can't fairly show the results seen in the full images. I look forward to seeing how far I can go in printing large versions of some of these images.
West River Sunset, Brattleboro, Vermont

There are many more pros and cons I could mention. I haven't even begun to explore the High Definition video capabilities of the camera, but I must remember that the purpose of this article was to respond to requests to see images from my new Carry Around. I can say that the SX50 HS is not a perfect camera. Like all small cameras it encompasses compromises in size, function and image quality, but so far I have been satisfied with the results. I can say I have been having fun shooting with this little camera that has such a big reach and, to me, that is the most important thing. I think I have found a new Carry Around.


Jeffrey Newcomer
Partridgebrookreflections.com

Sunday, February 2, 2014

Foot Photography


 Getting to Know Your Camera

This week I want to make one basic point about getting familiar with the capabilities of your camera.  Simply stated, get comfortable in your chair and shoot your feet.

That New Camera Smell

So you have just liberate your new camera from the box.  Before the Styrofoam has settled to the floor, you are struggling with finding the memory card slot and how to attach the damn strap.  You throw the manual to one side with a promise to scan it later and then you are off on your first bumbling shoot.  Given the complexity of even the simplest of today's high tech digital cameras, it can take hours of study to figure out all the capabilities and features.   Of course we experienced photographers don't need "no stinking manual" to tell us what to do.  We would rather enjoy the adventure of trying to figure out on our own how to set A, T, M, and P modes, how to control where the camera is focusing and what Exposure Bracketing actually does.  There is much more to learn, but don't worry, give it a few years and you will figure it out.  Of course in a few years you will be ready for a new camera and the process, or rather the non process, will start all over again.  In the meantime there is always "P" mode.  The camera companies will try to tell you that "P" stands for "Program", but we all know that it means Pathetic. 


Of course, I know that you aren't one of THOSE people.  You will insist that, before the memory card gets close the that shiny new treasure, you settle into a chair and read the manual cover to cover. Great photographers know everything about their cameras at an almost instinctual level.  They can change settings without even looking at the dials and they can navigate complex menus without have to search for the correct option. I'm not there yet, but I'm working at it.  It takes study and practice, but how do you start?


The process of learning a camera's functions has never been easier.  With those big LCD screens the results of anything we try is instantly available, but the time to experiment should not be when you are trying to capture that once in a lifetime shot.  


Foot Photography
  
Ok, start by putting a fully charged battery in your new camera and a memory card in the slot, if you can find it.  Grab a cup of coffee, not wine, and settle into a comfortable chair.  Open your manual and start shooting your feet.  


It doesn't matter if your feet aren't especially photogenic.  The idea is to work your way through the manual, experimenting with all the
major settings.  In less than an hour you should know how to use auto-focus to select what you want to keep in precise focus, and how to lock the focus while reframing.  You can experiment with the effect of shooting in aperture and shutter preferred modes and how depth of field can be controlled with adjustments in aperture.  You will want to try varying the exposure using adjustments in aperture and shutter and also discover how to adjust the ISO setting.  You can try shooting with longer exposures to discover how slow you can go before you may need a tripod to control camera shake.  And, if you have it,  be sure to find the anti-shake switch.  Of course your ability to hold steady may be affected by that coffee you've been drinking. 


You can shoot more than feet.


At this point, if you have resisted the urge to run outside to photograph a tree, you can explore more technical adjustments, such as various modes of focusing to capture action, and the use of exposure bracketing for HDR photography.  It is especially important to become comfortable with the use of flash and if your flash is built into the camera, be sure to learn how to turn the damn thing off.

As usual, I am belaboring a very simple point.  Take the time to learn your camera and practice until it becomes second nature.  This technique is not restricted to new equipment.  I am still learning new things about my camera.  And of course your can choose other exciting subjects beyond your feet.  Lamps, computer screens or your compliant dog all work as well.  You will be glad that you invested the effort the next time you try to quickly adjust your camera to catch that majestic bird flying by. 


Sunday, December 16, 2012

Escaping your Camera's Dictatorial Viewfinder


Compositional Pre-Visualization


Gulf Brook, Chesterfield, NH


The Usual Lame Apology

The holiday season is always a hectic time for photographers. For me this year has been especially challenging. In addition to the usual rush of last minute Christmas orders and the annual  struggle to get my calendar to all the places where it is needed, I have the additional strain of remaking and moving my websites. I created my primary web gallery about 6 or 7 years ago from scratch using Microsoft's Front Page editor. The site has been an easily accessible repository for over two thousand of my images, but it is embarrassingly out of date. Today services like SmugMug and Zenfolio provide easily managed photo gallery sites with beautiful designs and an amazing collection of features. I've meant to update but I never seemed to have the time. Now I have been forced from my lethergy by the fact that my web host is going out of the hosting business. I have no choice but to move by the end of the year, and I also have to find a new home for the Chesterfield Conservation Commission web site. 


My Current Front Page Design

After much research, and the advice from many of my friends at the New England Photography Guild, I decided to go with Zenfolio. It has been exciting, but laborious, to move thousands of my images to the new platform and I am also working though a long list of design decision. My old portfolio images are of fairly low resolution. They are adequate for a rough archive of my work, but won't show well given the capabilities of their new home. I have just started the process of re-editing my favorite pictures to show best on the new site and be available for on-line sales. it will take months to get all the images up to standard. My hope is to get everything reasonably presentable by the end of the month, when the lights go out at my old home.  Hopefully, within a few days, partridgebrookreflections.com will have a whole new look.

The real reason for sharing my strain is to serve as a long winded apology for what will be a short and simple blog this week. My one goal is to remind folks about the size of their viewfinder and how overly tight framing of a composition within the constraints of the viewfinder can limit how your images can be presented when it comes to printing.

Going Standard

Pocket Full of Rye, Keene, N

I do my own matting and framing and can cut my mats to fit any  picture size, but when I am producing matted images for sale in stores I usually try to adjust my composition to fit a few standard sizes. This makes it easier and less expensive for my customers to find frames for the pictures. This doesn't work for all images. Some pictures loose there impact if confined to an arbitrary framing, but for the most part images can work well within just a few standard options. For larger prints I typically will use either a 12x16 or an 12x18 print. These two sizes end up being mated to fairly standard 20"x24" or 18"x24" dimensions. I typically size my "8x10" images close to 7"x10" since this fits more evenly in a standard 11"x14" frame. Now that I have started producing my own note cards, I am also printing more in a standard 4"x6" format.

Getting the Composition Right in the Digital Camera
All of this careful sizing depends on getting an image in the camera that can eventually be cropped to a desired aspect ratio and this is the simple point of today's blog. When you use the viewfinder as your compositional frame, you may be restricting your options later to crop the image in the best way.

12x18 & 4x6 Fit the Viewfinder

The standard "full" digital sensor matches the size of 35 mm film at 36mm x24mm yeilding an aspect ratio of 1 : 1.5 in the viewfinder. That is, the long dimension is 50% longer than the short. This matches the aspect ratio of 12"x18" and 4"x6" compositions, but if you frame tightly within the viewfinder you may find you are limited when it comes to cropping to other ratios. For example, a 12"x16" is at a ratio

12x16

of 1 : 1.33. For illustration, I have included a number of frames with the different aspect ratios superimposed on a standard viewfinder, but the simple point is to consider how you might eventually display an image when you compose in the camera. Today's digital cameras have lots of resolution and broadening the initial composition is

7x10

unlikely to significantly degrade the quality of the image. Once again the best image in the digital camera may not be the one that looks the best in your camera's viewfinder. The secret is to pull back from the strict 1:1.5 ratio imposed by the viewfinder. To apply your own visual cropping and make sure that everything you need for that ideal composition is safely within the frame. The image directly from the camera may well include distracting elements, but that is what cropping is for.

Final Points
Just a couple of additional points. First the 1 : 1.5 ratio holds for most of the crop sensor cameras as well. Canon's usual 1.6 crop sensor has an aspect ratio of approximately 1 : 1.58. Finally, I should point out that my compositional limitations are often saved by the fact that, like many DSLRs, the viewfinder on my Canon D Mark II only shows 95% of the image that will be recorded by the sensor. I can always go to Live View to see the full image, but sometimes it's good to have that little bit of buffer to protect me from my natural tendency to want to see the perfect image in that nasty, dictatorial viewfinder.