Digital Solutions to the Challenge of Exposure
in Patchy Bright Light
 |
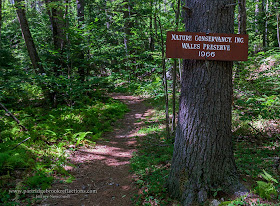
| Dappled forest Sunlight, Gridley River, Wales Preserve, Sharon, New Hampshire |
One of the biggest photographic challenges is managing exposure in spotty or dappled light. If you require proof, just take a hike in our beautiful New England forests on a bright sunny summer day. I did that just last week.
Bagel Mill Show
Early this week I set up a show at the Bagel Mill in Peterborough, New Hampshire. It is a great place to display my photographs and a great place for a quick snack or a long lingering cup of coffee. Check out the show. The Cafe is tucked away on a side street off of route 202 just west of the intersection with 101.

As I was finishing the set-up, Jim, the Cafe owner, told me about a lovely little forest preserve in nearby Sharon. He gave me detailed directions to the Wales Preserve, but I knew I was in trouble when his map went over to second sheet of paper. Needless to say I got lost, but I was lost along a beautiful stretch of upland pastures which commanded spectacular views of Mount Monadnock. It was a new area for me and I didn’t mind the confusion one bit.
Wales Preserve
With the help of my New Hampshire Gazetteer and GPS I finally found the Wales Preserve. The compact 49 acre forest is managed by the Nature Conservancy and encompasses a lovely section of
 Gridley River. The “river” is actually more of a brook in this section and is also charmingly know as “McCoy's Sabbath Day Trout Creek”. The easy trail parallels the brook as it gentle descends through series of lovely cascades and pools. The day was sunny and refreshingly cool with the dappled sunlight playing magically across the rushing water and the forest path. New England forest are dream-like on sunny days, but the restless kaleidoscopic patterns of brilliant light and deep shadows are a nightmare for photographers trying to capture the full dynamic range of the experience. I think there may be no more challenging conditions in which to manage photographic exposure than in dappled light. My hike got me thinking about the various ways that this problem might be attacked. My next thought was “Blog”. I apologize for the length of this article, but it was interesting to think through the various approaches that are available to the digital photographer.
 In my film days I had largely abandoned attempts to capture forest trails in bright sunlight. I found myself always trying to decide between exposing for the highlights, leaving everything else in impenetrable shadow or opening up to catch the mid and dark tones while completely blowing out the highlights. I often was left with a muddy compromise with nothing well exposed. The usual solutions to high contrast, such as variable neutral density filters, couldn’t work with restless patches of brightness wandering randomly throughout the scene. Then along came digital.
Digital to the Rescue
Digital photography and processing has provided a number of new techniques for dealing with patchy high contrast situations. None are perfect in all situations, but they provide options where none previously existed.
The Artistic Option
First, it should be said that it is not always necessary to squash the full dynamic range into your image. It is still a valid artistic choice to focus on the highlights or shadows and let the opposite end of the dynamic range go. The result will not be the most accurate representation of the scene, but can be an interesting and dramatic choice. Who said images have to be close to the natural experience?
I Did!
OK, enough of that artsy stuff; let’s talk about capturing the scene.
First, Shoot Raw! :
It is difficult to believe that there are still folks out there who will dispute the value of shooting RAW, but when attempting to tame high contrast and especially dappled lighting it is a necessary prerequisite. The expanded dynamic range of RAW images is essential to most of the techniques I will discuss. Many of which involve capturing multiple bracketed images, but you should start by shooting RAW!

Multi- Image Solutions
HDR Software
 |
| Photomatix HDR |
solutions such as Photomatix or the capabilities built into recent versions of Photoshop are obvious approaches to this problem, but I have found that the algorithms used by these programs have trouble with the constantly moving forest foliage. HDR software works best with static scenes and the dapples of brightness in the sunlit forest are never in the same spot from image to image. Anti-ghosting options can be of some help, but this is a real challenge for the software. Masters of HDR can get some very interesting results but I seldom find that HDR software yields the best natural appearing images in these challenging conditions.
Manual Blending of Bracketed Image(s)
 |
| Patches of blown-out hihiglights |
 |
| Detail in Highlight |
 |
| Emerald Cascade |
 |
| Two Image Manually Blended |
I was pleased with the final result. My goal was to keep the flashes of light from distracting from the soft appearance of the cascade. The challenge with this technique is to soften the blown out highlights without losing the magic of the dappling. Manual blending works nicely when only a few areas of distracting highlight require muting, but this approach becomes much more time consuming and tedious when applied to an picture with many bright patches, such as my earlier trail image. I gave it a try, but in such situations the magic of Photoshop and Lightroom can be a lifesaver.
Single Images
Although using multiple images can lead to a better result in some situations, an appropriately exposed single image can also be edited
 |
| Dark, but Highlights Preserved |
increased noise in the shadows, but I study the histogram and select the one shifted the furthest to the right without completely blowing out the highlights. As I have discussed in a previous blog, because of the increased data in the highlights, shooting to the right is always best even when you can’t go as far to the right as you would like. As the histogram moves to the right, the dark zones get pulled into areas greater bit density and noise is reduced. Trust me or go read my "Exposing to the Right" article . Anyway, in case of dapple light, the images will still be dark and noise will still be an issue, but improved noise reduction functions can do a lot to minimize the damage.
 |
| Single Image Editing , Lightroom 5 |
 |
| Modified Single Image |
The bottom line is that the digital photographer now has a wide range of options to control challenging high dynamic range situations. Whether you use HDR, image blending or the remarkable controls in Lightroom and Photoshop, the result is that the sunny forest is no longer a forbidding place for photographers.
 |
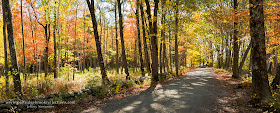
| Forest Glade, Arlington, Vermont |
No comments:
Post a Comment