Dealing with the Dust
Do I need to say anything more. Anyone with a DSLR knows the frustration of dealing with the blotches on their images created by tiny of pieces of dust, pollen and hair which inevitably settle on the sensor and require long periods of painstaking editing to remove from the final images.
 |
| Dust Detected |
 |
| Lightroom Ready for Spot Detection |
 |
| Newport Sunrise : Cleaned |
First I should point out that dust usually does not actually contaminate the sensor, instead it lands on the overlying glass anti-aliasing filter. Although not as expensive as the sensor this piece of glass is liable to scratching and is not cheap to replace. We live in a dusty world and there is no way to fully avoid the problem of sensor contamination. Given that there is no completely satisfactory cure for the problem, I have only a few incomplete thoughts on the subject of dealing with the dust.
Dust Avoidance.
Since prevention is always the best approach how can sensor dust be reduced or avoided. I can suggest only one absolutely reliable preventive measure, use a fixed lens camera or never change your lens.
 |
| Canon SX50 HS |
 |
| DON'T Changes Lens' |
If lens changing is unavoidable I try, although not always successfully, to follow a careful lens switching technique. I start by getting my replacement lens ready for the switch. To reduce the time of exposure, I keep it close at hand. Since much of the dust comes from the internal element of the lens, I use my pocket rocket to blow away any contamination and I try to keep the internal lens cap clean. To keep gravity working for me, I try to keep both the open camera body and the lens pointing down. It is also important to be sure that the camera is turned off during lens changes. Power flowing to the sensor creates an electrical charge that can attract the dust particles.
Reducing the Dust Effect
 |
| Dusty Sky |
The visibility of sensor dust on an image is closely related to the
 |
| Jaffrey Center Sky : Aperture Effect |
What You Can't See
 |
| Cut Out the Sky |
Getting Rid of the Dust
There is a long list of techniques to physically remove sensor dust and as might be expected the most effective approaches are also those most likely to cause sensor damage, but let's start with the noninvasive techniques.
In-Camera Dust Removal
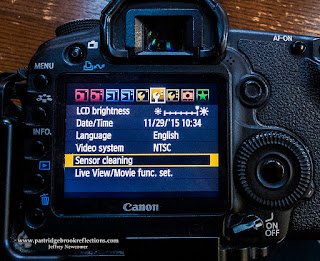 Many cameras have built-in sensor cleaning functions. Automatic dust removal generally works by generating an ultrasonic vibration in the overlying anti-aliasing filter to dislodge the dust and allow it to fall to a dust collection area below the sensor. This works well for loose particles but sticky contamination such as pollen may not be removed.
Blowers
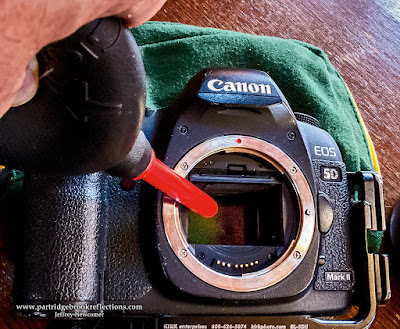 My next step is to use a blower. I use my Giotto Rocket blower to clean the lens elements as well as the sensor. My Canon 5d has a lens cleaning function which locks the mirror up to expose the sensor. I insert the blower right over the sensor and apply several vigorous squirts of air. I generally do this with the camera aimed down in hopes that the dust will fall away. This procedure should not be done with canned compressed air since the jets may be contaminated with oils or other solvents. The use of a blower is a reasonably safe procedure, but it is not totally risk free. The danger is that if the power shuts off during cleaning, the mirror and shutter will close potentially leading to severe damage. Ideally the camera should be attached to an external power source or at least have a fully charged battery.
 Touchy-Feely
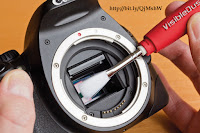 If after I have applied a vigorous blow there is still substantial amounts of dust on the sensor, I am faced with a dilemma. The next steps in cleaning are more vigorous, involve touching the anti-aliasing filter and can cause scratches or leave residues. I am very
 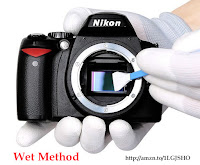 reluctant to risk damage to the sensor and I have to consider very carefully weather physically removing the remaining dust is worth the risk. I have only rarely resorted to the use of brushes and swabs and have never suffered a disaster, but I don't like pressing my luck. Most often I have decided to accept the requirement to remove dust splotches in post processing. Dust removal tools in Lightroom, Photoshop and other editing programs have improved to the point that there is less need to risk your sensor, but, if you are an adventurous sort, the internet contains many excellent reviews of the more invasive dust removal techniques.
- Cleaning Digital Cameras
- Sensor Cleaning : Luminous Landscape
- Canon sensor cleaning: remove dust in 4 steps
An Plan of Action
 |
| Use Levels Adjustment to Reveal Dust |
 |
| Remove with Healing Brush |
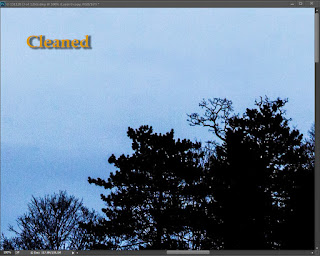 I usually use a Levels adjustment to darken the image, which reveals even the more subtleblotches. Dust spot removal is just part of my routine detailed inspection of my images and does not add significantly to my processing time. Both Lightroom and Photoshop have specialized spot removal tools, but I usually still stick to my careful manual approach. I find that I have better control over the size of the brush and the source of the healing pixels.
 |
| Five Barns, Putney, Vermont : Cleaned Sky |
 |
| Lightroom Spot Removal |
 |
| More Foreground, Less Sky |
Jeffrey Newcomer
Partridgebrookreflections.com


Thanks so much for these great tips, Jeff. I've never had so many dust spots as I've had with my Nikon D7100. Around the same time as I got the camera I also got a new camera bag. I tend to lay the camera in the bag to change the lens. So I tend to wonder whether there's a connection between the two. Anyhow, I also appreciate the visuals you've posted along with the text. This post is a valuable keeper.
ReplyDeleteAll of these are looking amazing . Thanks .
ReplyDelete