Saturday, June 30, 2012

Waterfall Treasures of Hillsborough County

Lower Purgatory Run-off
This week it is once again my turn to contribute an article to the New England Photography Guild Blog. The Guild is a wonderful organization of talented photographers who concentrate their efforts on recording the unique beauty and character of our corner of the country. I am honored to be among such a great group of photographic artists who live in New England and know it so well.

I have always enjoyed waterfall photography and my article for the NEPG blog is about a wonderful cluster of beautiful falls in Hillsborough County. Unlike on my personal photography blog,  the NEPG Blog has conscientious editors who place strict and completely appropriate limitations on my usual verbosity and on the number of images I can display. As I did on my last Guild blog about Monadnock’s Route 124, I will use this weeks personal blog as a album for some of the other images of the Hillsborough's falls that I couldn’t squeeze into the main article.


Enjoy and please go to the New England Photography Guild Blog for much more information about these great Waterfalls of Hillsborough County.


1) Purgatory Falls, Mt. Vernon & Milford, NH
Upper Purgatory Falls Pool, Mt. Vernon, NH
Upper Purgatory Falls, Mt Vernon, NH


Lower Purgatory Split, Milford, NH
Lower Purgatory Falls


Purgatory Brook
Above Lower Purgatory Falls


2) Tucker Brook Falls, Wilton


Tucker Brook Swirl

Tucker Brook Falls


3) Sentor Falls, Lyndeborough

Sentor Falls, Lyndeborough, NH
Through the Trees Sentor Falls


4) Garwin Falls, Milford

Garwin Falls, Wilton, NH
Below Garwin Falls, Wilton, NH


Return to the New England Photography Guild Blog:
"Waterfall Treasures of New Hampshire's Hillsborough County"

Saturday, June 23, 2012

Saint Gaudens' Retreat


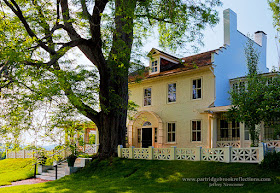
The Thornless Honey Locust in front off Aspet House has continued to thrive
since its planting in 1886, just one year after Saint-Gaudens first summered here.


August Saint-Gaudens
Augustus Saint-Gaudens (1848-1907) was a renown 19th century sculptor who was a leader in the renaissance of American art of that time. He was born in Ireland, raised in New York City and received his early artistic training in Europe. He is most widely known for his monumental sculptures, but also created delicate cameos. Many of his statues celebrate the heroes of the civil war and can still be seen decorating parks and other public places throughout the country. His “double Eagle” gold piece is felt to be the most beautiful American coin ever struck. Later in his life Saint-Gaudens spent much of his time at his retreat along the Connecticut River in Cornish New Hampshire. Here a distinguish group of American artists gathered, forming what became known as the “Cornish Colony”. Included among this group was Maxfield Parish, whose intensely romantic New England landscape paintings have been a strong influence on my photographic vision.


Amor Caritas
in the Atrium
After Saint Gaudens death in 1907 his estate was preserved as a National Historical site managed by the National Park Service. The park includes acres of beautiful gardens which are decorated with examples of some of Saint Gaudens' most famous works. Over 100 pieces of his sculpture are housed in a number of galleries which had been his work shops.. The artist’s home, “Aspect House” sits on a knoll overlooking Mount Ascutney. The peak, which is across the river in Vermont, was considered by Saint Gaudens to be his “Mt. Olympus" and he placed his building to take maximum of advantage of this vista. 


Mount Ascutney from the "Little Studio"


The Faragate
Cornish is only one hour north of our house, so it is surprising that my first visit to the site was just a couple of weeks ago. Sue and I traveled up along the river late in the afternoon of an unusually warm spring day and found the estate to nearly deserted. It was marvelous to wander undisturbed among the gardens and galleries. The soft afternoon light played beautifully off the sculptures, changing their appearance from moment to moment as the sun settled toward the Vermont hills. 


The Shaw Memorial
Some of the most affecting pieces included the triumphant Robert

Shaw Memorial
Gould Shaw Memorial, the Standing Lincoln and the deeply introspective Adams Memorial. All of these works still stand in their original locations throughout the country, but it is amazing how fully, and beautifully, realized are the “copies” that Saint Gaudens created and that now grace the gardens and galleries in Cornish.  Of all the works, New Englanders may be most familiar
with the Shaw Memorial which stands at the edge of Boston Common just across the street from the Massachusetts State House. Shaw was the commander of the all black 54th Massachusetts
54th Massachusetts
Infantry Regiment in the Civil War, and was killed, in July 1863, at the battle of Fort Wagner in South Carolina. The monument is a striking relief featuring Shaw on Horseback, but it is perhaps most notable for the strong, determined faces of the black soldiers marching to their fate. At a time when blacks were often represented in unflattering stereotypes, Saint-Guadens modeled about 40 portrait heads in clay before settling on the 16 that best portrayed the strength and humanity of his subjects. 


The Adams Memorial
The Adams Memorial is a much different piece of funereal art. It is

Adams Memorial
a contemplative, shrouded figure memorializing the wife of the historian Henry Adams. Adams was a member of the Adams political family and the great grandson of John Adams. His wife Marian suffered from depression and died by suicide. Adams disliked labels, and bristled when observers tried to name the sculpture “Grief”. He preferred that the work be seen as asking a question, not giving answers. The sculpture in Cornish sits in a quiet, isolated garden alcove. A marvelous aspect of sculpture in natural light is that the viewing experience can change depending on the angle and quality of the light. When I first saw the Adams memorial, the light was stark and flat, but later in the evening its features were better define and glowed in the evening illumination, and the shadows from the surrounding foliage poetically framed the figure. 


Birch Allee
Study of
Gen William Tecumseh Sherman


The Puritan
Aspet Iris


Diana in the
Little Studio
I could go on about the many remarkable pieces at Saint-Gaudens, each has its own story, but I would rather let the images speak and encourage you to find the time to come by.  Saint Gaudens' work has a power and presence that can only be fully appreciated in person. It is well worth the trip, but be sure that you give yourself enough time to quietly linger and contemplate. Contemplation is what Saint-Gaudens’ country retreat is all about. 


Diana in the Little Studio


The grounds of The Saint Gaudens Historic Site are accessible year round, but the exhibit buildings are open only from the Saturday of Memorial Day weekend to October 31 from 9:00 a.m. to 4:30 p.m. and the grounds until dusk. For more information, check out the park web site. The site includes a very helpful IPad App, which describes most of the attractions and provides a virtual tour of the grounds and galleries. 


Little Studio

http://www.nps.gov/saga/index.htm


Sunday, June 17, 2012

Freezing the Foliage : ISO Stacking


Getting ISO Right in the Digital Camera II


I know that I’m in trouble when I insist at the beginning of a blog that “This will be a short one”. It usually means that it will go on for pages, but this time, I am committed. I have a talk to prepare for the Worcester Camera Club and I have much more to do. I could always dust off one of my old talks, but my plan has been to do a new presentation covering a lot of the “Getting It Right in the Digital Camera” articles that I have been publishing of late. So, HONESTLY, this will be a brief extension of my recent “ISO Control” article. 


ISO 100 Moving Foliage
Two week ago I discussed the use of the expanded ISO range in many of our newer digital cameras and the benefits of being able to control ISO with the turn of a dial. The capability to adjust ISO as shooting situations change has provided an important new control over exposure. I have talked previously about the benefits of bracketing photos including both exposure and focus. ISO can also be bracketed in some challenging situations.


 ISO Stacking
In my landscape photography, I am often faced with trying to get broad depth of field in situations where the wind is moving the foliage.When I stop down to expand the depth of field the resulting long exposure usually leaves the foliage a blurry mess, especially in the foreground.

ISO 100, 1.3 Seconds
Detail


ISO 1600. 1/8 Seconds
Detail
One approach, which I have discussed before, is to focus bracket or stack, using
Stacked Image with Foliage Motion
"Painted out"
multiple images with a wider aperture to allow faster shutter speeds, but sometimes this isn’t enough to freeze the gyrating greenery and the shallow depth of field of each image may not fully overlap leaving gaps of soft focus. Another strategy is to capture an image with the aperture and shutter adjusted to freeze the motion with acceptable depth of field and then adjust the ISO to balance the exposure. This may only be required in the foreground image(s) where the motion is most noticeable. Greater noise reduction may be required for these slices, but they can then be stacked with the images taken at lower ISO to construct a complete picture with full DOF and sharp leaves, horses or whatever else was moving.  
 
 
Example:
For my example I am using the same image that illustrated my first ISO Control article.  The picture taken at ISO 100 and 1.3 seconds had the best image quality, but with blurred foliage, both on the foreground tree and in the background.  ISO 1600 gave me a shutter speed of 1/8 second which was sufficiently fast to freeze the movement and had good DOF at f20.   I simply stacked the ISO 1600 above the ISO 100, aligned the two with Auto-Align and then painted a mask to reveal the sharp foliage over the areas of blur.  With the use of noise reduction and the application of the high ISO image only where needed the final picture retained high image quality.

That’s IT. I told you this would be short. In this case the "best image from the camera" was actually two images at different ISOs.  Give it a try and let me know how it comes out.


OK, I can’t resist. Just one more point while we are talking about moving foliage. Another technique I use occasionally to freeze motion is based on the fact moving foliage does not all move at the same time. If you take a number of images at the same focal length you can often combine parts of each to isolate times when each region is relatively still. This is inevitably a tedious process of selective masking, but the results can be quite effective.

That’s it, I promise. Now off to Powerpoint.

Sunday, June 10, 2012

The Angry Wet Sea


Last weekend Susan and I went to the Maine seacoast for a celebration of her birthday. I love photographing the coast. It's the one thing I miss by being in the center of New England, and I'm always looking for a reason to get back to the ocean. This weekend the food was great, the bed and breakfast was warm and friendly, and the weather absolutely SUCKED. I firmly believe that bad weather, generally, makes great photography, but this really challenged me to find interesting subjects and ways to shoot without getting my camera and myself completely soaked.


Cape Porpoise. Maine
We arrive in Kennebunkport late Friday afternoon and checked in to the Maine Stay Inn, which is a lovely B&B, with charming friendly owners. It hadn't begun to rain so we ran over to Cape Porpoise before it got dark. The Cape provides a nice contrast to the touristy bustle of Kennebunkport. It is a picturesque, working lobstering village with boats nestled in a protected cove and Goat Island Light marking the entrance. The condition were still cold, dark, and blustery so I concentrated on shooting the details of the traps and wharf. On the way back to town I noticed a lovely tree seen across a pasture with a base of wildflowers. I couldn't resist. Susan was very patient, almost as patient as Nellie. Thank god for crossword puzzles.


The next day the rain came down in a heavy drizzle only during the brief interludes between the prolonged assaults of gale blown deluge. We decided to head north along the coast, but
Paddy Creek Rain
 with the exception of a quick shot of Paddy Creek, it was just not possible to escape the car. I'm a firm believer in shooting in the rain, check out my blog article "Surviving the Wet", but this was crazy. With elaborate protection, I was able to keep most of the water off the camera, but there was no way to keep the lens dry in the swirling sheets of rain. We eventually ended up in Portland, where we had lunch with good friends, and where Susan could do some much deserved shopping. The evening turned out much better. Still pouring, but we had the chance to have dinner with Bob and Margie Dennis at Joshua's, a marvelous natural food restaurant in Wells. Bob is a great photographer who has become the go-to guy for images of the Kennebunkport area. He has a beautiful house on the water in Cape Porpoise and takes full advantage of his prime location. I got to know Bob through his work on Flickr, but his work is seen in many local stores, and in his books and calendars. It was great fun to pick Bob's brain about his region. He is well connected, but he still couldn't get me an invitation for tea with George and Barbara on Walker Point. My only frustration from the evening was my total failure to convince Bob to shoot in Raw!


Walker Point Surf

Sunday morning the rain had softened but the winds remained
strong. I just couldn't leave the coast without trying to get at least a few ocean pictures, and I knew that the surf would be impressive after all that wind.
St. Ann's Chapel and Rectory
We cruised along the shore from Kennebunkport to just past Walker Point. I got out several times in full rain gear and my camera in my Opt/Tech Rainsleeve.  Thank goodness for Gortex!  The wind was still howling, but I found that I could protect my lens, at least for a few shots, as long as I kept my back to the gale. I shot off bursts of exposures as the waves came crashing in and caught a few nice images. I have never been able to predict which waves are likely to produce the best show. Thankfully, with digital, I could waste tons of images to catch the occasional prize. 


North Branch River Rush
On the way home I had to check out the flowing water in a couple of my favorite locations, including North Branch River in Antrim and the Stone Arch Bridge in Surry. I even got a couple of shots of kayakers enjoying the rush on the North Branch.  This is considered some of the most challlenging white water in New Hampshire


Surry Stone Arch Bridge

All-in-all it was not the best weekend to be on the coast, but we still had a lovely time away. If we were home in the rain, I'm sure Susan would have proposed a long list of worthy indoor projects, so Maine was just fine!

Monday, June 4, 2012

ISO Control


Bradley Hill Spring, Chesterfield, NH


Getting It Right in the Digital Camera
My father handed down my first 35mm SLR at a time when
everyone was taking snap-shots with Instamatics. I know, I'm older than dirt, but I just got a $10 lifetime National Park Pass, so suck it!
Song in a Dark Czech Bar  : ISO 6400
Anyway, when I got the camera, I had to decide which speed of Kodachrome to use. I made the radical decision to forsake the time-honored ASA 25 and go with the new, lightening fast, ASA 64. My father worried that I was a communist, but that extra stop felt liberating. As film improved faster speeds became available, always with the trade-off of coarser grain. The increased sensitivity was great, but If you wanted to change film speed in the middle of a roll, you had to wind the old film back into the canister while trying to stop before the lead got sucked in all the way. I know what it feels like to open the camera and find that the lead is gone, and with it, the remaining exposures on the roll. The whole process was complicated, time consuming and wasteful. The result was that changing film to adjust speed for varying conditions was not a routine consideration. Exposure was almost always adjusted through the manipulation of just two variables; aperture and shutter speed and these two factors were unbreakably linked. For any specific aperture there is only one shutter speed that will result in the desired exposure, but the ease of adjustment of ISO in digital cameras has broken the chains of that strict inverse relationship.

With digital photography the adjustment of sensor sensitivity is achieved through the turn of a dial or tap of a button, making ISO the important third variable in controlling exposure. Through the adjustment of ISO, there is now a range of shutter speeds that can be used with a fixed aperture while keeping the exposure constant.

Nazca Boobie, Galapagos Ecuador;: ISO 1600

Conversely, when a fast shutter speed is needed to capture action, adequate depth of field can be preserved by stopping down on the aperture and compensating by increasing the ISO. The combination of easily adjustable ISO and the ridiculously high sensitivity of modern digital sensors has remarkably expanded our flexibility in controlling exposure. But this flexibiliy comes at a cost and that cost is noise.

Sensor Noise
As is true with film, higher ISO's lead to increased image noise. Newer sensors have greatly improved low light response making it possible to get quite serviceable images with surprisingly high ISO settings, but different cameras have varying abilities to handle noise. Even as it is essential to know how shutter and aperture affect exposure and image quality, it is also important to know how adjustments of ISO affect image noise and sharpness on your camera. The physics of shutter and aperture are essentially the same for all cameras, but digital sensors vary greatly and the only way to understand how your camera handles high ISO is to test it. I have to admit that, until recently, I have used the" shoot and pray" approach to high ISO, but after testing my Canon 5D Mark 2, I feel much more comfortable pushing the ISO when needed. The result has been better low light images and sharper action shots.

The Test

ISO Test Imag
1) First start with a scene that has a wide range of brightness. Dark areas are especially important since noise is most noticeable in these regions. If you wonder why this is true, check out my recent "Exposing to the Right" article.

2) Shoot a series of images using your full range of ISOs. Aperture preferred mode works best since it keeps the depth of field constant. The scene should be well illuminated to avoid long exposure noise from contaminating the images taken at low ISO. If possible, shoot in RAW for maximum flexibility.

3) In my test I first I brought each image through Adobe Camera Raw with identical settings for optimal exposure, but without any sharpening or noise reduction. Zooming in on a small segment of the image, it is easy to see how noise increased with higher ISO. To my eye, results were quite good up to about ISO 800, but then progressively deteriorated up to the max of 6400. 


Image Detail, No Noise reduction


4) I then went back to the images and used Camera Raw's excellent noise reduction function to clean up the images. The noise reduction function in the new Lightroom 4 has also been improved. There are many other good software solutions for noise reduction, but in all of them the best final result is a compromise between noise reduction and the inevitable softening of detail. In my test, noise reduction expanded the acceptable ISO range by a step or two. 


Noise Reduction in Camera

A test like this can be a helpful guide, but the impact of high ISO on any specific image will vary depending on its brightness, the importance of shaddow detail and the final destination of the image. A large fine art print will have a narrower range of acceptable ISOs than a picture destined to be a small, low resolution jpg on Flickr.

As is always true, photography is defined by the compromises you make. The control and expansion of ISO made possible by digital photography, provides a great new creative variable to the complicated equation that makes up each image. The art is in how you balance the competing factors to achieve your own solution to the equation. It is just one part of getting it right in the digital camera.