About Me

My photo
Spofford, New Hampshire, United States
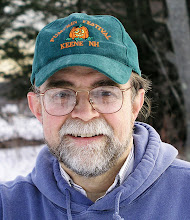
Jeff Newcomer had been a physician practicing in New Hampshire and Vermont for over 30 years. Over that time, as a member of the Conservation Commission in his home of Chesterfield New Hampshire, he has used his photography to promote the protection and appreciation of the town's wild lands. In recent years he has been transitioning his focus from medicine to photography, writing and teaching. Jeff enjoys photographing throughout New England, but has concentrated on the Monadnock Region and southern Vermont and has had a long term artistic relationship with Mount Monadnock. He is a featured artist in a number of local galleries and his work is often seen in regional print, web publications and in business installations throughout the country. For years Jeff has published a calendar celebrating the beauty of The New England country-side in all seasons. All of the proceeds from his New England Reflections Calendar have gone to support the Pulmonary Rehabilitation Program at the Cheshire Medical Center. Jeff has a strong commitment to sharing his excitement about the special beauty of our region and publishes a blog about photography in New England.

Monday, February 20, 2012

Focus II, Getting it Right in the Digital Camera

Baker Brook in Newfane Vermont
This week I would like to complete my discussion of controlling depth of field in digital photography with a review of one additional Photoshop technique to manage especially difficult situations. If you are using a recent version of Photoshop, this is for you, if not, you may talk among yourselves.

Rant-Free Blogging
Mount Monadnock, Marlboro New Hampshire
Last week, after a prolonged rant about what it means to get images "right in the digital camera", I finally got around to discussing how digital photography has expanded our options for achieving wide depth of field. Specifically I talked about blending multiple, focus bracketed images. This approach is usually not particularly challenging, especially when Photoshop can do the work of aligning the image layers. It is easiest when the content of the image recedes from the camera uniformly from the bottom to the top of the frame, but the approach begins to fail when there is a more varied range of depth within the same region of the frame, especially up close. In these situations manual adjustment of layer masks can become frustratingly complex. 


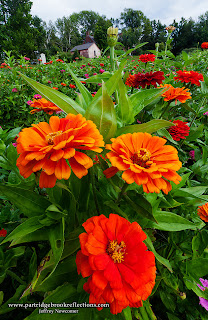
Rosaly's Garden Peterborough NH
In my picture from Rosaly's Garden in Peterborough NH, I used three images to capture the full depth of field. The primary foreground element was the flowers, but, I found that, in the same area, the underlying leaves, stalks and grass were further away and were not sharp in the foreground image layer.


Magic of Auto-Blend
In this situation, Photoshop's "Auto-Blend" tool can be a great help. My first step is always to align the focus bracketed image layers using the "Auto-Align" tool found in the edit drop-down menu. Next I highlight all of image layers and run "Auto-Blend". This tool compares all the images and applies layer masks attempting to select the sharpest of the layers for each point on the image.

Auto-Blend Layer Masks
White Exposes the Underlying Layer
This works better with more layers, but I usually start with at least three. After the computer grinds for awhile the results that pop up are generally amazing with great apparent sharpness throughout the image. It is a remarkable piece of computer magic, but, on closer inspection, the results are seldom perfect. Typically there are patches of soft focus scattered throughout the image. It is possible to manually edit the masks to bring out the best focus, but because the process often requires not only revealing the sharp layer but also covering up the overlying soft area, it can become very complicated to get the perfect combination of masked layers.
After Patching
Area of Soft Focus Following Blending


Applying the Patch


Patching Layers (red)
I have found that it is much easier to copy a set of the aligned layers and place this "patching" set above the originals before I run the blending tool on the original layers. I mask out the patching layers so that, after the blend, I can correct any problem spots by simply painting with white on the appropriate patching layer to reveal the sharper pixels. This avoids all the problems of dealing with the complex interactions of blended layer masks below. It still requires some careful editing, but the results are worth the effort.

Wow. I have come to think of this approach as rather simple, but when I try to explain it, I'm not sure even I will be able to figure it out next time. The only way to understand the technique is to try it on appropriate images.  I guess the easiest way to sum this up is that you are creating a separate set of aligned, but unblended layers to use as the source for corrections to the original blended results. This does result in a very large image file with many layers, but once the automatic and manual blending is done, you can flatten the layers and ideally enjoy a lovely image with otherwise impossible depth of field.


I hope these last two posts have opened up some of the potential of the digital darkroom to manage the challenges of controlling depth of field. The only way to master these techniques is to get in there and play with the tools. You have nothing to loose except that fuzzy foreground.

Chesterfield, New Hampshire


No comments:

Post a Comment